
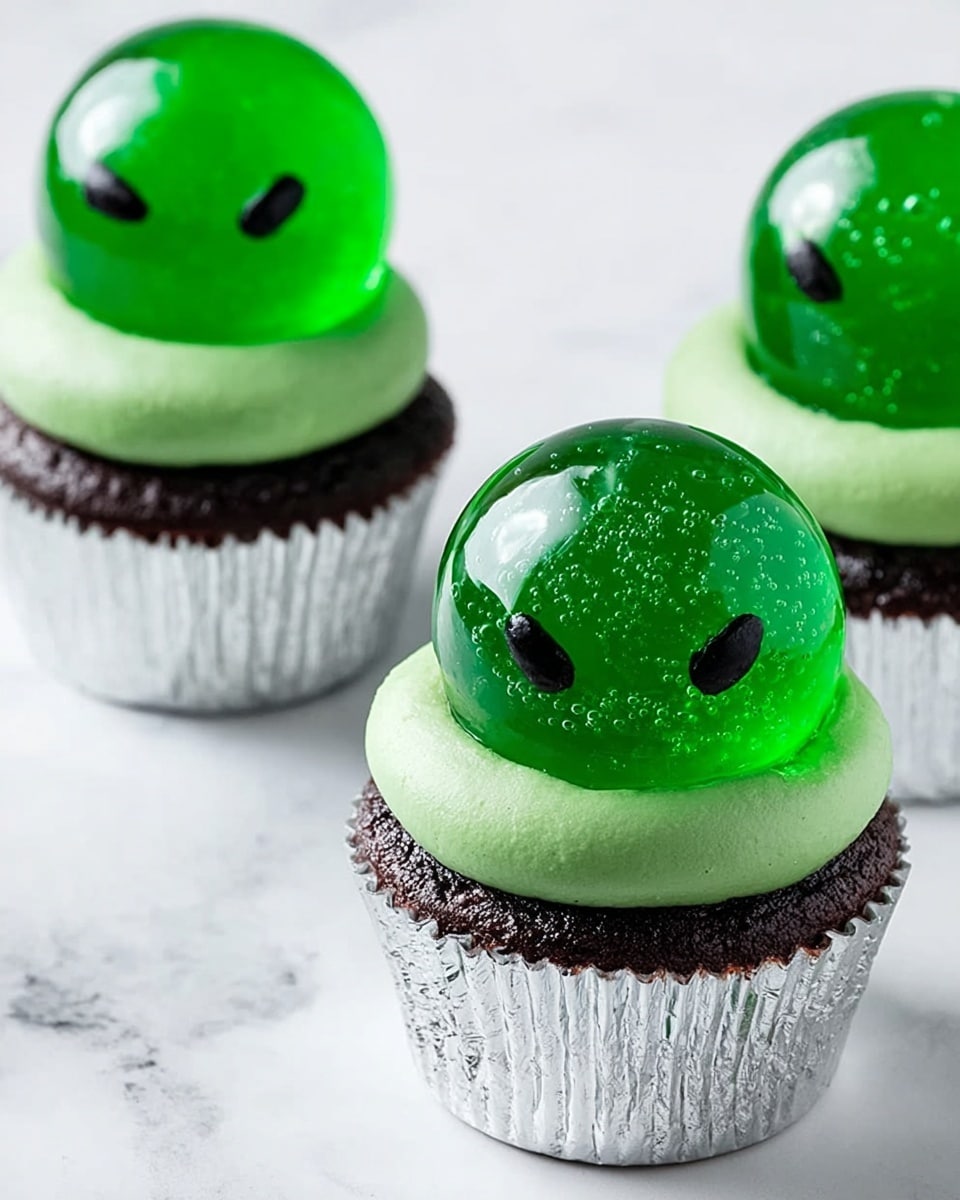
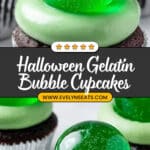
If you’re looking to wow your guests with something seriously cool and a little spooky, I’ve got just the thing. This Spooky Gelatin Bubble Cupcakes Recipe is one of my all-time favorites for Halloween or any fun occasion where you want to bring some magic (and a little “eww”) to the table. These cupcakes topped with delicate, bouncy gelatin bubbles are as fun to make as they are to eat, and trust me, your friends won’t believe you pulled off such a neat trick!
Why You’ll Love This Recipe
- Eye-Catching Presentation: Those gelatin bubbles create an incredible “wow” effect that’s perfect for spooky parties or fun family treats.
- Simple Ingredients: The recipe uses basic pantry staples – water, gelatin, balloons – but transforms them into a unique dessert.
- Fun and Interactive: Kids especially love these cupcakes, because they get to see and touch the bubbles before indulging.
- Make-Ahead Friendly: You can prepare the bubbles the day before, making party prep stress-free and smooth.

Ingredients You’ll Need
To bring these spooky gelatin bubbles to life, you don’t need a long grocery list, and you’ll find that each ingredient plays its own vital role to make those bubbles bouncy, colorful, and perfectly perched on cupcakes.
- Wooden pop sticks: These act as your handle – grab ones sturdy enough to hold the balloon without bending.
- Water balloons: Air-filled and small sized work best; they’re the mold that shapes your bubbles.
- Water: The base liquid that mixes with gelatin to form your edible bubble coating.
- Food coloring: Just a few drops will add eerie colors that make the bubbles extra spooky and fun.
- Unflavored gelatin: The magic ingredient that solidifies the bubbles without taste or color.
- Black decorating gel: Perfect for drawing creepy spider webs, faces, or other Halloween motifs directly on the bubbles.
- Frosted cupcakes: The perfect platform for your spooky bubbles; choose your favorite flavor, but vanilla or chocolate work perfectly.
Variations
I love to mix things up with this Spooky Gelatin Bubble Cupcakes Recipe by adjusting colors, decorations, and sometimes even themes. Feel free to personalize it to fit your party vibe or dietary needs!
- Color Play: I once tried neon green and bright orange bubbles for a retro Halloween party, which really popped under blacklight – your creative color combos bring so much character.
- Flavor Twist: Adding a few drops of flavored gelatin instead of plain gives a subtle fruity kick to your bubbles, though plain often works best visually.
- Dietary Swap: If you want a vegan option, try agar powder instead of gelatin, but note the texture will be different and less bouncy.
How to Make Spooky Gelatin Bubble Cupcakes Recipe
Step 1: Prepare Your Balloon Sticks
Start by inflating your water balloons with air, not water, to about the size you want your bubbles to be. Tie them securely and insert a wooden pop stick carefully through the tied end—this will give you a handle to dip the balloons without getting gelatin all over your fingers. Set these upright somewhere safe, like in a foam block or a cup, so they don’t roll away.
Step 2: Make the Gelatin Mixture
In a bowl slightly larger than your largest balloon, combine the water and 2 to 3 drops of your chosen food coloring. Next, sprinkle in the unflavored gelatin and stir gently to combine. Microwave this on high for about 15 seconds, then stir until perfectly smooth and lump-free. It needs to be warm but not hot — the goal is to coat the balloons easily without popping them.
Step 3: Dip and Dry Your Gelatin Bubbles
Hold one balloon by its pop stick and dip it into the warm gelatin mixture. Turn it slowly to make sure it gets fully coated. Then lift it out and let the excess drip back into your bowl. Place the dipped balloon upright into your foam block or cup, and it’ll start setting right away. Repeat with the rest of your balloons. Patience is key here — let them dry overnight. This slow drying gives you those perfect, firm bubbles that hold their shape.
Step 4: Remove Balloons and Decorate
Once dried, carefully and gently pierce the balloons with a pin to deflate, then slowly peel away the balloon from inside the gelatin bubble. If needed, trim the opening edges with scissors to make it neat. Now comes the fun part — use your black decorating gel to draw creepy spider webs, spooky eyes, or little monster faces right on the gelatin bubbles. Kids especially love this decorating part!
Step 5: Assemble Your Cupcakes
Take your frosted cupcakes and gently place one gelatin bubble on top, using the pop stick as a handle or carefully removing it if you want a “floating” effect. The combination of soft cupcake and jiggly bubble is just delightful and totally unexpected.
Pro Tips for Making Spooky Gelatin Bubble Cupcakes Recipe
- Use Air-Filled Balloons: Water-filled balloons will be too heavy and likely to pop when dipped; air-filled ones hold their shape gently and are easy to remove later.
- Slow and Steady Drying: Don’t rush the drying time—overnight is best to get those firm gelatin bubbles that hold up well.
- Handle With Care: Gelatin bubbles are delicate, so peel off balloons slowly and avoid sharp bending.
- Keep Bubbles Cool: Warm or humid environments can soften gelatin quickly, so store in a cool, dry place until serving.
How to Serve Spooky Gelatin Bubble Cupcakes Recipe
Garnishes
I love adding a little extra flair with black decorating gel drawings — spider webs and creepy eyes immediately transform the bubbles into mini Halloween art pieces. Sometimes I sprinkle edible glitter for a sparkly eerie effect, or add a tiny plastic spider hidden carefully for the brave eaters.
Side Dishes
Since these cupcakes are a show-stopper dessert, I usually keep sides simple — think mugs of hot cider or a batch of themed cookies. If it’s a party, finger foods like mini sandwiches or veggie trays keep things balanced and let the cupcakes shine.
Creative Ways to Present
For a Halloween bash, I’ve presented these on black cake stands surrounded by scattered autumn leaves and faux cobwebs. Another time, I placed the cupcakes on a spooky-themed platter with dry ice bubbling around for dramatic fog effects — guests loved that immersive experience! Little name tags with punny spooky titles make it even more fun.
Make Ahead and Storage
Storing Leftovers
If you have leftovers (though I rarely do!), store the gelatin bubbles separate from the cupcakes in an airtight container to keep their shape. Keep them in the fridge to stay fresh, but avoid stacking to prevent breakage.
Freezing
I haven’t frozen the gelatin bubbles themselves — freezing changes their delicate texture and makes them less bouncy. However, you can freeze plain frosted cupcakes ahead of time and add fresh bubbles when ready to serve.
Reheating
Since cupcakes are best served at room temp or chilled, I let frozen cupcakes thaw at room temperature. Once thawed and topped with fresh bubbles, they taste just as great as freshly baked.
FAQs
-
Can I use flavored gelatin instead of unflavored gelatin in the Spooky Gelatin Bubble Cupcakes Recipe?
Absolutely! You can substitute flavored gelatin to add a hint of taste. Just remember that it might add color and flavor, which could alter the visual effect and subtlety of the bubbles, so choose a flavor and color that complements your cupcake.
-
How long do gelatin bubbles last on the cupcakes?
Gelatin bubbles are best enjoyed within a day of making to maintain their bounce and structure. In warmer or humid settings, they might soften or sweat faster, so keep them refrigerated and assembled close to serving time for best results.
-
What size balloons should I use for the bubbles?
Small water balloons inflated to about 2 to 3 inches in diameter work great—they’re easy to handle and create a perfect bubble size that balances well on cupcakes.
-
Can I make these cupcakes without balloons?
The balloons are essential as molds for the gelatin bubbles. Without them, it’s tricky to get that perfectly round, thin shape. If you don’t have balloons, you might consider other spheres like small bowls or molds but balloons give the best texture and ease.
Final Thoughts
I absolutely love how this Spooky Gelatin Bubble Cupcakes Recipe brings the “wow factor” to any party without complicated techniques or expensive tools. When I first tried making these, I was amazed at how simple ingredients like gelatin and balloons transformed into this stunning, spooky treat my family couldn’t stop admiring (and tasting!). If you’re ready to add some spooky science and delicious fun to your baking lineup, give these a go—you’ll enjoy the process as much as the payoff!
Print
Spooky Gelatin Bubble Cupcakes Recipe
- Prep Time: 5 minutes
- Cook Time: 0 minutes
- Total Time: 5 minutes prep + overnight drying (approximately 12 hours)
- Yield: 3 to 4 spooky gelatin bubble cupcakes
- Category: Dessert
- Method: No-Cook
- Cuisine: American
Description
Create spooky gelatin bubble cupcakes perfect for Halloween or eerie-themed parties. This fun and visually striking recipe features frosted cupcakes topped with delicate, colorful gelatin bubbles that look like mysterious orbs. Easy to make in just 5 minutes prep time, these treats add a playful and spooky twist to classic cupcakes, making them an eye-catching dessert for any celebration.
Ingredients
Bubble Gelatin
- 3 to 4 wooden pop sticks
- 3 to 4 water balloons, filled with air
- 4 tablespoons water
- 2 to 3 drops food coloring
- 2 tablespoons unflavored gelatin
- Black decorating gel
- 3 to 4 frosted cupcakes
Cupcakes
Instructions
- Prepare Balloons: Insert wooden pop sticks through the tied ends of the inflated water balloons and set them aside, ensuring the sticks are secure for handling the balloons later.
- Make Gelatin Mixture: In a bowl slightly larger than the largest balloon, combine 4 tablespoons of water with 2 to 3 drops of food coloring. Stir in 2 tablespoons of unflavored gelatin until dissolved. Microwave the mixture on high for 15 seconds, then stir until smooth and uniform.
- Dip Balloons: Holding a pop stick, dip one balloon into the gelatin mixture, turning it to coat evenly. Allow excess gelatin to drip off the balloon to form a thin gelatin layer on the surface.
- Dry Gelatin Bubbles: Once coated, insert the pop stick into a foam block to keep the balloon upright. Repeat the dipping and drying process with the remaining balloons. Let the gelatin bubbles dry completely overnight to harden.
- Remove Balloons: Carefully pierce the dried gelatin bubbles to release the air from the balloons inside and remove the balloons gently, leaving hollow gelatin bubbles.
- Trim Openings & Decorate: Using scissors, trim any uneven openings from the gelatin bubbles if necessary. Decorate the bubbles with black decorating gel to create spooky effects.
- Assemble Cupcakes: Place the decorated gelatin bubbles on top of the frosted cupcakes just before serving to complete the spooky dessert presentation.
Notes
- Ensure the gelatin mixture coats the balloons evenly for a more uniform bubble shape.
- Let the gelatin bubbles dry completely overnight for best results; premature removal might cause breakage.
- Use caution when piercing the balloons inside the gelatin bubbles to avoid cracking the gelatin.
- Black decorating gel can be used to add spooky designs like spider webs or eyes to enhance the Halloween theme.
- This recipe is best served the same day after assembling for optimal gelatin bubble texture.
Nutrition
- Serving Size: 1 cupcake with gelatin bubble
- Calories: 250
- Sugar: 24g
- Sodium: 150mg
- Fat: 10g
- Saturated Fat: 3g
- Unsaturated Fat: 5g
- Trans Fat: 0g
- Carbohydrates: 34g
- Fiber: 1g
- Protein: 3g
- Cholesterol: 20mg