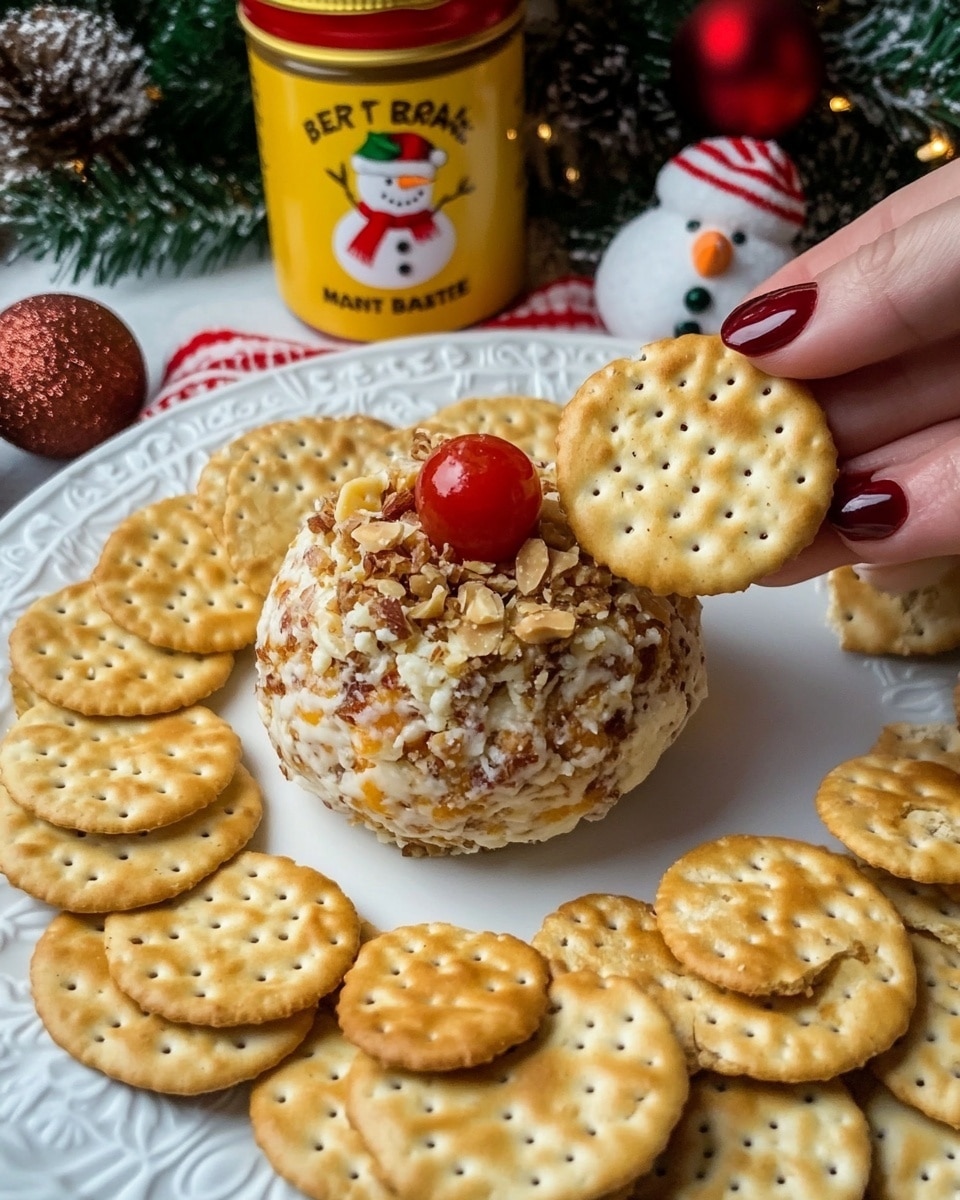
Let me tell you about a festive party favorite I’ve been making for years—the Rudolph Cheese Ball with Pecans and Festive Garnishes Recipe. It’s so simple yet charming, and every time I bring it out, it instantly becomes the star of the snack table. What I love most is how it combines creamy, tangy, and nutty flavors with a playful holiday twist that never fails to impress both kids and adults.
Whether you’re hosting a holiday gathering or just want a fun appetizer for a cozy winter evening, this Rudolph Cheese Ball fits perfectly. It’s not only delicious but also a conversation starter with its adorable reindeer look, making snack time feel extra special. Plus, you’ll find that prepping it is a breeze—even if you’re last minute like I often am!
Why You’ll Love This Recipe
- Festive and Fun: The presentation as Rudolph brings a joyful charm to your holiday spread.
- Quick and Easy: You can whip up this cheese ball in under 10 minutes plus chilling time.
- Crowd Pleaser: The combination of sharp cheddar, horseradish mustard, and pecans hits the perfect balance of flavors that everyone loves.
- Versatile Snack: Easily pairs with crackers, pretzels, or veggie sticks, making it great for all kinds of tastes and diets.

Ingredients You’ll Need
The beauty of this Rudolph Cheese Ball with Pecans and Festive Garnishes Recipe is in its simplicity. Each ingredient brings its own magic, from the creamy base to the crunchy pecan coating—and I’ve got some insider tips for picking the best ones.
- Cream Cheese: Make sure it’s softened to room temperature for easier mixing and a smooth texture.
- Sharp Cheddar Cheese: Freshly shredded will melt better and give a more vibrant flavor—pre-shredded works too in a pinch.
- Hot Horseradish Mustard: I like Silver Springs Beer’n Brat kind, but any fiery horseradish mustard adds a fun spicy kick that balances richness.
- Worcestershire Sauce: Adds a subtle umami depth—don’t skip it, even if the amount is small.
- Garlic and Onion Powder: These seasonings amplify flavor without overpowering; be generous but balanced.
- Crushed Pecans: Fresh, lightly toasted pecans give a fantastic crunch and a nutty contrast to the creamy cheese.
- Cherry Tomato: For Rudolph’s charming red nose, pick firm and bright tomatoes.
- Black Olives: They’re perfect for making the eyes distinct and easy to place.
- Twisted Pretzels: Use sturdy ones for antlers that hold shape and add a rustic touch.
Variations
I love that this Rudolph Cheese Ball with Pecans and Festive Garnishes Recipe is a great starting point for creativity. Once you get comfortable with the base, you can tweak the flavors or decorations to match your own style or dietary needs.
- Spicy Variation: I’ve boosted the heat before by adding a pinch of cayenne or swapping in a spicier horseradish mustard, which my family adored for a little extra zing.
- Nut-Free Option: If pecans aren’t your thing or someone has allergies, try rolling the cheese ball in crushed pretzels or crispy fried onions for a tasty crunch.
- Herb Infused: Finely chopped fresh herbs like chives or parsley mixed into the cheese add brightness and freshness that balance the richness.
- Presentation Tweaks: Instead of pretzel antlers, I once used rosemary sprigs for an aromatic twist that looked surprisingly elegant.
How to Make Rudolph Cheese Ball with Pecans and Festive Garnishes Recipe
Step 1: Mix the Cheese and Flavorings
Start by combining the softened cream cheese, shredded sharp cheddar, hot horseradish mustard, Worcestershire sauce, garlic powder, and onion powder in a large bowl. I use a sturdy spoon or even my hands for a few minutes to get everything super smooth and evenly blended. This step sets the base for all those delicious flavors to meld perfectly.
Step 2: Shape and Chill the Cheese Ball
Transfer the cheese mixture onto a large piece of plastic wrap—this is my favorite trick to keep things neat. Wrap it up and shape it into a round ball using your hands through the wrap. Chill it in the fridge for at least an hour; this firms the cheese making it easier to roll in pecans and form without mess. I often pop it in while I get other party prep done.
Step 3: Coat with Crushed Pecans
Once chilled, unwrap your cheese ball and gently roll it in crushed pecans, pressing lightly so the nuts stick evenly all over. This crunchy coating is the perfect contrast to the creamy cheese inside. A quick tip—toast your pecans lightly beforehand for even more flavor depth!
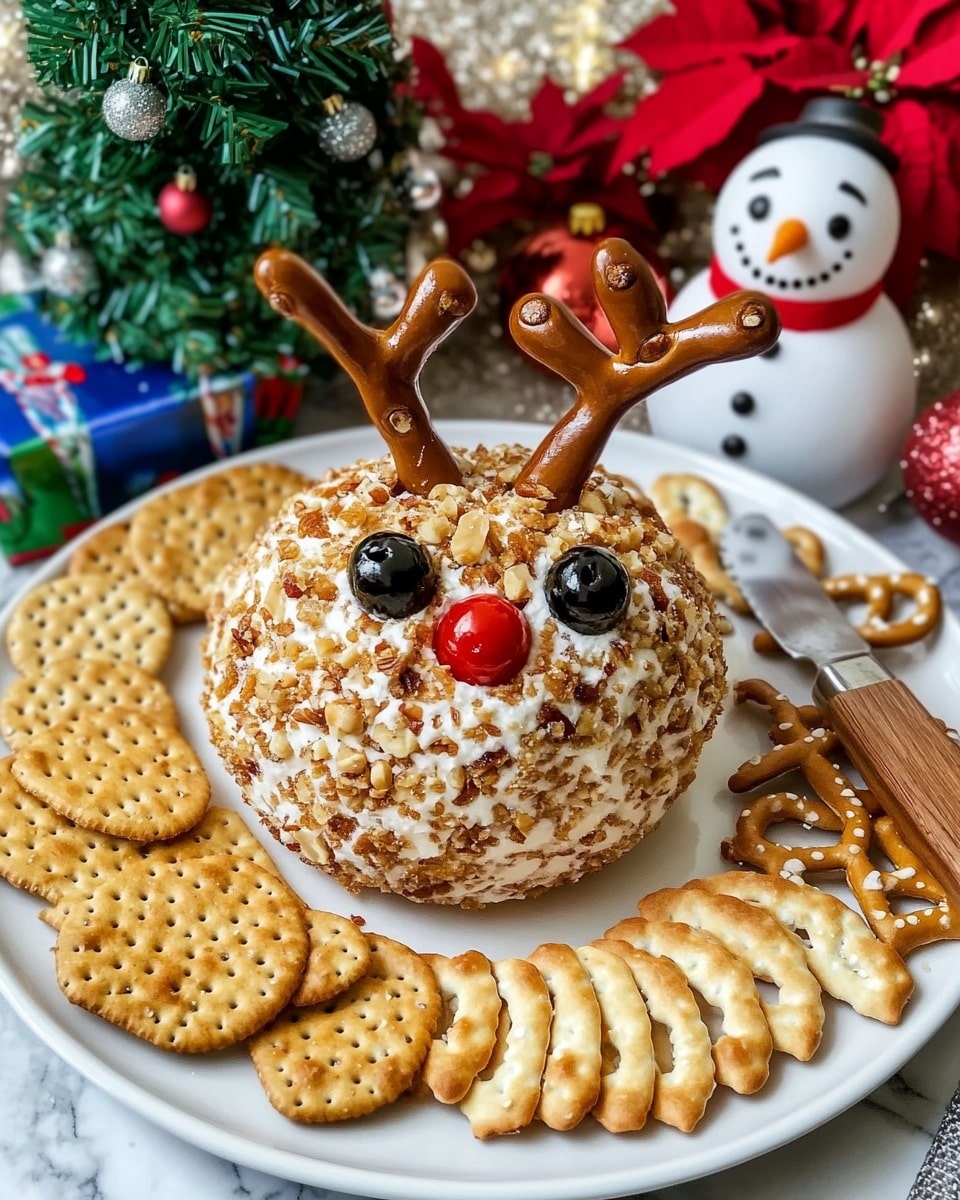
Step 4: Add Rudolph’s Festive Face
Now for the fun part: decorating your Rudolph. Use black olives for eyes, a cherry tomato for the nose, and twisted pretzels for the antlers. When placing the eyes and nose, use your fingers to make small indents so they’ll stay put—and trust me, this little trick makes assembling much easier without them slipping off.
Step 5: Serve and Enjoy
Serve this festive cheese ball with an assortment of crackers, pretzels, or crisp veggie sticks. I find it’s a hit when guests can scoop or spread their own bites, making snack time both interactive and tasty. Expect compliments—and possibly requests for your recipe!
Pro Tips for Making Rudolph Cheese Ball with Pecans and Festive Garnishes Recipe
- Room Temperature Cheese: Always allow cream cheese to soften fully before mixing—it prevents lumps and ensures smooth blending.
- Chilling Time Matters: Don’t skimp on the chilling; it makes rolling the ball easier and the texture just right.
- Crushing Pecans: I find pulsing nuts in a food processor a few times gives the perfect texture—coated but not powdery.
- Assembling Garnishes: Make indents with your fingers before placing eyes and nose to keep them secure and looking neat.
How to Serve Rudolph Cheese Ball with Pecans and Festive Garnishes Recipe
Garnishes
I typically stick to the classic cherry tomato nose, black olive eyes, and pretzel antlers. It’s a winning combo that’s visually festive and super easy. Sometimes, I swap in rosemary sprigs as antlers—they add a lovely aroma and hint of pine that’s unexpected but delightful!
Side Dishes
This cheese ball pairs wonderfully with a simple charcuterie board—think cured meats, sliced apples, and crunchy crackers. I also love serving it alongside crisp veggie sticks like celery and bell peppers, which add freshness and balance.
Creative Ways to Present
For extra holiday flair, I place the cheese ball on a festive platter surrounded by holly sprigs or edible flowers. Another idea I tried was putting Rudolph on a small wooden board with themed toothpicks for easy self-serving—that instant party hit looked charming and was super practical.
Make Ahead and Storage
Storing Leftovers
Any leftovers I wrap tightly in plastic wrap and keep refrigerated for up to 3 days. The cheese ball holds up wonderfully, though it’s best enjoyed within a day or two for the freshest taste. When ready to serve again, I let it sit out briefly to soften a bit.
Freezing
Freezing isn’t my go-to since the texture changes slightly after thawing, but if you need to, wrap it tightly in plastic and aluminum foil before freezing. Thaw overnight in the fridge. Keep in mind the pecan coating can lose some crunch after freezing.
Reheating
I don’t recommend reheating this cheese ball since it’s meant to be served cold or room temp. Letting it warm slightly at room temperature is enough to bring out the best flavors and spreadability without losing texture.
FAQs
-
Can I make the Rudolph Cheese Ball with Pecans and Festive Garnishes Recipe ahead of time?
Absolutely! Making it a few hours or even a day before your event helps the flavors meld and makes assembling less stressful. Just keep it refrigerated until ready to serve.
-
What can I substitute if I don’t like horseradish mustard?
You can use regular mustard or Dijon for a milder tang, or even kick it up with a bit of prepared horseradish if you want the heat without the mustard flavor. Adjust to taste!
-
How do I keep the garnishes from falling off?
Make small indents with your fingers in the cheese ball before placing the olives and tomato; this grips them more securely. I also gently press each garnish into place.
-
Can this cheese ball be made vegan or dairy-free?
You could experiment with dairy-free cream cheese and cheddar-style shreds; however, texture might vary. Rolling in nuts and assembling garnishes can remain the same for a festive look.
Final Thoughts
Honestly, the Rudolph Cheese Ball with Pecans and Festive Garnishes Recipe holds a special place in my holiday traditions. It’s such a delightful way to add a little whimsy to your party spread without extra fuss. When you try it, you’ll notice how it brings smiles and makes snack time something to look forward to. I can’t recommend it enough—give it a go, and watch your friends and family go crazy for this festive, flavorful treat!
Print
Rudolph Cheese Ball with Pecans and Festive Garnishes Recipe
- Prep Time: 5 minutes
- Cook Time: 0 minutes
- Total Time: 1 hour 5 minutes
- Yield: 16 servings
- Category: Appetizer
- Method: No-Cook
- Cuisine: American
- Diet: Vegetarian
Description
Celebrate the festive season with this delightful Rudolph Cheese Ball—a creamy, tangy cheese spread shaped into a fun reindeer design. Combining sharp cheddar, cream cheese, and a spicy horseradish mustard, this appetizer is both flavorful and playful. Perfect for holiday parties, it’s easy to prepare, visually appealing, and sure to be a crowd-pleaser when served with crackers, pretzels, or vegetable sticks.
Ingredients
Main Ingredients
- 8 oz Cream Cheese, softened to room temperature
- 2 cups Sharp Cheddar Cheese, shredded
- 2 tbsp Silver Springs Beer’n Brat Hot Horseradish Mustard or any variety of hot horseradish mustard
- 1 tbsp Worcestershire Sauce
- 1/2 tsp Garlic Powder
- 1/2 tsp Onion Powder
- 1/2 cup Crushed Pecans (for coating)
For Decorating
- 1 Cherry Tomato (red nose)
- 2 Black Olives (eyes)
- 2 Twisted Pretzels (antlers)
Instructions
- Mix the Cheese Base: In a large mixing bowl, combine the softened cream cheese, shredded sharp cheddar cheese, hot horseradish mustard, Worcestershire sauce, garlic powder, and onion powder. Mix thoroughly until the mixture is smooth and well combined, ensuring even distribution of flavors.
- Shape the Cheese Ball: Transfer the cheese mixture onto a large piece of plastic wrap. Use the plastic wrap to help shape the mixture into a round ball form. Once formed, wrap it tightly and refrigerate for at least 1 hour to allow the cheese ball to firm up and hold its shape.
- Coat with Pecans: After chilling, remove the cheese ball from the refrigerator and unwrap it. Roll it gently in the crushed pecans, pressing slightly to ensure the nut coating adheres evenly around the entire surface of the cheese ball.
- Decorate the Rudolph: Use your fingers to make small indentations on the cheese ball to place the decorations. Insert two black olives as eyes, a cherry tomato as the iconic red nose, and two twisted pretzels on top to resemble antlers. This creates a fun and festive Rudolph appearance.
- Serve and Enjoy: Place the Rudolph Cheese Ball on a serving platter with an assortment of crackers, pretzels, chips, or vegetable sticks for dipping. Encourage guests to enjoy this flavorful and whimsical appetizer at your holiday gathering.
Notes
- For best results, ensure the cream cheese is fully softened before mixing to create a smooth texture.
- You can substitute the horseradish mustard with your favorite spicy mustard variation if desired.
- Chilling time is essential for the cheese ball to firm up properly and hold the shape during serving.
- Crushed walnuts or almonds can be used in place of pecans for the coating if preferred.
- Keep the cheese ball refrigerated until just before serving to maintain freshness.
Nutrition
- Serving Size: 1 serving (approx. 1 oz)
- Calories: 110
- Sugar: 1g
- Sodium: 180mg
- Fat: 9g
- Saturated Fat: 3.5g
- Unsaturated Fat: 4.5g
- Trans Fat: 0g
- Carbohydrates: 2g
- Fiber: 0.5g
- Protein: 5g
- Cholesterol: 25mg


