If you’ve ever wanted to take a simple condiment to the next level, this Roasted Garlic Aioli Recipe is hands-down one of my favorites to whip up. It’s creamy, packed with deep roasted garlic flavor, and surprisingly easy to make. Whether you’re dressing up fries, jazzing up sandwiches, or adding a special touch to grilled veggies, you’ll find this aioli a game changer. I absolutely love how it turns out every time—rich but balanced—and I just know you’ll feel the same once you try it.
Why You’ll Love This Recipe
- Deep, Roasted Flavor: Roasting the garlic transforms harsh raw bites into buttery, mellow sweetness you’ll crave.
- Super Simple Prep: Minimal ingredients and easy steps mean you can make it anytime with no fuss.
- Versatile Condiment: Perfect as a dip, spread, or salad dressing base—you’ll find endless uses for it.
- Make Ahead Friendly: It tastes even better after chilling, and keeps well in the fridge, so you can prep ahead without stress.

Ingredients You’ll Need
These ingredients come together in such a straightforward way, but each one has a role that really makes this roasted garlic aioli sing. Plus, I’ll share a few tips on picking the best ingredients to get that perfect silky texture and bold flavor.
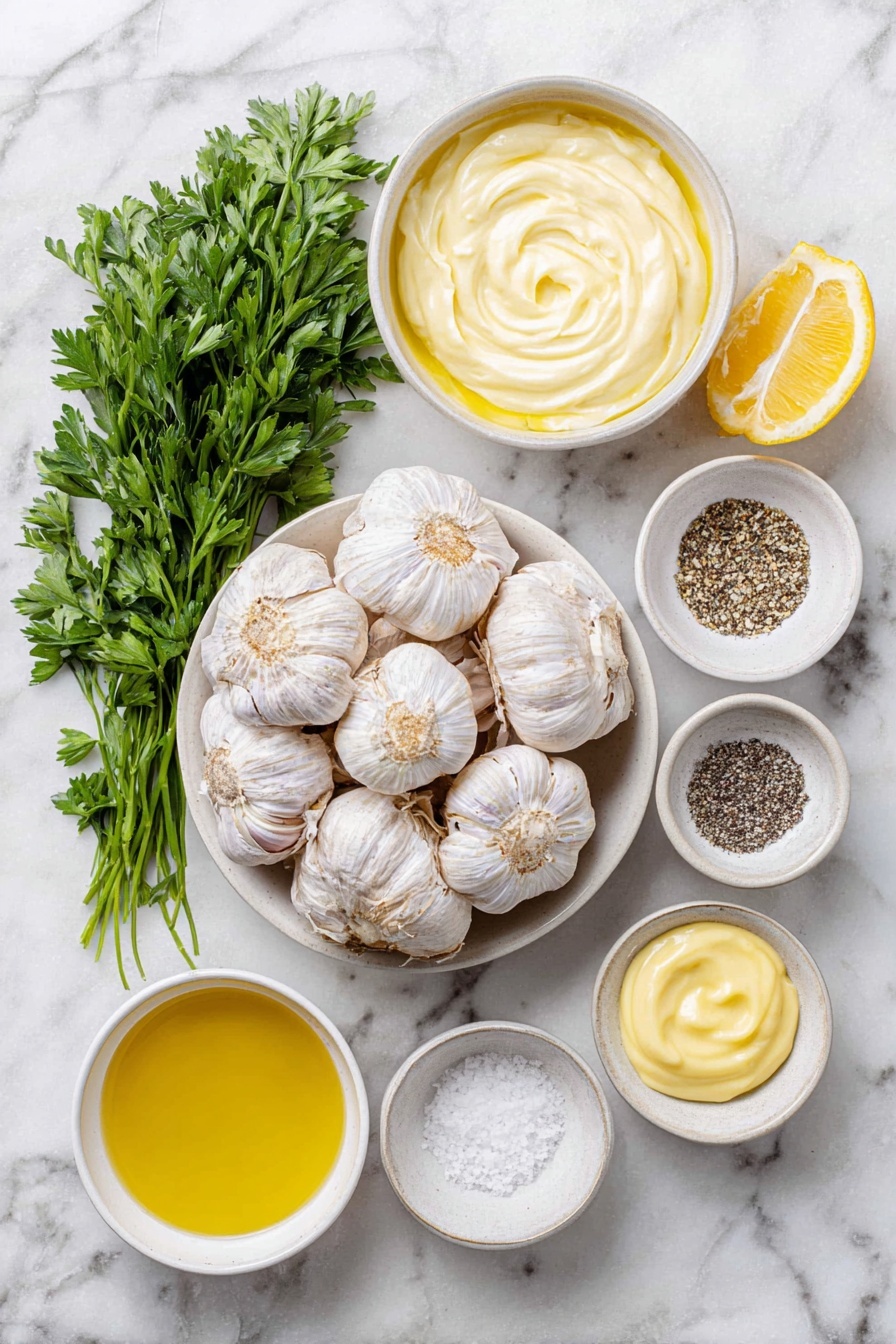
- Garlic: Use a fresh head with plump cloves for roasting—it’s the star of the show!
- Olive Oil: A good quality olive oil adds richness and helps the garlic caramelize beautifully.
- Mayonnaise: This is the creamy base that balances the roasted garlic’s intensity; I prefer a good-quality mayo for best flavor.
- Lemon Juice: Adds brightness and cuts the richness—freshly squeezed if possible.
- Dijon Mustard: A tiny kick that deepens the aioli’s flavor complexity without overpowering it.
- Salt and Pepper: Simple seasoning to enhance all the flavors.
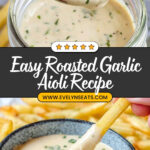
- Parsley or Chives: Fresh herbs add a lovely pop of color and subtle freshness at the end.
Variations
I love that this roasted garlic aioli recipe has room for you to make it your own. Sometimes I like to switch things up depending on what I’m serving it with or just what I’m in the mood for. Don’t hesitate to play with it!
- Smoky Aioli: I add a pinch of smoked paprika—this adds a subtle smoky vibe that’s incredible with grilled meats or roasted veggies.
- Herb-Infused: Sometimes I stir in a handful of fresh basil or tarragon for a bright, herbal twist that’s perfect for summer sandwiches.
- Spicy Kick: Adding a dash of cayenne or hot sauce brings heat and liveliness; perfect if you like a little fire in your condiments.
- Vegan Version: Swap the mayo for a vegan mayo and you’re good to go without missing out on that creamy texture.
How to Make Roasted Garlic Aioli Recipe
Step 1: Roast the Garlic to Perfection
First things first, preheat your oven to 400°F (200°C). Peel away the outer layers of the garlic bulb carefully but leave the cloves intact—the bulb is like a little package. Slice off the top just enough to expose the tops of the garlic cloves. Drizzle the exposed cloves with olive oil, pop the bulb onto a foil sheet, and wrap it tight. The magic happens during roasting, so leave it in the oven for about 30-40 minutes until the garlic cloves are soft, golden, and smell incredible. You’ll know they’re ready because they’ll be tender enough to mash easily.
Step 2: Mash and Mix Your Aioli Base
Once the garlic has cooled enough to handle, squeeze the roasted cloves right out of their skins into a small bowl. I like to mash them really well with a fork to get that silky, spreadable texture. Next, combine your mashed garlic with the mayo, lemon juice, and Dijon mustard. Stir everything together until it’s smooth and creamy. Don’t forget to season it well with salt and pepper, taste, and tweak to your liking. If you’re feeling fancy or want a perfectly smooth finish, you can blitz this mixture in a food processor, which I sometimes do when I’m making a big batch.
Step 3: Chill and Garnish
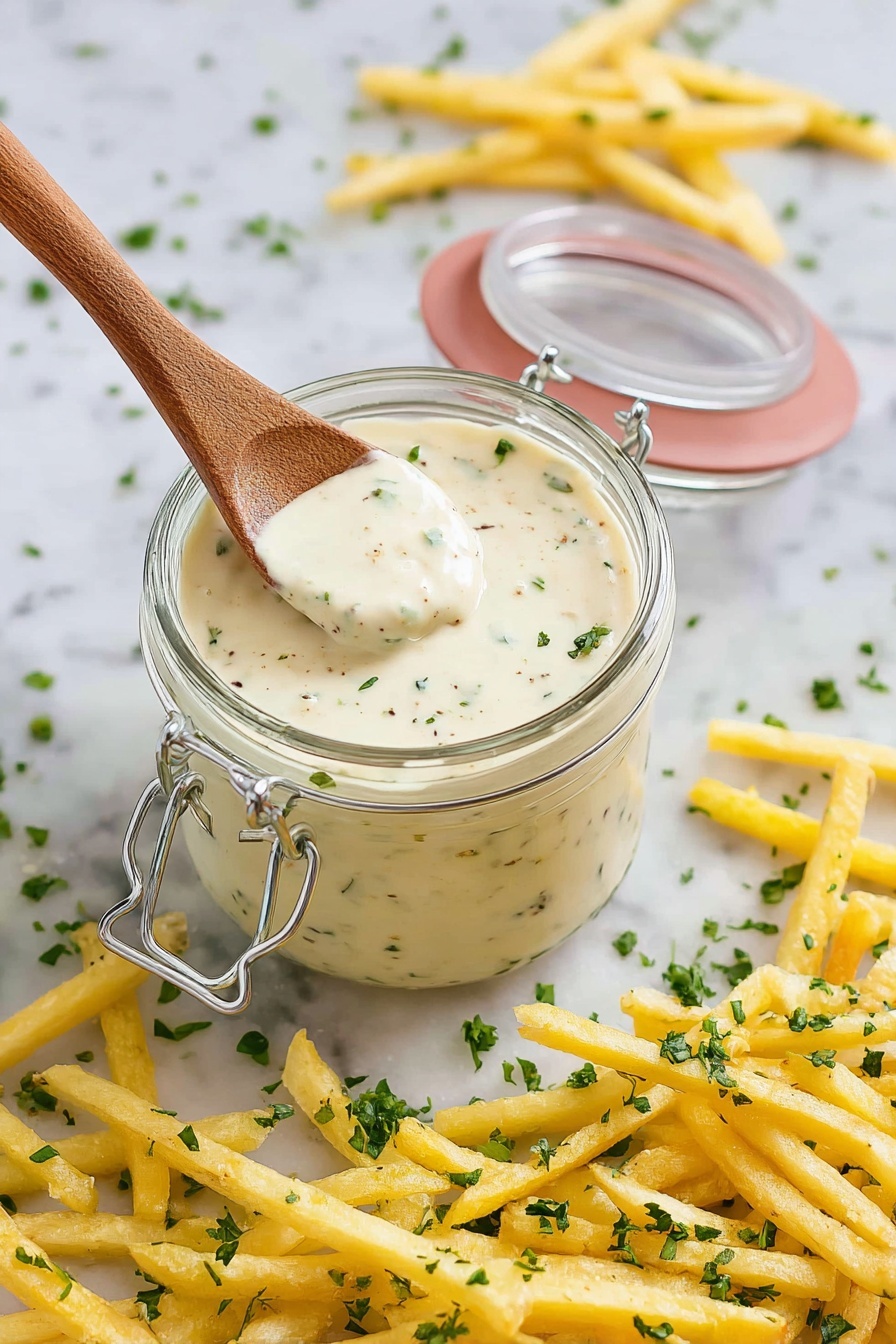
Transfer your aioli to a serving dish or an airtight container and pop it in the fridge for at least 30 minutes. This step is key because it lets the flavors blend and mellow beautifully. When you’re ready to serve, sprinkle chopped parsley or chives on top. The fresh herbs add not just color but a subtle herbal lift that brightens the whole thing.
Pro Tips for Making Roasted Garlic Aioli Recipe
- Roast Extra Garlic: I always roast a few extra cloves—they’re divine spread on warm bread or tossed into pasta.
- Use Fresh Lemon Juice: It makes a noticeable difference in brightness, I promise—it’s worth the extra squeeze.
- Adjust Consistency Thoughtfully: If your aioli feels too thick after chilling, stir in a teaspoon of water or lemon juice; it wakes up the texture without diluting flavor.
- Mind the Salt: Start light and taste as you go. The garlic and mustard bring flavor, so it’s easy to over-salt if you’re not paying attention.
How to Serve Roasted Garlic Aioli Recipe
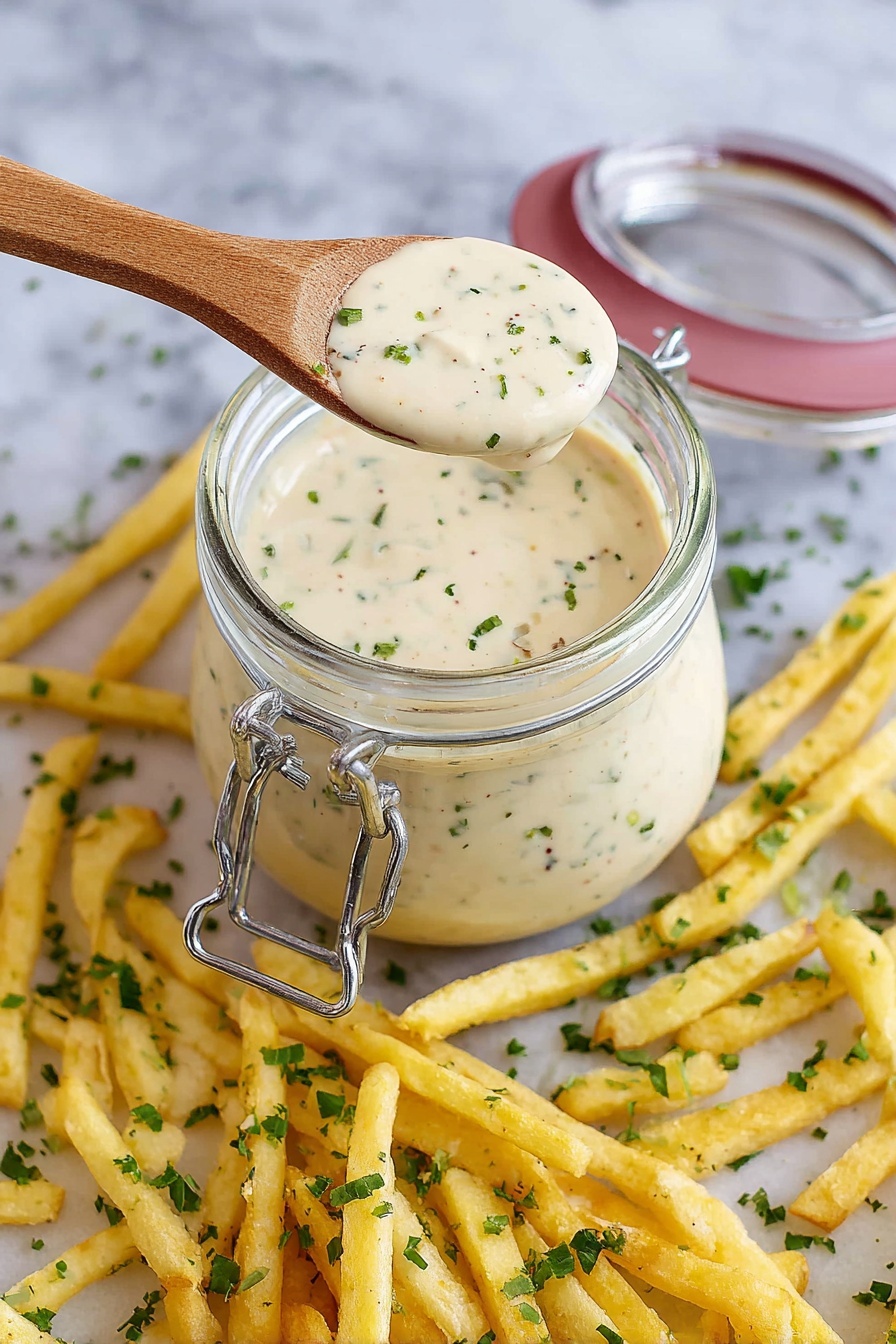
Garnishes
I like to keep it simple and fresh—chopped parsley or chives always do the trick. Sometimes, I add a little lemon zest if I want an extra pop. It really livens up the creamy base and makes your aioli feel extra special and inviting on the plate.
Side Dishes
This roasted garlic aioli pairs amazingly with crispy fries (homemade or store-bought), grilled chicken, roasted vegetables, or even as a sandwich spread. One of my favorite combos is roasted cauliflower dipped in this aioli—my family literally goes crazy for it every time.
Creative Ways to Present
For a party, I like scooping the aioli into small mini ramekins and arranging them on a platter with colorful crudités and roasted potatoes on the side. You can also drizzle a little extra virgin olive oil over the top and sprinkle with smoked paprika or chili flakes for a beautiful, tantalizing finish that will wow your guests.
Make Ahead and Storage
Storing Leftovers
I keep leftover aioli in an airtight container in the fridge, and it usually lasts about 4-5 days. Because it thickens after chilling, sometimes I give it a quick stir and add a tiny splash of water or lemon juice before serving again to freshen it up.
Freezing
I haven’t personally frozen this aioli often because it’s so quick and easy to make fresh, but if you do freeze it, make sure to thaw it slowly in the fridge and check the texture. Sometimes emulsified sauces can separate a bit during freezing, so give it a good stir or re-blend if needed.
Reheating
This aioli is best served cold or at room temperature, so I usually take it out of the fridge about 15 minutes before serving. That way, the flavors open up nicely without needing any heat, which can break down the mayo and change the texture.
FAQs
-
Can I make Roasted Garlic Aioli Recipe without a food processor?
Absolutely! I make it by hand all the time with just a fork. Roasting the garlic softens it enough to mash smoothly. Then just mix everything well—though a blender or food processor can smooth it out even more if you like silky textures.
-
How long does homemade roasted garlic aioli last?
Stored in an airtight container in the fridge, it typically stays fresh for 4 to 5 days. Always give it a sniff and taste before using, especially if it’s been several days.
-
Can I use this aioli as a salad dressing?
Definitely! You might want to thin it slightly with a splash of water or extra lemon juice to get the perfect dressing consistency. It adds a creamy garlicky punch to any salad.
-
What if I don’t have Dijon mustard?
If you’re out of Dijon, you can use yellow mustard for a milder flavor or skip it entirely, though the flavor profile will be slightly different. The mustard adds subtle tang and depth, so I usually keep some on hand.
Final Thoughts
This Roasted Garlic Aioli Recipe is one that’s become a staple in my kitchen—it’s easy enough for weeknights but tasty enough for entertaining. The way the roasted garlic mellows into creamy mayo with a hint of brightness just gets me every single time. I truly believe you don’t have to be a fancy chef to make condiments that taste restaurant-quality, and this recipe proves it. Trust me, once you make it, you’ll find yourself looking for excuses to use it. Give it a try and let me know how it turns out—you might just discover your new favorite sauce!
Print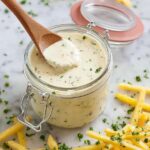
Roasted Garlic Aioli Recipe
- Prep Time: 5 minutes
- Cook Time: 40 minutes
- Total Time: 45 minutes
- Yield: 8 servings
- Category: Condiment
- Method: Roasting
- Cuisine: Mediterranean
- Diet: Vegetarian
Description
This creamy, flavorful Roasted Garlic Aioli is a versatile condiment perfect for enhancing sandwiches, dipping fries, or adding a zesty touch to grilled vegetables. Made with roasted garlic, mayonnaise, lemon juice, and Dijon mustard, it delivers a rich, mellow garlic flavor with a tangy kick.
Ingredients
Roasted Garlic
- 1 head garlic
- 1 tablespoon olive oil
Aioli Base
- ½ cup mayonnaise
- 1 tablespoon lemon juice
- ½ teaspoon Dijon mustard
- Salt and pepper, to taste
Garnish
- Parsley or chives, chopped (for garnish)
Instructions
- Preheat the Oven: Set your oven to 400°F (200°C) to prepare for roasting the garlic.
- Prepare Garlic for Roasting: Peel away the outer layers of the garlic bulb without separating the cloves. Slice off the top to expose the tops of the cloves. Place the bulb on a piece of aluminum foil, drizzle with olive oil, and wrap tightly.
- Roast the Garlic: Roast the foil-wrapped garlic in the preheated oven for 30-40 minutes until cloves are soft and golden brown.
- Cool and Squeeze Garlic: Remove garlic from oven and allow it to cool slightly. Squeeze the roasted garlic cloves out of their skins into a small bowl.
- Mash Garlic: Mash the roasted garlic cloves with a fork until creamy and smooth.
- Combine Aioli Ingredients: In a separate bowl, mix the mashed garlic with mayonnaise, lemon juice, and Dijon mustard. Stir well to blend evenly.
- Season the Aioli: Add salt and pepper to taste, adjusting the seasoning as needed to balance flavor.
- Garnish the Aioli: Optionally, stir in or sprinkle chopped parsley or chives for color and fresh flavor.
- Chill Before Serving: Transfer the aioli to a container, cover, and refrigerate for at least 30 minutes to meld the flavors.
Notes
- Roast extra garlic cloves to use as a spread or in other dishes.
- For a smoother texture, blend the aioli ingredients in a food processor or blender.
- If the aioli is too thick, thin it with a small amount of water or additional lemon juice.
- The aioli will thicken after chilling, so adjust consistency accordingly before chilling.
- Customize the flavor by adding smoked paprika, honey, or other spices to give your aioli a unique twist.
Nutrition
- Serving Size: 2 tablespoons
- Calories: 90
- Sugar: 0.4 g
- Sodium: 150 mg
- Fat: 9 g
- Saturated Fat: 1.5 g
- Unsaturated Fat: 6.5 g
- Trans Fat: 0 g
- Carbohydrates: 1 g
- Fiber: 0.2 g
- Protein: 0.3 g
- Cholesterol: 5 mg

