
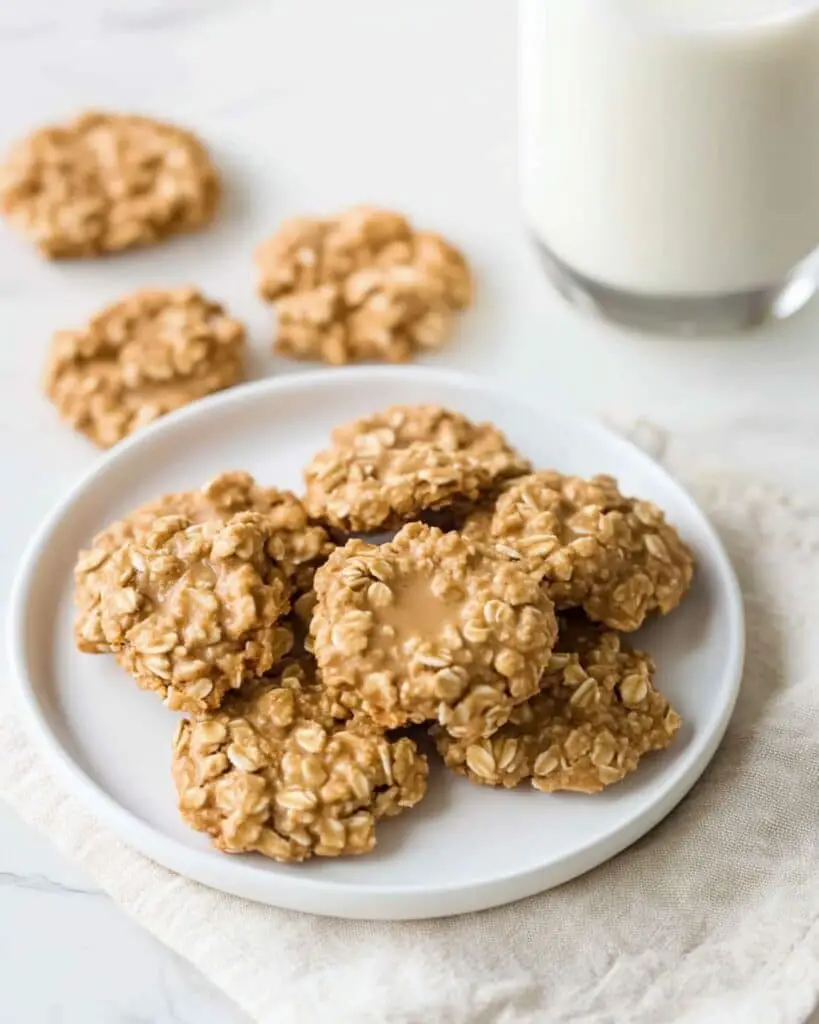
These Best Key Lime Mini Cheesecakes are a delightful twist on traditional cheesecake that will transport your taste buds straight to the These irresistible Peanut Butter No Bake Cookies are the ultimate treat for when you’re craving something sweet but don’t want to turn on the oven. Ready in just minutes with pantry staples you likely already have, these cookies combine the perfect balance of creamy peanut butter, satisfying oats, and just the right amount of sweetness. They’re wonderfully chewy with a melt-in-your-mouth texture that makes them impossible to resist!
Keys! Perfectly portioned for individual servings, these creamy, tangy treats feature a buttery graham cracker crust topped with a velvety smooth key lime filling. The balance of sweet and tart flavors makes these mini desserts irresistible for any occasion, from casual family dinners to elegant gatherings.
Why You’ll Love This Recipe
- No Oven Required: Perfect for hot summer days when you don’t want to heat up the kitchen or when you need a quick dessert without waiting for preheating.
- Quick Preparation: From start to finish, the active cooking time is less than 5 minutes—then just let them set!
- Simple Ingredients: Uses everyday pantry staples you probably already have on hand.
- Kid-Friendly: Both making and eating these cookies is fun for the whole family. Let kids help drop the cookies onto the wax paper.
- Crowd-Pleaser: These cookies disappear fast at potlucks, bake sales, or family gatherings. I’ve never met anyone who didn’t love them!

Ingredients You’ll Need
- Granulated Sugar: The foundation of sweetness in these cookies, it also helps create that perfect firm-but-chewy texture when cooked properly.
- Butter: Adds richness and helps the cookies hold together. Always use real butter for the best flavor.
- Milk: Creates the right consistency and helps dissolve the sugar. Whole milk gives the richest results, but any milk works.
- Vanilla: That warm flavor enhancer that makes everything taste better. Use pure vanilla extract if possible.
- Peanut Butter: The star of the show! Creamy works best for smooth cookies, but crunchy adds interesting texture if that’s your preference.
- Quick Oats: Provides the structure and chewiness. Quick oats work better than old-fashioned as they absorb moisture more efficiently.
Note: You’ll find the complete list of ingredients, along with their exact measurements, in the printable recipe card at the bottom of this post.
Variations
Want to switch things up? Try these tasty twists:
- Chocolate Lover’s Version: Add 3 tablespoons of unsweetened cocoa powder to the sugar mixture before boiling.
- Extra Crunch: Fold in ½ cup chopped nuts or rice krispies with the oats.
- Flavor Boost: Use almond butter or cookie butter instead of peanut butter for a different flavor profile.
- Holiday Special: Add festive sprinkles while the cookies are still warm for a seasonal touch.
- Healthier Option: Reduce sugar to 1 cup and use natural peanut butter with a touch of honey.
How to Make Peanut Butter No Bake Cookies
Step 1: Prepare Your Workspace
Before you start cooking, lay out sheets of wax paper on your countertop or table. You’ll need to work quickly once the mixture is ready.
Step 2: Create the Sugar Base
In a medium saucepan over medium-high heat, combine the sugar, butter, and milk. Stir continuously as the mixture comes to a temperature.
Step 3: Time the Boil Perfectly
Once the mixture reaches a full rolling boil (bubbles across the entire surface), set your timer for exactly 2 minutes and 30 seconds. Keep stirring continuously during this time—this is crucial for proper setting!
Step 4: Add Flavor Components
Remove from heat immediately when the timer goes off. Stir in the vanilla and peanut butter until completely smooth. The mixture should be glossy and well-combined.
Step 5: Incorporate the Oats
Add the quick oats to the mixture and stir vigorously until everything is evenly coated. The mixture will begin to thicken quickly.
Step 6: Form and Cool
Working swiftly, drop tablespoon-sized portions onto your prepared wax paper. If the mixture gets too stiff, you can add a tiny splash of hot water and stir.
Step 7: Let Set
Now comes the hardest part—waiting! Let the cookies set undisturbed for about 30 minutes. They’ll firm up as they cool.
Pro Tips for Making the Recipe
- Timer Precision: The 2-minute-30-second boiling time isn’t arbitrary—it’s the sweet spot for perfect texture. Use a proper timer, not just counting in your head.
- Weather Awareness: Humidity affects setting time. On rainy days, you might need to boil the mixture an extra 15 seconds or let them set longer.
- Stirring Technique: Use a wooden spoon for stirring—it doesn’t conduct heat like metal and gives you better control.
- Cookie Sizing: A cookie scoop ensures uniform sizes and makes the process much cleaner and faster.
- Wax Paper Trick: If you’re out of wax paper, parchment paper or a silicone baking mat works great too. Avoid aluminum foil—the cookies will stick!
How to Serve
These versatile treats work in so many settings:
Simple Enjoyment
Pair with a cold glass of milk for the classic experience, or serve with coffee for an afternoon pick-me-up.
Dessert Upgrade
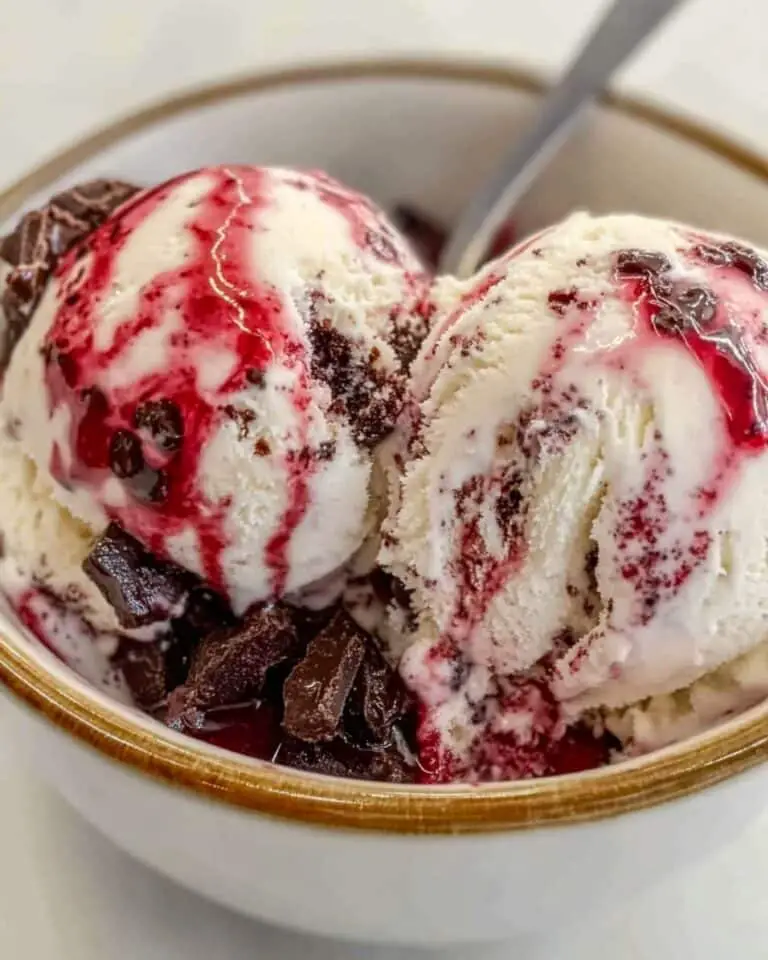
Crumble over vanilla ice cream or use as the “bread” for an ice cream sandwich.
Gift Giving
Stack in a decorative tin with parchment paper between layers for a homemade gift that everyone appreciates.
Make Ahead and Storage
Storing Leftovers
Store in an airtight container at room temperature for up to 5 days. Place parchment paper between layers to prevent sticking.
Refrigeration
In warmer weather, refrigerate for firmer texture and longer freshness—up to 10 days.
Freezing
These cookies freeze beautifully! Place in a single layer on a baking sheet until frozen solid, then transfer to a freezer container or zip-top bag. They’ll keep for up to 3 months.
Reheating
No need to reheat—just let frozen cookies thaw at room temperature for about 20 minutes before enjoying.
FAQs
-
Why didn’t my cookies set properly?
The most common reason is insufficient boiling time. The sugar mixture needs to reach the soft-ball stage (about 235°F) to set correctly. Use a candy thermometer if you’re unsure. If it’s humid out, you might need to boil slightly longer. Conversely, if they’re too dry and crumbly, you likely boiled too long.
-
Can I use old-fashioned oats instead of quick oats?
While you can, the texture will be quite different. Old-fashioned oats are thicker and take longer to soften, resulting in a chewier, more substantial cookie. If that’s all you have, you can pulse them briefly in a food processor to break them down slightly.
-
Is there a dairy-free version of this recipe?
Absolutely! Use plant-based butter and your favorite non-dairy milk (oat milk works particularly well). The cookies might take slightly longer to set, but they’ll be just as delicious.
-
Why do I need to stir continuously while boiling?
Constant stirring prevents the mixture from burning on the bottom of the pan and ensures even heat distribution. It’s critical for achieving that perfect texture—skip this step and you might end up with grainy or burnt-tasting cookies.
Final Thoughts
These Peanut Butter No Bake Cookies are truly a lifesaver recipe to have in your arsenal. They’re incredibly quick to make, require minimal ingredients, and satisfy sweet cravings in a heartbeat. Whether you’re making them for a last-minute gathering or just treating yourself after a long day, they never disappoint. The combination of creamy peanut butter and chewy oats creates a nostalgic treat that brings joy with every bite. So grab your saucepan and get ready to create some magic—I promise these will become a regular in your cooking rotation!
Print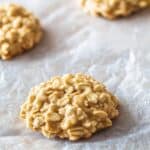
Peanut Butter No Bake Cookies Recipe
- Prep Time: 5 minutes
- Coll time: 30 minutes
- Cook Time: 5 minutes
- Total Time: 40 minutes
- Yield: 36 cookies
- Category: Desserts
- Method: No-cook
- Cuisine: American
Description
No-bake cookies are a quick and delicious option when you’re craving something sweet, especially if you’re a peanut butter lover. These soft and chewy cookies combine the richness of peanut butter with the wholesome goodness of oats, and there’s no need for an oven. Simple to make, these cookies are perfect for a treat that the whole family will enjoy.
Ingredients
Sugar Mixture:
- 1 1/2 cups granulated sugar
- 1/2 cup (1 stick) butter
- 1/2 cup milk
- 1 tsp vanilla extract
Cookie Base:
- 1 cup peanut butter
- 2 1/2 cups quick oats
Instructions
-
Prepare the Sugar Mixture
In a medium-sized saucepan over medium-high heat, combine the granulated sugar, butter, and milk. Stir continuously to prevent the mixture from sticking or burning. Bring it to a rapid boil and let it boil for exactly 2 minutes and 30 seconds. Be sure to set a timer for accuracy. This step ensures the right consistency for the cookies. -
Add Flavors
Remove the saucepan from the heat and immediately mix in the vanilla extract and peanut butter. Stir well until the peanut butter is completely melted and incorporated into the mixture. This step adds flavor and creaminess to the cookies. -
Incorporate the Oats
Gradually stir in the quick oats until the mixture is evenly combined. The oats help form the cookie base, providing texture and structure. Make sure to blend the ingredients thoroughly for uniform cookies. -
Shape the Cookies
Using a tablespoon, drop portions of the mixture onto waxed paper. Make sure to work quickly before the mixture cools and begins to set. Leave about an inch of space between each cookie to allow for easy removal once they’re set. -
Set and Cool
Let the cookies sit at room temperature for about 30 minutes or until they are fully set. Avoid handling them during this time to allow them to firm up properly. Once cooled, the cookies are ready to enjoy.
Notes
- To achieve the perfect consistency, make sure to boil the sugar mixture for exactly 2 minutes and 30 seconds. Over- or under-boiling may affect the texture of the cookies.
- Atmospheric conditions, such as humidity, can impact the results of this recipe. On rainy or humid days, the cookies may take longer to set, so be patient.
- Avoid substituting quick oats with old-fashioned oats, as the texture may vary significantly.
Nutrition
- Serving Size: 1 cookie
- Calories: 110kcal
- Sugar: 12g
- Sodium: 65
- Fat: 6g
- Saturated Fat: 3g
- Unsaturated Fat: 3g
- Trans Fat: 0g
- Carbohydrates: 13g
- Fiber: 1g
- Protein: 2g
- Cholesterol: 10mg


