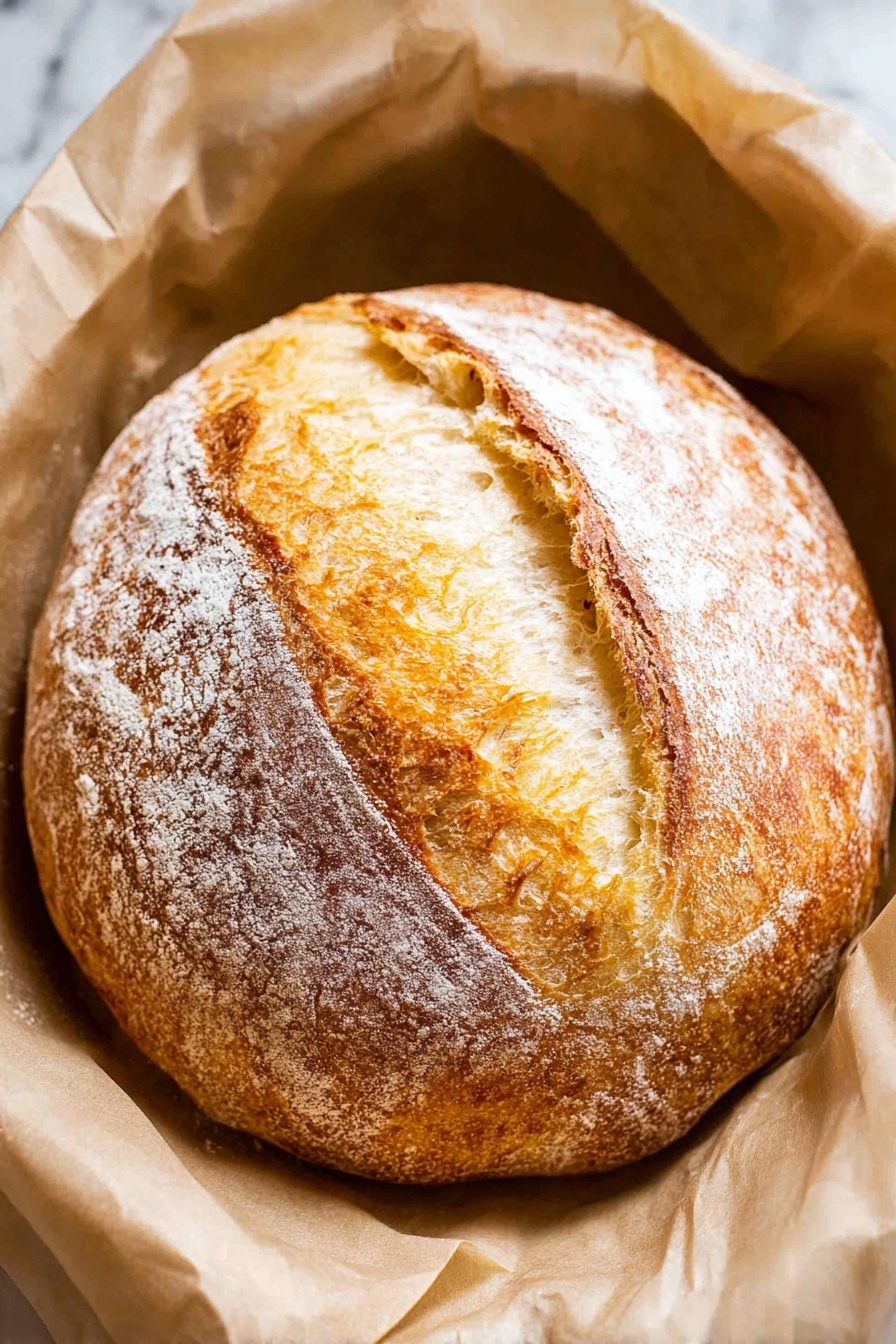
If you’ve ever dreamed of baking bakery-quality bread at home without all the fuss, then you’re going to absolutely love this No-Knead Sourdough Bread Recipe. It’s simple, forgiving, and honestly, one of my favorite ways to get that crispy crust and tender crumb without spending hours kneading dough. Stick with me, and I’ll share every little tip to make your first loaf turn out just right — spoiler, it’s fan-freaking-tastic every time!
Why You’ll Love This Recipe
- No Kneading Required: Say goodbye to sore arms and hello to effortlessly delicious bread.
- Perfect Crust & Crumb: You’ll get that beautiful crisp edge and soft, airy inside every time.
- Beginners Welcome: I was new to sourdough too, and this method made baking approachable and fun.
- Flexible Timing: You can prep ahead and let fermentation do the work while you relax.

Ingredients You’ll Need
The magic of this No-Knead Sourdough Bread Recipe comes from simple, quality ingredients working in harmony. I always keep these staples on hand, and finding a lively starter is key.
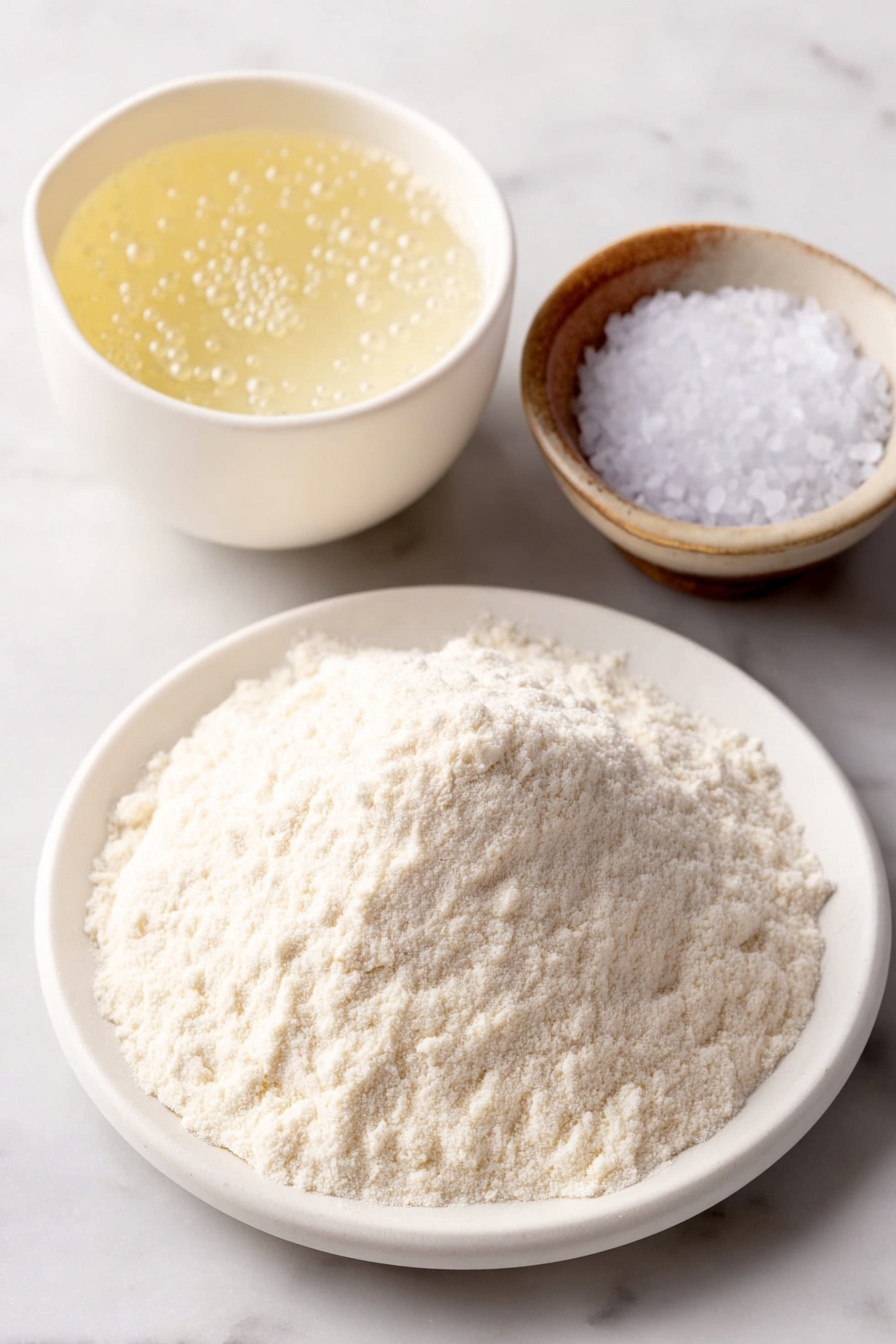
- Mature Starter: Your bubbly starter is the heart of the bread—make sure it’s active and healthy for best rise.
- Unbleached Bread Flour: Bread flour gives that great chew and structure, but unbleached all-purpose works if you’re in a pinch.
- Filtered Water: I find that filtered water helps the starter and dough behave better without off flavors.
- Sea Salt: A good pinch rounds out the flavor—don’t swap it for table salt if you can avoid it.
Variations
I love how versatile this No-Knead Sourdough Bread Recipe is, and you’ll find it easy to tweak depending on your pantry or taste cravings.
- Whole Wheat or Rye Flour: Swap up to half the bread flour with whole wheat or rye for a deeper, earthier flavor — my family adores the rustic twist this adds.
- Add-ins: Think olives, rosemary, or toasted seeds folded gently before the final proof for bursts of texture and aroma.
- Hydration Levels: If you love a really open crumb, try increasing the water a bit—but make sure you’re comfortable with handling a wetter dough.
- Gluten-Free Alternative: This recipe isn’t naturally gluten-free, but sourdough gluten-free breads can be tackled with specific flour blends if you want to experiment.
How to Make No-Knead Sourdough Bread Recipe
Step 1: Build Your Starter the Night Before
The night before baking, mix 25 grams of your mature starter with 75 grams of flour and 75 grams of warm water (about 90°F) in a clean jar. Stir until smooth—no lumps! Cover it loosely and leave it on your counter overnight. By morning, it should be bubbly and nearly doubled, smelling pleasantly tangy. This ripe starter jumpstarts your dough’s fermentation, so don’t skip this step!
Step 2: Mix the Dough
Add 100 grams of your ripe starter into a large bowl with 300 grams of warm water, stirring until the starter dissolves. Toss in 500 grams of bread flour and 10 grams of sea salt. Mix everything until the flour is just hydrated and you have a shaggy, sticky dough. Don’t stress about how it looks here—it’s supposed to be wet and rough!
Step 3: First Rise in a Warm Spot
Cover your bowl with plastic wrap and pop it in the oven with just the light on to keep things cozy (about 80-85°F). Let it rise for 5-6 hours—look for it to double and get puffy. Test by poking gently: your finger should leave an indent that slowly fills back in. If your kitchen is chilly, this trick will save you from waiting all day.
Step 4: Shape Your Dough
Dump the dough onto a lightly floured surface, seam side down. Starting from the top, fold the dough edges into the center one by one—top, bottom, left, right—and pinch to seal. Repeat this folding once more, then flip and gently round the dough into a smooth, taut ball using cupped hands. It will still be soft, but the surface should feel tight and pillowy. I love this step because you really start to feel the dough coming alive!
Step 5: Final Proof in the Bread Basket
Flour a banneton or bread basket generously, place the dough seam-side up, and dust lightly on top to prevent sticking. Cover again with plastic wrap and back into the warm oven light for 2-3 hours. It should puff up and hold a fingerprint when pressed. This proofing step gives your loaf that gorgeous open crumb and great oven spring.
Step 6: Prep and Bake
Preheat your oven to 450°F but don’t preheat your Dutch oven — this recipe works best when you place the dough inside a cold pot. Gently turn your dough onto parchment paper, seam side down, and score the top with a sharp knife or lame — I keep mine simple with a single slash down the middle. Using the parchment as handles, carefully lift the dough into the Dutch oven, cover with the lid, and reduce temperature to 425°F. Bake covered for 40 minutes, then uncover and bake another 5-10 minutes until a deep golden crust forms and the loaf sounds hollow when tapped.
Step 7: Cool Completely Before Slicing
Allow your bread to cool on a rack for at least two hours—that’s when the crumb fully sets and the crust crisps up perfectly. It’s tempting to slice early (trust me, I’ve been there!), but patience rewards you with a better texture and amazing flavor.
Pro Tips for Making No-Knead Sourdough Bread Recipe
- Use an Active Starter: I learned that a lively starter makes all the difference — it should bubble and float in water before you use it.
- Don’t Overproof: Keep an eye on your dough’s rise and poke test; overproofed dough can collapse in the oven.
- Master the Fold: Folding gently but confidently shapes the dough and builds structure without kneading.
- Score Deeply & Decisively: This helps the bread expand nicely in the oven — a shallow or hesitant score leads to wonky shapes.
How to Serve No-Knead Sourdough Bread Recipe

Garnishes
I often brush the crust with a little olive oil right out of the oven and sprinkle flaky sea salt or herbs like rosemary. It adds a rustic charm and extra punch that my family notices immediately.
Side Dishes
This bread shines alongside soups like tomato basil or creamy mushroom, and it’s gorgeous with a spread of garlic butter or your favorite cheese board. When guests come over, I slice it thick with avocado and a drizzle of lemon—always a crowd-pleaser.
Creative Ways to Present
For a special occasion, I love hollowing out the loaf and filling it with warm dips or chili—turning it into a bread bowl is surprisingly easy and impressive. You can also serve a few slices alongside a charcuterie board with colorful veggies and spreads for a festive touch.
Make Ahead and Storage
Storing Leftovers
Wrap your cooled sourdough in a paper bag or a kitchen towel to keep the crust crisp for 2-3 days at room temp. Plastic bags keep it soft but risk soggy crust, so I usually avoid those unless I want softer bread for toast.
Freezing
I slice leftover loaves before freezing in airtight containers or freezer bags. When I want bread, I take out a few slices and toast or thaw gently, and it tastes almost fresh-baked every time. Makes busy mornings a breeze!
Reheating
To revive your loaf, I preheat the oven to 350°F, sprinkle the bread lightly with water, wrap loosely in foil, and heat for 10-15 minutes. The crust comes back crisp and the crumb feels fresh—much better than microwave heating, which can toughen the bread.
FAQs
-
Can I use all-purpose flour instead of bread flour in this No-Knead Sourdough Bread Recipe?
Absolutely! While bread flour gives better gluten development for a chewy texture, unbleached all-purpose flour works well too. Your loaf might be just a bit less chewy, but still delicious and perfect for sandwiches or toasting.
-
How do I know if my sourdough starter is ready to use for this recipe?
Your starter should be bubbly, active, and have roughly doubled after feeding. The float test is a good indication: drop a spoonful in water and if it floats, it’s ready. Using an unripe starter can lead to sluggish rise and dense bread.
-
What if I don’t have a Dutch oven for baking?
No worries! You can bake this bread on a preheated baking stone or heavy baking sheet. To mimic steam, place a tray with water in the bottom of the oven or spritz the oven walls with water to get a crisp crust.
-
Why does the dough need to be sticky in this No-Knead Sourdough Bread Recipe?
Sticky dough means there’s enough hydration to develop an open crumb and keep the bread tender. It looks messy but that stickiness is what leads to the signature airy texture of artisanal sourdough bread.
Final Thoughts
This No-Knead Sourdough Bread Recipe has truly changed how I bake at home — it’s straightforward, forgiving, and the results never disappoint. I love sharing it with friends who are nervous about sourdough because it breaks down the process into easy steps that fit into any schedule. Give it a shot and enjoy the warm, crusty, tangy goodness you can pull right from your own oven—you’ll be hooked, just like me!
Print
No-Knead Sourdough Bread Recipe
- Prep Time: 15 minutes
- Cook Time: 50 minutes
- Total Time: 10 hours 5 minutes
- Yield: 8 servings
- Category: Bread
- Method: Baking
- Cuisine: American
Description
This Easiest Ever Sourdough Bread recipe is a no-knead artisan loaf that produces a beautifully crusty exterior and soft, airy crumb using a simple overnight starter build and a slow fermentation process. Perfect for beginner bakers, it requires minimal effort yet yields delicious homemade sourdough bread with a crisp crust and tender interior.
Ingredients
Starter Build (Night Before)
- 25 grams mature starter (about 2 tablespoons)
- 75 grams unbleached bread flour or all-purpose flour (½ cup + 1 teaspoon)
- 75 grams water, 90°F (⅓ cup)
Dough
- 100 grams ripe starter (heaping ⅓ cup)
- 300 grams filtered water, 90°F (1¼ cups + 1 tablespoon)
- 500 grams white bread flour or unbleached all-purpose flour (3½ cups + ½ teaspoon)
- 10 grams sea salt (2⅛ teaspoons)
Instructions
- Build the Starter: The evening before baking, combine 25 grams mature starter with 75 grams flour and 75 grams warm water at 90°F in a clean jar. Mix thoroughly until no dry flour remains. Cover loosely with plastic wrap and allow to rest at room temperature for 8-12 hours until doubled in size and bubbly.
- Prepare the Dough: The next morning, mix 100 grams ripe starter with 300 grams warm filtered water (90°F) in a large bowl until fully dispersed. Add 500 grams bread flour and 10 grams sea salt. Stir until a shaggy dough forms, then use your hands to bring it into a sticky ball. This sticky, rough texture is ideal.
- First Rise: Cover the bowl with plastic wrap and place it inside the oven with only the light on for warmth (~80-85°F). Let the dough rise for 5-6 hours until it visibly puffs up and doubles in size. A gentle poke should leave an indent that slowly fills back.
- Shape the Dough: Lightly flour your counter and turn the dough out smooth side down. Fold the dough’s edges (top, bottom, left, right) toward the center, pinching to seal. Repeat the fold sequence once more. Flip dough seam-side down and use cupped hands to rotate and tighten into a smooth ball. The surface should be taut yet soft.
- Second Rise: Dust a bread basket generously with flour. Place the shaped dough seam-side up in the basket, lightly flour the surface, cover with plastic wrap, and return to the oven light for 2-3 hours until doubled and airy. When pressed, it should hold an indentation.
- Preheat Oven and Prepare for Baking: Remove dough from oven and preheat oven to 450°F. Unlike traditional methods, do not preheat the Dutch oven. Place a sheet of parchment paper on counter and gently turn dough out seam-side down. Score the top with a sharp knife ½-inch deep lengthwise.
- Bake the Bread: Using the parchment, lift the dough into the Dutch oven. Cover with the lid and reduce oven temperature to 425°F. Bake covered for 40 minutes, then remove the lid and bake an additional 5-10 minutes until the crust is dark golden brown and sounds hollow when tapped.
- Cool the Bread: Remove the bread from the Dutch oven with the parchment paper and transfer to a cooling rack. Let cool completely for at least 2 hours, allowing the internal temperature to reach 190-205°F. The crust will crisp up and the crumb will set perfectly before slicing.
Notes
- Ensure your starter is active and bubbly; if it doesn’t float in water, it’s not ready to use.
- If you don’t have a proofing basket, a large bowl lined with a well-floured kitchen towel works well.
- The dough is naturally sticky during mixing—this is normal and leads to a perfect artisan texture.
- In colder kitchens, fermentation may take longer; the oven light method maintains gentle warmth ideal for rising.
- Score the dough confidently with a sharp knife or lame; hesitant cuts may cause uneven rising. Beginners can stick with a simple straight line.
- While bread flour is preferred for the best structure, all-purpose flour can be substituted with successful results.
- Store bread at room temperature in a paper bag for up to 3 days. For longer storage, slice and freeze in airtight containers for up to 3 months.
Nutrition
- Serving Size: 1 slice (approx. 100g)
- Calories: 220
- Sugar: 0.2g
- Sodium: 350mg
- Fat: 1g
- Saturated Fat: 0.2g
- Unsaturated Fat: 0.7g
- Trans Fat: 0g
- Carbohydrates: 45g
- Fiber: 2g
- Protein: 7g
- Cholesterol: 0mg


