
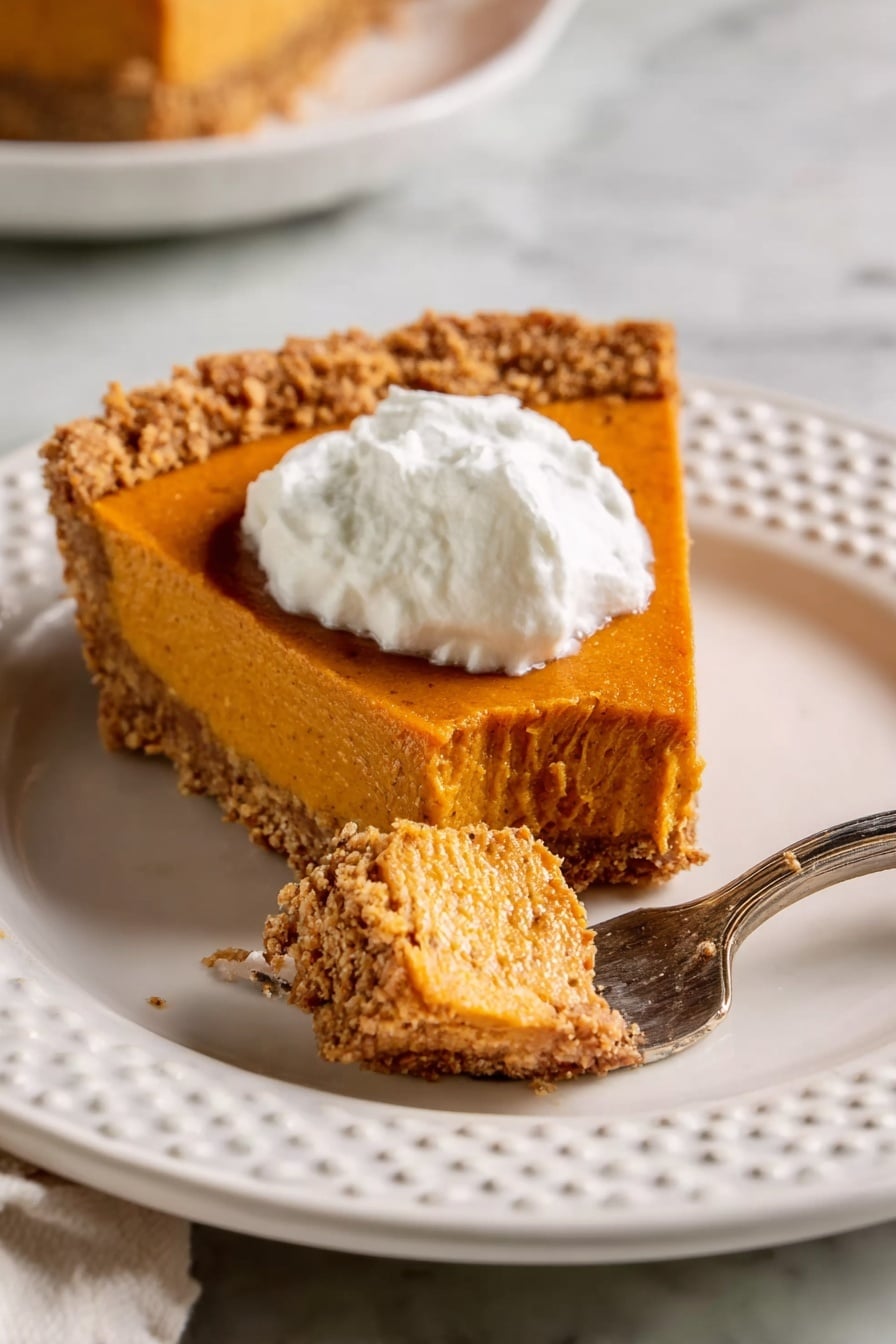
If you’re craving that cozy, comforting slice of fall but want to skip the oven time, this No-Bake Pumpkin Pie Recipe is exactly what you need. It’s creamy, spiced just right, and comes together faster than traditional pies—perfect for when you want pumpkin flavor without the fuss. Trust me, once you try this, you’ll wonder why you ever bothered with baking at all!
Why You’ll Love This Recipe
- Speedy preparation: You’ll have this pie ready to chill in under 30 minutes, no baking required.
- Perfect pumpkin spice balance: The blend of cinnamon, nutmeg, and cloves feels warm without being overwhelming.
- Creamy, fluffy texture: Using melted marshmallows and whipped cream gives it a light, dreamy consistency.
- Family favorite: My loved ones always ask for this pie during fall and holiday gatherings.

Ingredients You’ll Need
The ingredients here are straightforward pantry heroes that come together beautifully—each playing a vital role in taste and texture. Using fresh pumpkin purée and quality spices really makes all the difference.
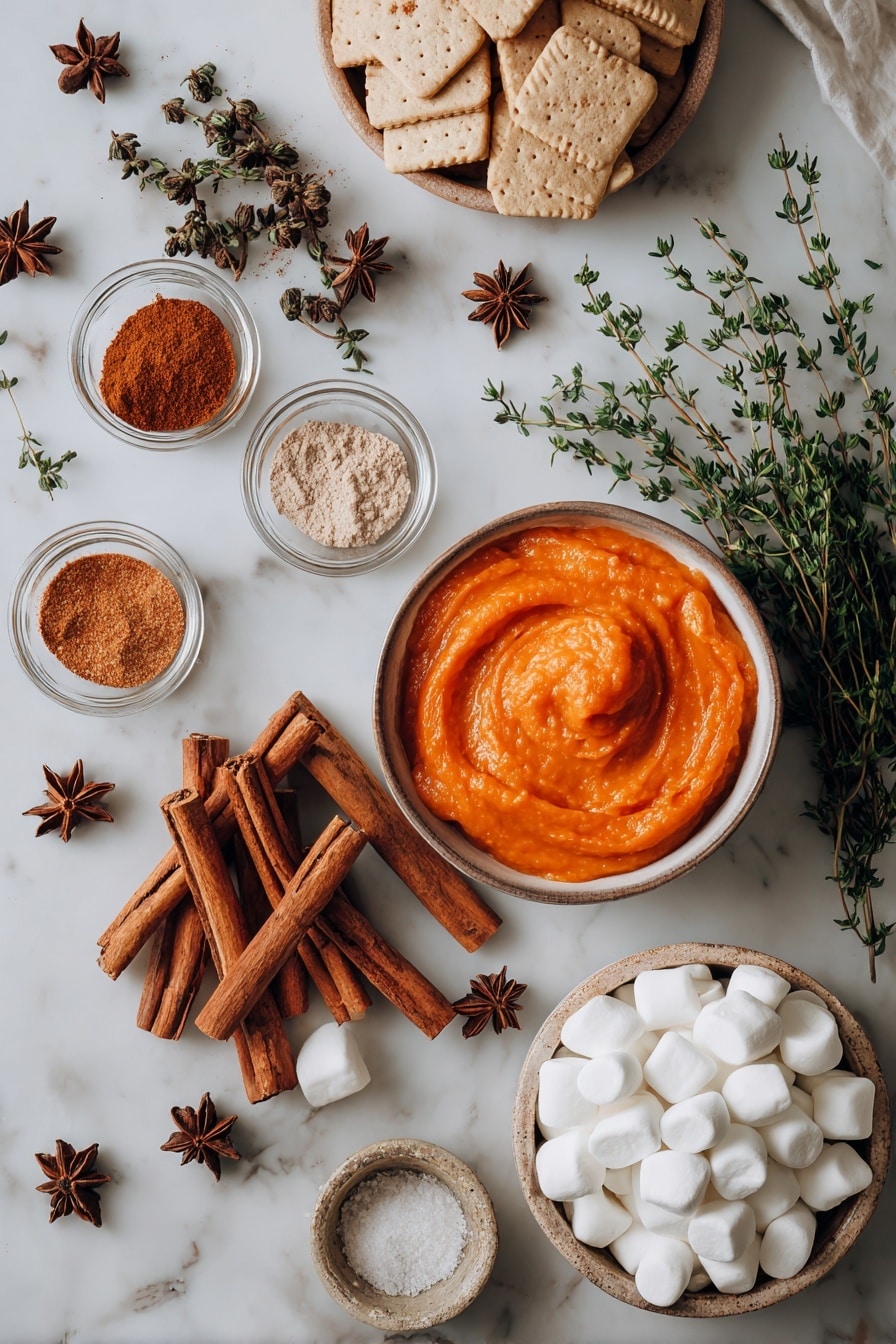
- Unsalted butter: Helps bind the graham cracker crust and adds richness without overpowering flavors.
- Graham crackers: The base of your crust; finely ground for a firm but tender bite.
- Sugar: Balances the slight saltiness of the crust and sweetens just right.
- Kosher salt: Enhances all the flavors—you won’t want to skip it.
- Pumpkin purée: Fresh or canned, just make sure it’s pure pumpkin, not pie filling.
- Cinnamon, nutmeg & cloves: Classic fall spices that bring familiar warmth and depth to the filling.
- Marshmallows: These melt into the pumpkin, adding subtle sweetness and a silky texture—mini marshmallows work great, or about 49 regular sized ones.
- Heavy cream: Whipped to light peaks to make the filling fluffy and airy.
- Whipped cream (optional): For topping—adds that extra touch of creaminess when serving.
Variations
I love how versatile this No-Bake Pumpkin Pie Recipe is—it’s a perfect canvas for tweaking to your taste or dietary needs. Feel free to experiment; you might find your new favorite twist.
- Dairy-Free Version: Substitute coconut cream for heavy cream and use dairy-free butter in the crust—I’ve tried this for a friend, and she said it was just as delicious!
- Spiced Up: Add a pinch of ginger or allspice for a more complex spice profile—I like this version when making the pie for holiday parties.
- Crust Swap: Swap graham crackers with gingersnaps or gluten-free cookies for a different texture and flavor—perfect if you want a festive crunch.
- Extra Pumpkin Boost: Stir in a little pumpkin pie spice blend or extra pumpkin purée to intensify the pumpkin flavor if that’s your jam.
How to Make No-Bake Pumpkin Pie Recipe
Step 1: Perfecting the Graham Cracker Crust
Start by melting the butter completely—it’s tempting to just warm it up, but make sure it’s fully melted so your crust binds perfectly. Pulse the graham crackers in a food processor until they’re fine crumbs, then add butter, sugar, and salt and pulse again until it looks like wet sand. Press the mixture firmly into your 9-inch pie pan, starting from the edges to create a neat rim. When pressing, compact it well so the crust holds together once chilled. Bake at 350°F for just 8 minutes until it’s lightly golden—this step really solidifies the crust and brings out the buttery flavor. Cool it well while you mix the filling.
Step 2: Crafting the Spiced Pumpkin Mixture
Warm the pumpkin purée and spices in a pot over medium heat until the aroma hits you—this should take about a minute. This quick warming helps the spices bloom, which makes a huge flavor difference. Lower heat and fold in the marshmallows, stirring gently so nothing scorches. You’ll want to be patient here—the marshmallows take a few minutes to fully melt and blend into a smooth, velvety pumpkin mixture. When it’s all melted, transfer it to a bowl and pop it in the fridge to cool for about 10 minutes. I’ve learned that rushing this step can cause the whipped cream to deflate later, so chilling is key.
Step 3: Whipping the Cream to Soft Peaks
Pour the heavy cream into a cold bowl and whip it using a hand mixer. Start on low speed, then gradually turn it up as the cream thickens. Stop whipping as soon as stiff peaks form—this means when you lift the beaters, the peaks hold their shape nicely without drooping. Overwhipping happens to the best of us, so keep a close eye here. This whipped cream is what makes the pie filling so fluffy and light.
Step 4: Folding Everything Together
Patience is your friend when combining the chilled pumpkin mixture with the whipped cream. Use a rubber spatula to fold gently—cut through the middle, scoop from the bottom, and turn it over repeatedly—until the mixture is uniform and creamy orange, like pudding. This method keeps your filling airy, so you don’t lose all those lovely whipped cream bubbles. I remember the first time I folded too aggressively, and the filling became heavy and dense—so I’ve gotten pretty gentle with it now!
Step 5: Assemble and Chill
Scrape the filling evenly into your cooled crust. A small offset spatula or even a butter knife works wonders to smooth out the top. Cover the pie with plastic wrap and refrigerate for at least 4 hours—you’ll know it’s ready when the filling feels firm to the touch but still creamy. The chilling step lets ingredients set beautifully without baking, so don’t skip it.
Pro Tips for Making No-Bake Pumpkin Pie Recipe
- Use room temperature ingredients: Let heavy cream sit out a bit before whipping—it whips better and faster.
- Don’t skip chilling the pumpkin mix: Cooling prevents the whipped cream from melting and helps the filling set nicely.
- Press your crust firmly: A compact crust means a slice that holds together well without crumbling everywhere.
- Avoid overmixing: When folding, gentle gestures preserve the airy texture you want in your filling.
How to Serve No-Bake Pumpkin Pie Recipe
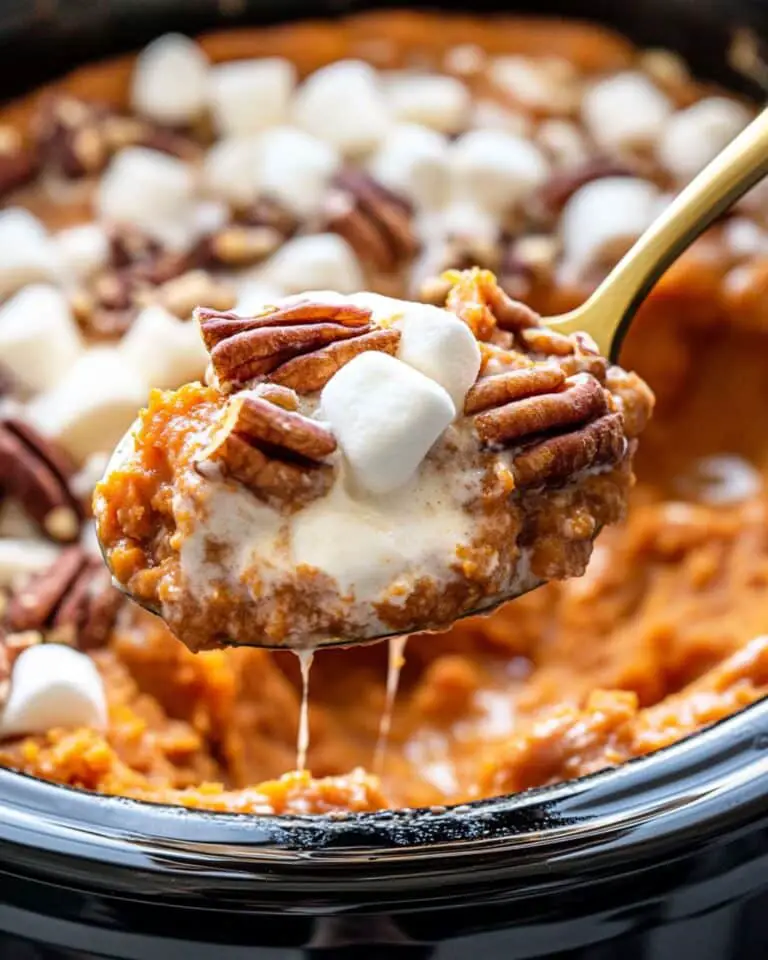
Garnishes
I’m a simple gal when it comes to garnishes: a dollop of freshly whipped cream on each slice does wonders. Sometimes I sprinkle a little extra cinnamon or toasted pecans on top to add a subtle crunch and fragrance. For a festive touch, a drizzle of caramel sauce really elevates the presentation and flavor—perfect for holiday guests.
Side Dishes
This pie pairs beautifully with a warm cup of spiced chai or freshly brewed coffee—both cut through the sweetness nicely. For a fuller dessert spread, I often serve it alongside gingerbread cookies or simple vanilla ice cream, which gives extra texture contrasts that guests love.
Creative Ways to Present
For special occasions, I like to serve this pie in individual mason jars or mini ramekins—this makes it perfect for parties and easier portion control. You can also top each serving with a small cinnamon stick or edible gold dust for that extra wow factor. Turning it into a pumpkin pie parfait by layering crust crumbs and pie filling in clear glasses is another fun way I’ve wowed friends!
Make Ahead and Storage
Storing Leftovers
Store your leftover pie wrapped tightly with plastic wrap or in an airtight container in the fridge. In my experience, it keeps perfectly fresh for up to 4 days. The crust stays nicely firm, and the filling retains its creamy texture without drying out.
Freezing
I’ve tried freezing this pie for emergencies, but it’s not my favorite method because the whipped cream can weep and the crust can lose its crispness. If you decide to freeze, cover it tightly and thaw overnight in the fridge before serving, then gently stir the filling to revive texture.
Reheating
This pie is best served chilled, so reheating isn’t really recommended. If you want a warmer spin, try serving a small slice with warm caramel sauce or a hot espresso on the side instead.
FAQs
-
Can I use canned pumpkin pie filling instead of pumpkin purée?
It’s best to use pure pumpkin purée rather than canned pumpkin pie filling because the filling already contains spices and sweeteners, which can throw off the flavor balance and texture of this No-Bake Pumpkin Pie Recipe. Using plain purée lets you control the spices and sweetness perfectly.
-
Will marshmallows melt completely in the pumpkin mixture?
Yes! When you lower the heat and stir gently, the marshmallows melt smoothly into the warm pumpkin mixture, creating a silky, sweet texture that helps the pie set without baking. Just be patient and stir constantly to prevent scorching.
-
Can I make this pie ahead of time?
Absolutely! In fact, chilling it for at least 4 hours (ideally overnight) is essential for the filling to fully set. The pie keeps well in the fridge for up to 4 days, so it’s perfect for preparing ahead of dinner parties or holiday celebrations.
-
How do I prevent the whipped cream from deflating when mixing?
The key is to fold your chilled pumpkin mixture gently into the whipped cream using a rubber spatula, rather than stirring or beating vigorously. This preserves the fluffy texture and keeps your filling light and airy, the way we want it.
Final Thoughts
This No-Bake Pumpkin Pie Recipe has become one of my go-to desserts for all things autumn. It’s so simple but delivers that classic pumpkin spice comfort with a dreamy texture that impresses every time. If you’re looking for a fuss-free, fail-proof way to enjoy pumpkin pie without the oven heat, I can’t recommend this enough. Give it a try—you’ll feel like you’ve unlocked a secret shortcut to fall happiness.
Print
No-Bake Pumpkin Pie Recipe
- Prep Time: 20 mins
- Cook Time: 8 mins
- Total Time: 4 hrs 28 mins
- Yield: 1 (9-inch) pie
- Category: Dessert
- Method: Baking
- Cuisine: American
Description
This No-Bake Pumpkin Pie features a homemade graham cracker crust and a creamy, spiced pumpkin filling made with marshmallows to add a sweet, fluffy texture. This easy-to-make pie requires no traditional baking of the filling and is perfect for a quick and delicious fall dessert that can be chilled and served with whipped cream.
Ingredients
Graham Cracker Crust
- 8 tablespoons unsalted butter
- 12 sheets (185g) graham crackers
- 2 tablespoons (28g) sugar
- 3/4 teaspoon kosher salt
Pie Filling
- 1 cup (244g) pumpkin purée
- 1 teaspoon cinnamon
- 1/8 teaspoon nutmeg
- Pinch cloves
- 1/2 teaspoon kosher salt
- 10 ounces marshmallows (49 regular marshmallows, or about 5 1/2 cups mini marshmallows)
- 1/2 cup heavy cream
- Whipped cream, for serving
Instructions
- Preheat Oven: Preheat your oven to 350°F to prepare for baking the crust.
- Make the Graham Cracker Crust: Melt the butter in a microwave-safe bowl. Process graham crackers in a food processor until finely ground, then add the melted butter, sugar, and salt. Process again until combined and resembling wet sand. Press the mixture evenly around the sides and bottom of a 9-inch pie pan, ensuring compaction so it doesn’t shift. Bake for 8 minutes until lightly browned, then cool on a rack.
- Prepare the Pumpkin Mixture: In a large pot, combine pumpkin purée, cinnamon, nutmeg, cloves, and kosher salt. Warm on medium heat while stirring for about 1 minute until fragrant. Reduce heat to low, fold in marshmallows, and stir constantly to prevent scorching until marshmallows fully melt and incorporate. Transfer mixture to a small bowl and refrigerate to cool.
- Whip the Cream: Pour heavy cream into a large bowl and whip with a hand mixer. Start at low speed and increase gradually. Whip on high until cream forms firm peaks and is fluffy.
- Finish the Filling: Once pumpkin mixture is cooled to room temperature (approximately 10 minutes), fold it gently into the whipped cream using a rubber spatula until uniform and creamy orange with no streaks.
- Assemble the Pie: Scrape the pumpkin filling evenly into the cooled graham cracker crust, spreading with an offset spatula or butter knife.
- Chill the Pie: Cover the pie with plastic wrap and refrigerate for at least 4 hours until the filling is firm to the touch.
- Serve and Store: Smooth the top if needed, slice, and serve chilled with whipped cream. Store any leftover pie covered in the refrigerator for up to 4 days.
Notes
- Press the crust mixture firmly into the pan so it holds its shape after baking.
- Stir marshmallows constantly on low heat to prevent burning during melting.
- Allow the pumpkin mixture to cool to room temperature before folding into whipped cream to avoid deflating it.
- Chilling time is important to ensure the filling sets properly.
- Use a butter knife or offset spatula to smooth the filling evenly in the crust.
- The pie can be stored refrigerated for up to 4 days to maintain freshness.
Nutrition
- Serving Size: 1 slice (1/8 of pie)
- Calories: 320 kcal
- Sugar: 22 g
- Sodium: 210 mg
- Fat: 20 g
- Saturated Fat: 12 g
- Unsaturated Fat: 7 g
- Trans Fat: 0 g
- Carbohydrates: 28 g
- Fiber: 2 g
- Protein: 3 g
- Cholesterol: 55 mg
