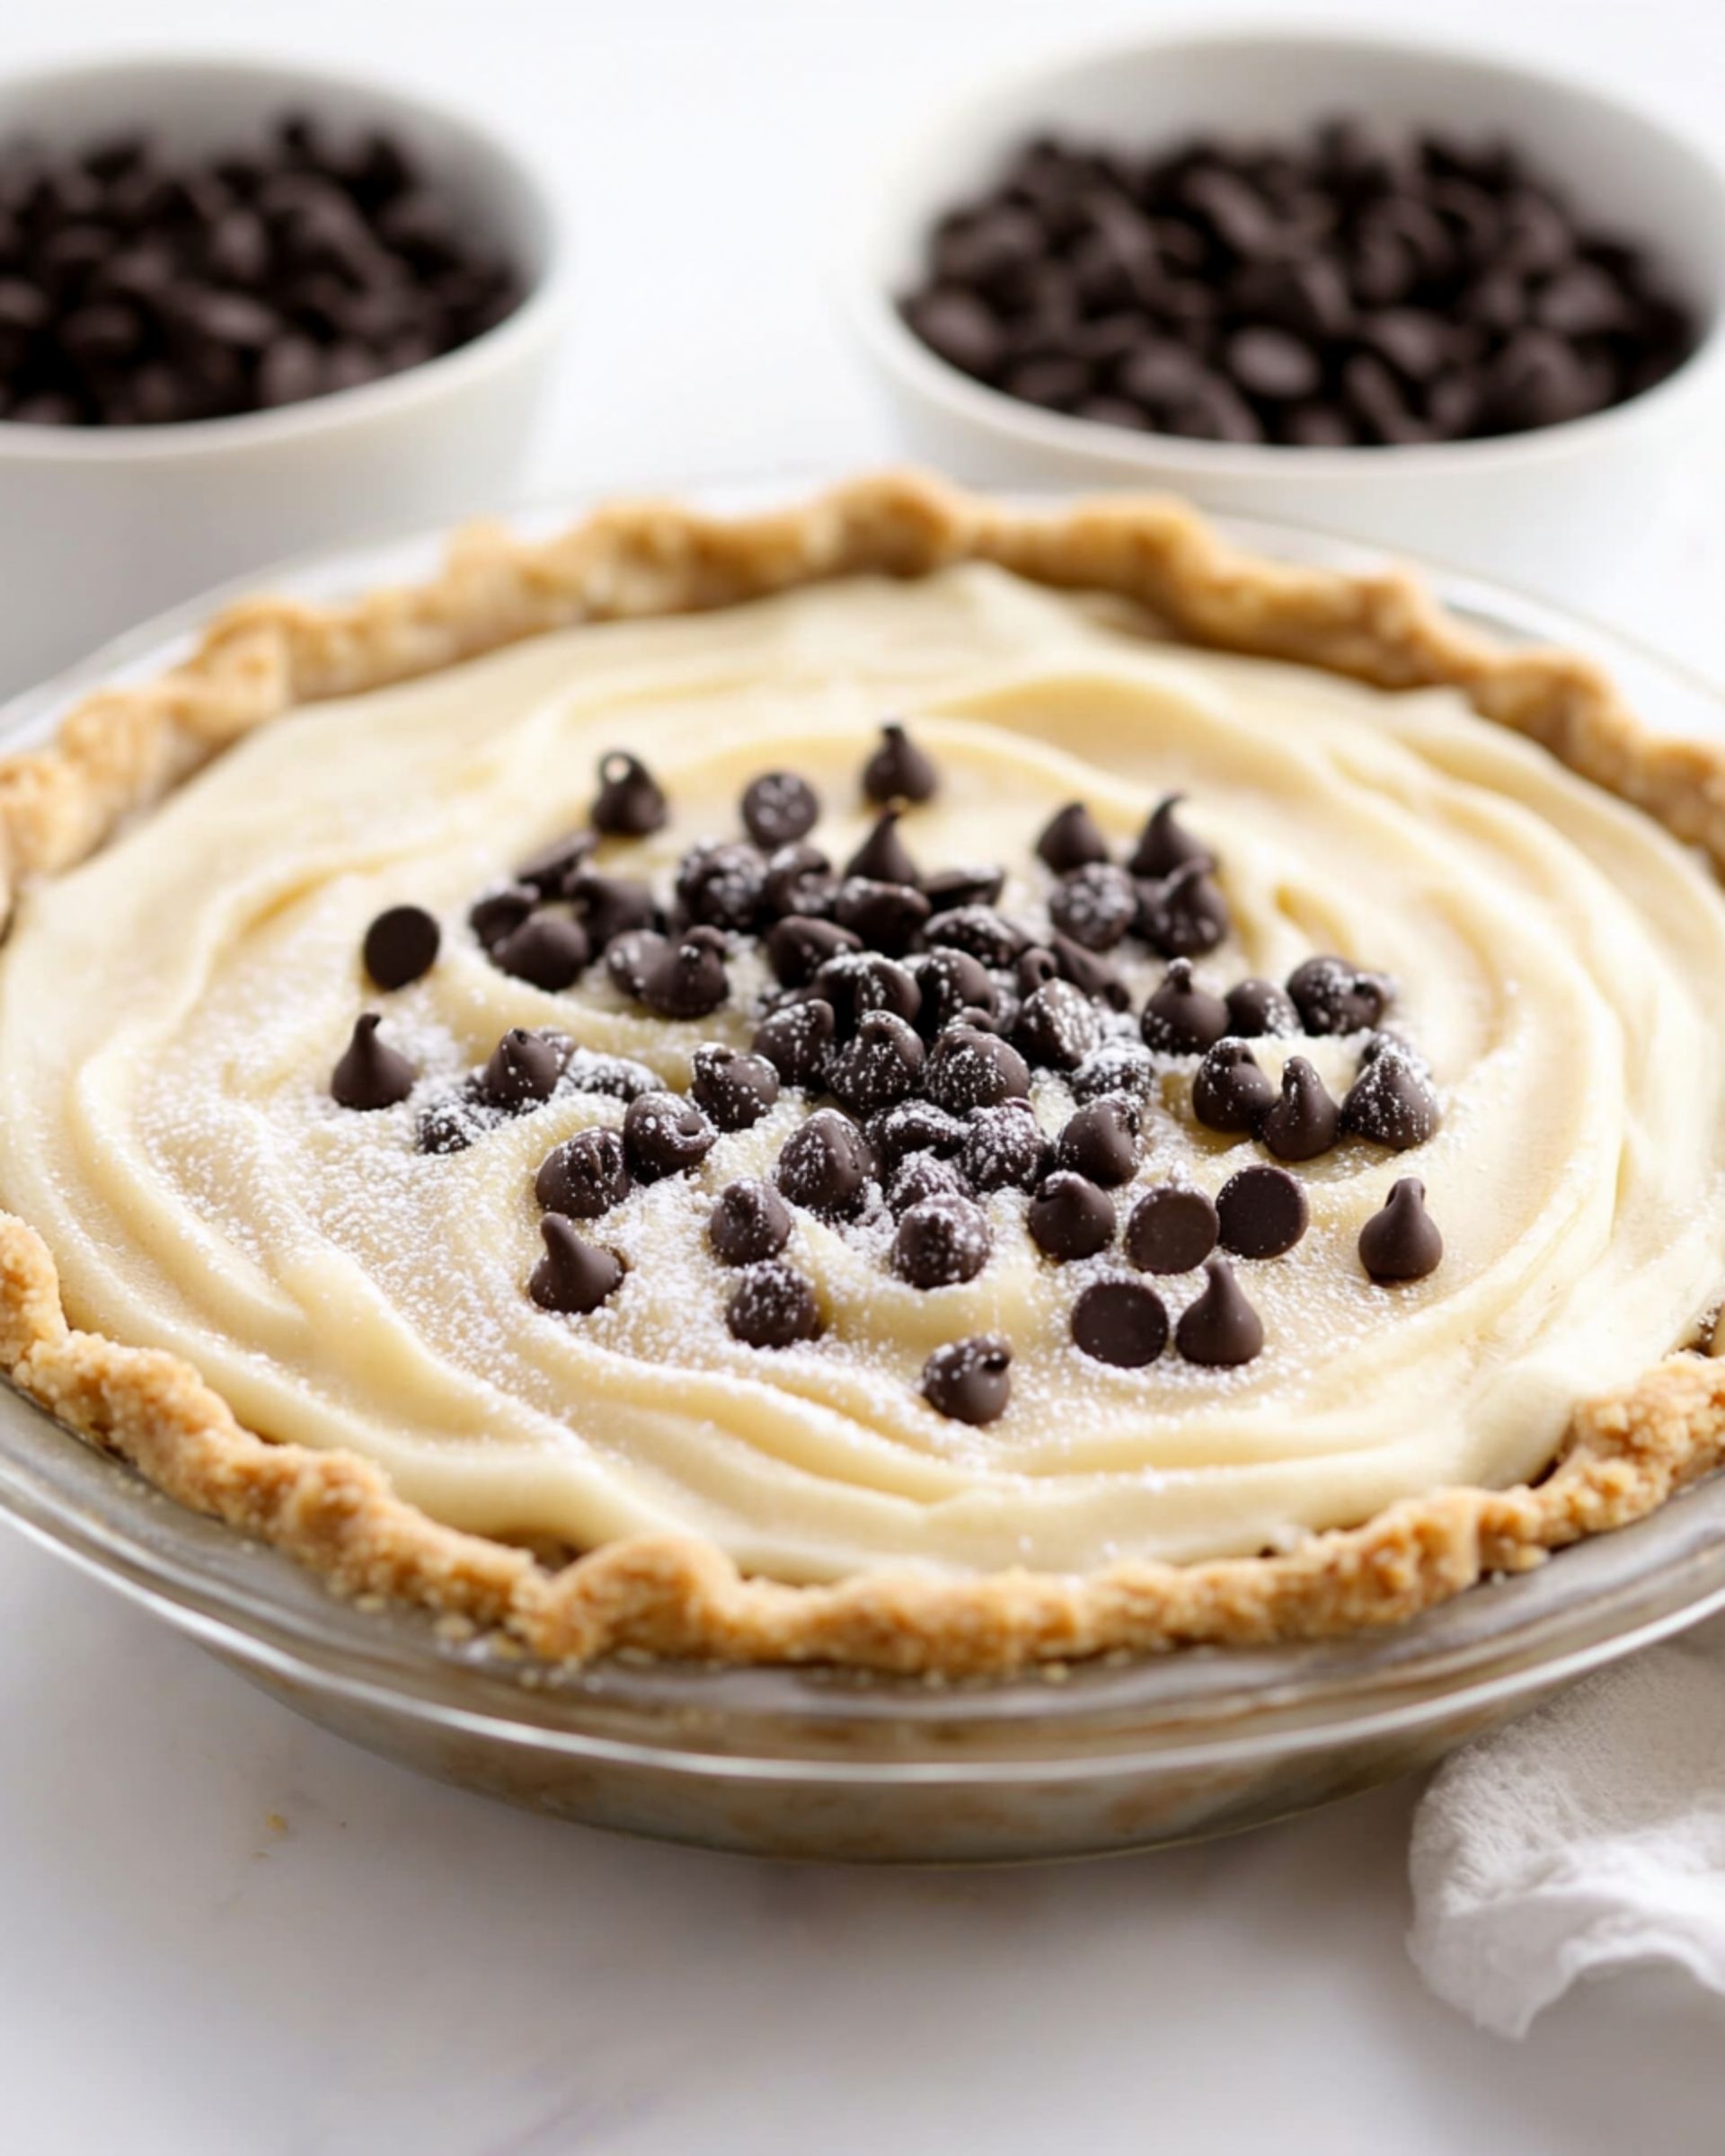
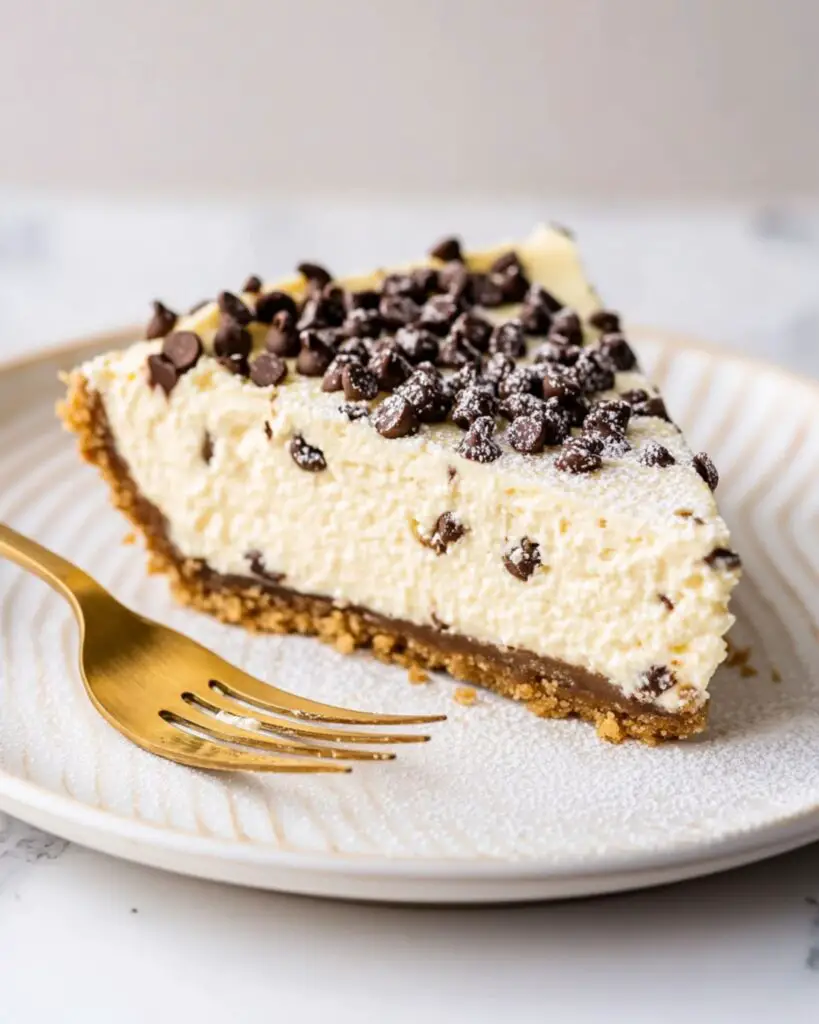
This No-Bake Cannoli Pie transforms the beloved Italian pastry into a show-stopping dessert that’s surprisingly simple to make! With a pistachio-vanilla wafer crust and a silky filling that perfectly balances mascarpone, ricotta, and whipped cream, this pie delivers all the classic cannoli flavors without any baking. It’s an elegant, make-ahead dessert that will impress everyone at your table!
Why You’ll Love This Recipe
- No Baking Required: Leave your oven off! This entire dessert comes together without any heat, making it perfect for warm weather or when you don’t want to wait for something to bake.
- Make-Ahead Wonder: Prepare this pie a day in advance, and it actually gets better as it chills – the flavors meld and the texture becomes perfectly set.
- Impressive Results: Despite being incredibly easy to prepare, this dessert looks and tastes like something from a high-end Italian bakery.
- Authentic Flavors: All the classic cannoli elements are here – creamy ricotta, citrus notes, pistachios, and chocolate chips – reimagined in a convenient pie form.

Ingredients You’ll Need
- Vanilla Wafers: Creates the backbone of our pie crust, adding a sweet, subtle vanilla flavor that complements the filling perfectly.
- Pistachios: Adds a wonderful nutty dimension and gorgeous green flecks to the crust, giving this pie an authentic cannoli touch.
- Butter: Binds the crust together and adds richness; use good quality unsalted butter for the best flavor.
- Heavy Cream: Whipped to perfection, it lightens the filling and creates that irresistible mousse-like texture.
- Mascarpone or Cream Cheese: Provides structure and rich creaminess to the filling; mascarpone offers a more authentic Italian flavor, but cream cheese works wonderfully too.
- Ricotta Cheese: The star of any cannoli, bringing that signature texture and subtle sweetness. Drain it if it seems watery.
- Powdered Sugar: Sweetens the filling without adding graininess; it dissolves beautifully into the creamy mixture.
- Orange Zest: That little pop of citrus brightness that makes traditional cannoli so special.
- Mini Chocolate Chips: The classic cannoli garnish that adds delightful little bursts of chocolate in every bite.
Note: You’ll find the complete list of ingredients, along with their exact measurements, in the printable recipe card at the bottom of this post.
Variations
Chocolate Lover’s Version
Fold ½ cup mini chocolate chips into the filling and top with even more chocolate! You could even drizzle some melted chocolate over the top before serving.
Pistachio Passion
Double down on the pistachio flavor by adding ¼ cup finely chopped pistachios to the filling and using them as a generous topping.
Berry Beautiful
Add a layer of fresh berries like strawberries or raspberries on top for a colorful, fruity twist.
Citrus Explosion
Increase the orange zest and add a bit of lemon zest too for a more pronounced citrus flavor. You could even add a tablespoon of limoncello to the filling for adults.
How to Make No-Bake Cannoli Pie
Step 1: Create the Crust
Process the vanilla wafers, pistachios, and sugar in a food processor until they resemble sand. Transfer to a bowl, add melted butter, and mix until the texture is like wet sand. Press this mixture into a 9-inch pie plate, starting with the sides and working down to the bottom. Use a flat-bottomed cup to pack it firmly. Place in the freezer while you make the filling.
Step 2: Whip the Cream
Using a hand mixer or stand mixer with a whisk attachment, whip the cold heavy cream until stiff peaks form. Set aside in a separate bowl.
Step 3: Prepare the Cheese Mixture
In the same mixing bowl (no need to clean it), combine mascarpone, powdered sugar, orange zest, and salt. Beat until completely smooth, about 2 minutes. Add the ricotta and beat on low until well combined, about 1 minute.
Step 4: Fold in the Whipped Cream
Add a third of the whipped cream to the cheese mixture and fold gently to lighten it. Then add the remaining whipped cream and fold carefully until fully incorporated, being careful not to deflate the mixture.
Step 5: Assemble and Chill
Transfer the filling to your prepared crust and smooth the top. Refrigerate for at least 4 hours, but preferably overnight to allow the flavors to meld and the pie to set properly.
Step 6: Garnish and Serve
Just before serving, sprinkle mini chocolate chips over the top and dust with powdered sugar for that classic cannoli finish.
Pro Tips for Making the Recipe
- Cold Ingredients: Make sure your heavy cream is very cold before whipping – this helps it whip up quickly and hold its structure.
- Check Your Crust Consistency: The crust should hold together when squeezed but shouldn’t be overly wet or dry. Adjust with more crumbs or butter as needed.
- Drain Ricotta If Needed: If your ricotta seems watery, place it in a fine-mesh strainer lined with cheesecloth for an hour before using.
- Gentle Folding Technique: When incorporating the whipped cream, use a light hand with a rubber spatula, cutting down through the center and folding the mixture over itself to maintain airiness.
- Smooth Filling: For an extra-smooth filling, you can process the ricotta in a food processor before adding it to the mascarpone mixture.
How to Serve
This No-Bake Cannoli Pie makes for a stunning dessert that deserves proper presentation!
Perfect Pairings
Serve with espresso or coffee for an authentic Italian experience. A glass of dessert wine like Moscato d’Asti or Vin Santo would also be delightful.
Serving Suggestions
For a special touch, plate each slice with a small scoop of vanilla gelato on the side and a light dusting of cocoa powder.
Garnish Ideas
Fresh mint leaves add a pop of color, or try candied orange peel for an extra nod to traditional cannoli flavors.
Make Ahead and Storage
Make Ahead
This pie actually benefits from being made a day ahead! Prepare the entire pie and refrigerate overnight, waiting to add the final garnishes until just before serving.
Storing Leftovers
Cover any leftover pie with plastic wrap and refrigerate for up to 3 days. The crust may soften slightly over time, but the flavor remains delicious.
Freezing
While you can freeze this pie for up to 1 month, the texture may change slightly upon thawing. Wrap tightly in plastic wrap and then foil before freezing. Thaw overnight in the refrigerator.
Reheating
No reheating necessary! Simply remove from the refrigerator about 15-20 minutes before serving to take the chill off slightly and allow the flavors to come through.
FAQs
-
Can I use all ricotta instead of mascarpone or cream cheese?
While traditional cannoli filling is primarily ricotta, I don’t recommend using only ricotta for this pie. The mascarpone or cream cheese provides necessary structure that helps the pie hold its shape when sliced. Without it, your filling may be too soft and wet.
-
My crust seems too crumbly. What did I do wrong?
It sounds like there might not be enough butter binding the crumbs together. Add more melted butter, one tablespoon at a time, until the mixture holds together when pressed between your fingers. Remember, it should feel like wet sand.
-
Do I really need to chill the pie for that long?
Yes! The extended chilling time is crucial for two reasons: it allows the crust to firm up properly, and it gives the flavors time to develop and meld together. While 4 hours is the minimum, overnight chilling produces the best results in both texture and flavor.
-
Can I make this pie without nuts for someone with allergies?
Absolutely! Simply omit the pistachios from the crust and increase the vanilla wafers by about ½ cup to compensate. You’ll lose some of that authentic cannoli flavor, but the pie will still be delicious. Consider adding a little almond extract to the filling if tree nuts aren’t an issue.
Final Thoughts
This No-Bake Cannoli Pie brings all the joy of traditional cannoli in a format that’s perfect for entertaining. It’s one of those rare desserts that’s both incredibly impressive and surprisingly simple to make. The combination of creamy filling, crunchy crust, and those classic cannoli flavors creates a dessert that will have everyone asking for the recipe. Give yourself the gift of an easy yet spectacular dessert and try this cannoli pie for your next gathering!
Print
No-Bake Cannoli Pie Recipe
- Prep Time: 25 minutes
- Cook Time: 0 minutes
- Total Time: 25 minutes (plus 4+ hours chilling)
- Yield: 8-10 servings
- Category: Desserts
- Method: No-cook
- Cuisine: Italian-American
- Diet: Vegetarian
Description
This creamy, dreamy No-Bake Cannoli Pie transforms the classic Italian dessert into an easy, crowd-pleasing pie with a rich ricotta and mascarpone filling inside a pistachio-vanilla wafer crust. Perfect for summer or anytime you crave a delightful, fuss-free treat with authentic cannoli flavors.
Ingredients
For the Crust:
- 6 ounces vanilla wafers (about 40 cookies, or 5-1/2 cups), more as needed
- 1/2 cup (50 grams) shelled, unsalted pistachios
- 1/4 cup (50 grams) granulated sugar
- 6 tablespoons (85 grams) unsalted butter, melted, more as needed
For the Filling:
- 3/4 cup (170 grams) heavy cream, cold
- 1 cup (227 grams) mascarpone or cream cheese
- 3/4 cup (90 grams) powdered sugar, plus more for garnish
- 1/2 teaspoon grated orange zest
- Pinch coarse kosher salt
- 1 cup (227 grams) ricotta cheese
- Mini chocolate chips (for garnish)
Instructions
- Prepare the Crust: In a food processor, combine the vanilla wafers, pistachios, and granulated sugar. Process until the mixture resembles fine sand. Transfer to a bowl and stir in the melted butter until the mixture is damp and holds together when squeezed. Add more melted butter if too dry or more wafer crumbs if too wet, a tablespoon at a time as needed.
- Shape the Crust: Pour the crumb mixture into a 9-inch pie plate. Press the crumbs up the sides to form the edges first, then distribute them into the bottom and pack down firmly with a flat-bottomed cup or measuring cup for an even crust. Place the crust in the freezer while you prepare the filling.
- Whip the Cream: Using a hand mixer or stand mixer with whisk attachment, whip the cold heavy cream until stiff peaks form. Transfer to a separate bowl and set aside.
- Make the Cheese Filling: In the same mixer bowl, add mascarpone (or cream cheese), powdered sugar, orange zest, and salt. Beat on medium speed (switch to paddle attachment if using a stand mixer) until completely smooth, about 2 minutes, scraping down the sides as needed.
- Incorporate Ricotta: Add the ricotta cheese to the mascarpone mixture and beat on low speed until fully combined, about 1 minute.
- Fold in Whipped Cream: Gently fold 1/3 of the whipped cream into the cheese mixture with a rubber spatula until combined. Fold in the remaining whipped cream, being careful not to deflate the mixture for a light, airy filling.
- Assemble the Pie: Transfer the filling to the prepared, chilled pie crust. Smooth the top with a spatula. Refrigerate for at least 4 hours, preferably 12 hours or overnight, to allow the pie to set.
- Garnish and Serve: Right before serving, sprinkle mini chocolate chips and a dusting of powdered sugar over the top. Slice and enjoy chilled.
Notes
- Chill the pie for at least 4 hours, but overnight yields the best texture and flavor.
- Use whole-milk ricotta and mascarpone for the richest taste and creamiest filling.
- For a gluten-free crust, use gluten-free vanilla wafers.
- Add more pistachios or even a few chopped candied oranges for extra flavor.
- The pie is best served chilled and can be made one day in advance.
Nutrition
- Serving Size: 1 slice (1/10th of pie)
- Calories: 390
- Sugar: 22g
- Sodium: 160mg
- Fat: 24g
- Saturated Fat: 13g
- Unsaturated Fat: 9g
- Trans Fat: 0g
- Carbohydrates: 38g
- Fiber: 1g
- Protein: 6g
- Cholesterol: 55mg


