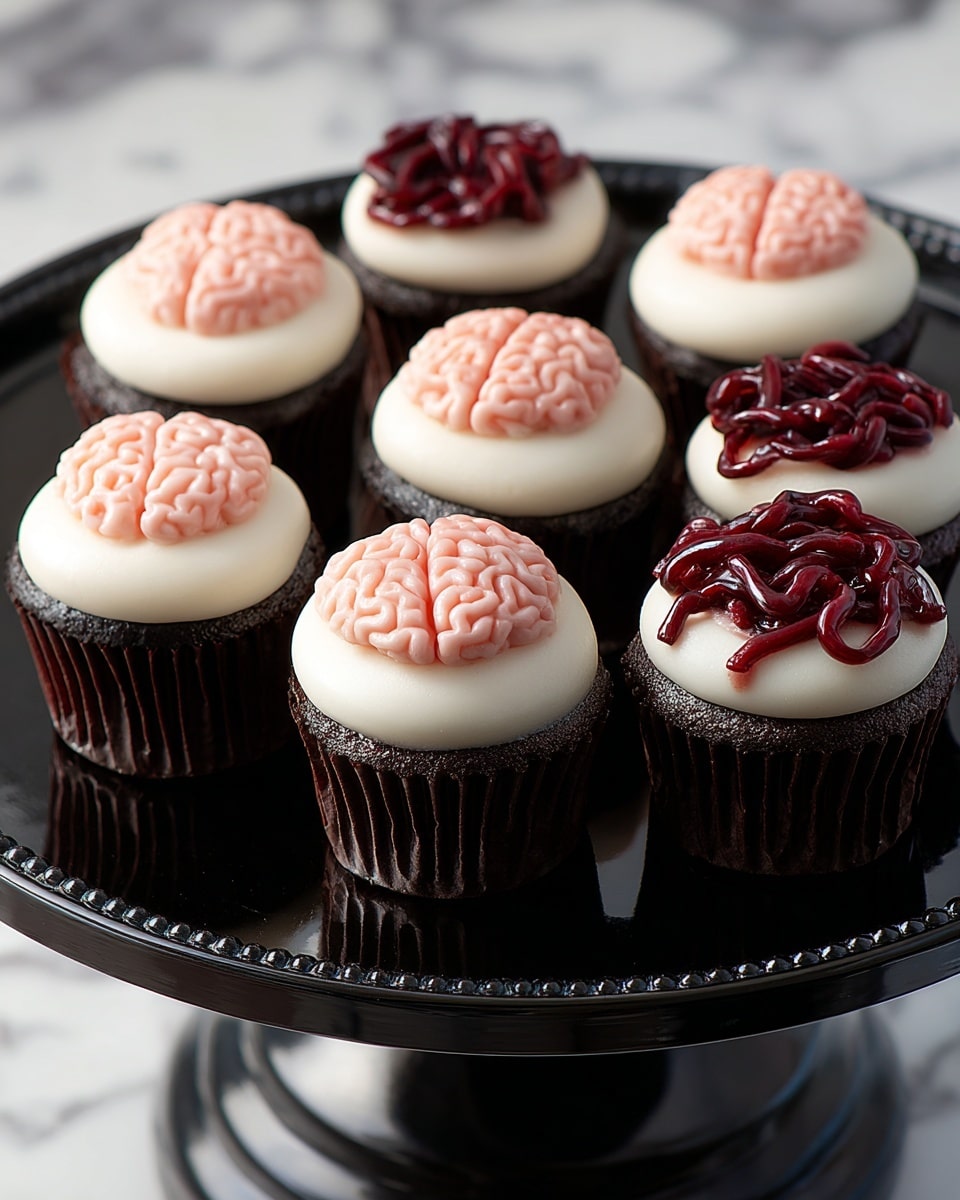
If you’re craving a spooky treat that’s both fun and a little bit creepy, you’re in the right place. I absolutely adore making and sharing this Intestine & Brain Cupcakes Recipe because it’s not your typical cupcake — it’s a playful twist that turns ordinary cupcakes into eye-catching conversation starters. Whether for Halloween, a themed party, or just to surprise your friends with something delightfully gross (in the best way), this recipe will walk you through all the steps to get those gelatinous brains and squiggly intestines looking super realistic. Trust me, once you try this, you’ll be hooked on how much fun it is to create edible art that’s as tasty as it is creepy.
Why You’ll Love This Recipe
- Eye-Catching Design: These cupcakes are real show-stoppers with detailed piping that mimics brains and intestines perfectly.
- Fun for All Skill Levels: Even if you’re not a pro baker, the step-by-step instructions make it super doable and enjoyable.
- Perfect for Special Occasions: Whether it’s Halloween or themed parties, they add a spooky fun factor that your guests will love.
- Customizable Frosting Colors: You get to mix and match colors for that extra realistic creepy-crawly effect.

Ingredients You’ll Need
When it comes to the Intestine & Brain Cupcakes Recipe, you want ingredients that are not only delicious but also lend themselves well to color and texture. Using a creamy white decorator frosting is key—it provides the perfect canvas to tint vibrant, realistic shades for piping the brains and intestines. And if you want, you can use your favorite cupcake recipe or a box mix as the base; either one works great for this project.
- Favorite cupcake recipe or box mix: Choose one that you know bakes well and tastes great because it’s the foundation of your masterpiece.
- Rose Icing Color Pink Food Coloring: Adds the soft pink tones needed for realistic brain coloring.
- Rose Gel Food Coloring: Gel colors offer stronger pigmentation—perfect for those deep reds and browns.
- Red-Red Icing Color: Essential for the dark, bloody look of intestines.
- Brown Food Coloring Icing Color: Great for mixing to create natural shading and depth.
- Creamy Peach Icing Color: Helps create a peachy, lifelike brain tint when blended properly.
- Creamy White Decorator Icing, Vanilla Flavored: A smooth, thick frosting base that holds shapes well.
Variations
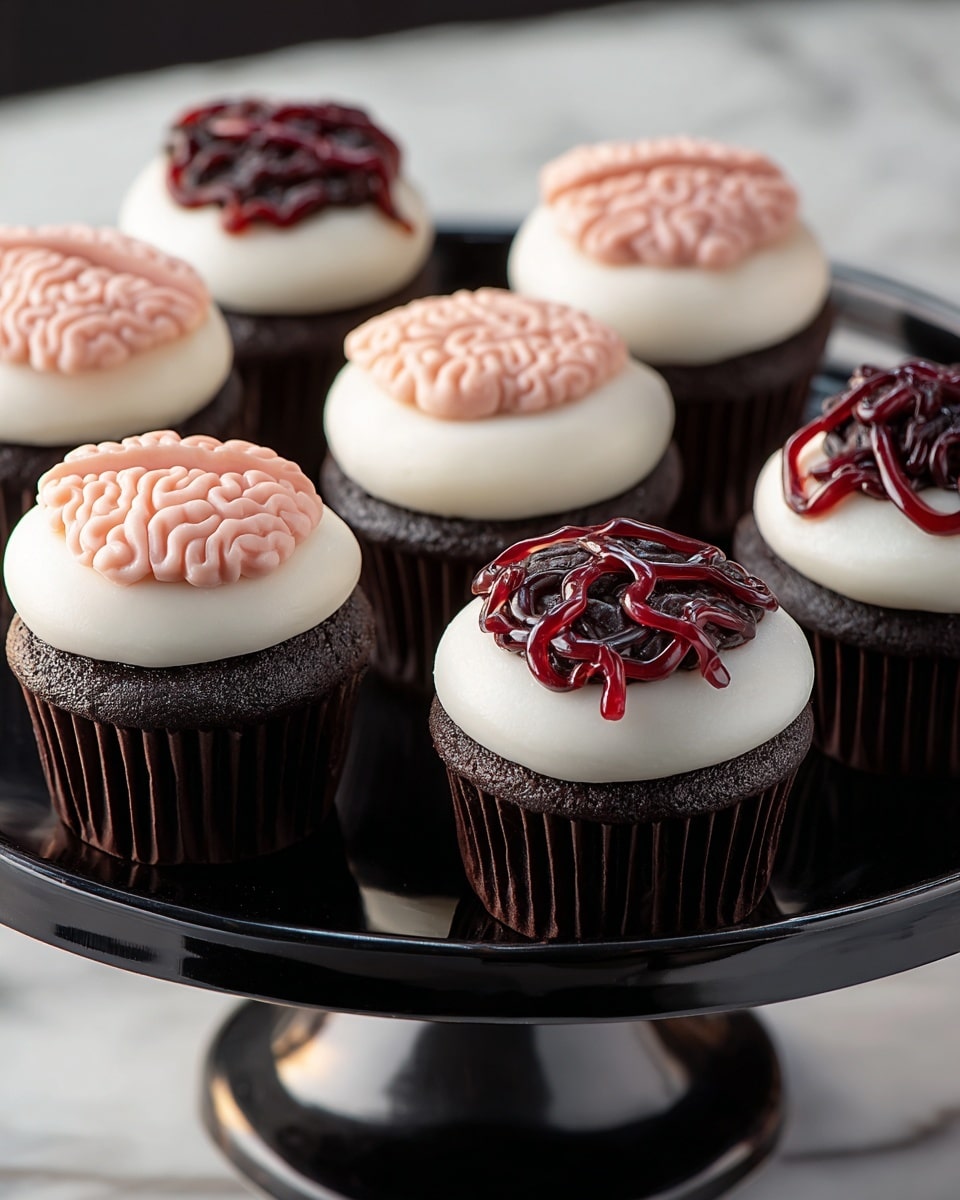
I love how customizable this Intestine & Brain Cupcakes Recipe is—once you get the hang of the piping technique, you can tweak colors and even mix flavors to suit your taste. For instance, swapping in chocolate or red velvet cupcakes adds a fun flavor twist and deeper color contrast for your brain and intestine designs.
- Chocolate Base: I tried a rich chocolate cupcake once and the dark cake made the pale brain designs pop even more.
- Flavor Infusions: Adding a hint of almond or citrus to your frosting can cut through the sweetness and balance the richness.
- Dairy-Free Options: I’ve swapped in vegan buttercream successfully for dairy-free friends; just be sure it pipes well.
- Color Adjustments: Experiment with adding more brown for aged or “rotten” effect on intestines for Halloween.
How to Make Intestine & Brain Cupcakes Recipe
Step 1: Bake Your Cupcake Base with Care
Start by prepping your favorite cupcake recipe or box mix — I usually make two batches so I have 24 cupcakes total. Line your muffin pan with black baking liners; this color really amps up the spooky vibe. Bake your cupcakes according to the recipe instructions and be sure to let them cool completely to room temperature before frosting. This step is key because warm cupcakes can mess with the frosting and make it slip off, which we don’t want when crafting those detailed designs.
Step 2: Create Your Tinted Frostings
This part is where your cupcakes transform from plain to creepy-cool. Take your creamy white decorator icing and tint one cup with a blend of creamy peach and brown colors until you achieve a soft peach shade perfect for the brains. For the intestines, tint another cup of white icing with red-red, rose, and brown gel to get a dark, blood-red color—a little like freshly squashed berries, but way more appetizing! I love how gel food coloring gives such vivid shades without watering down the frosting.
Step 3: Frost Cupcakes with a Smooth Base Layer
Using a tapered spatula, give each cupcake a generous smooth coat of white icing. This will be the “canvas” to build upon. Take your time here—smooth frosting means your brain and intestine designs will really stand out. I sometimes chill the cupcakes for a few minutes after this step to help the base firm up a bit before piping.
Step 4: Pipe the Brains
On half of the cupcakes, grab your piping bag fitted with a tip 1A and fill it with the peach brain-colored frosting. Pipe a rounded, oval-shaped mound about 1 1/4 inches in diameter right in the center of each cupcake to mimic a brain hemisphere. Next, switch to a piping bag with tip 4 filled with the same peach frosting to outline each half of the brain. Fill the interior with zigzag squiggles to replicate those iconic brain folds. When I first tried this, I practiced a few times on parchment paper so I felt confident before piping on the cupcakes. You’ll find your own rhythm quickly!
Step 5: Pipe the Intestines
For the other half of the cupcakes, load a piping bag with tip 8 and the dark red intestine-colored frosting. Pipe continuous elongated beads forming overlapping loops that look like squiggly lines — sort of like a tangled maze of intestines. Don’t worry if it’s not perfect; slightly irregular loops add to the authenticity here. After piping, chill the cupcakes until the frosting is firm to the touch.
Step 6: Add the “Bloody” Piping Gel
Combine 1/2 cup of clear piping gel with red-red and just a touch of brown icing color to create a rich dark blood red gel. Using a small brush, carefully apply this gel onto the intestines to give them a shiny, wet, and realistic bloody look. This final touch elevates the visual effect dramatically. When I first added this, guests were totally fascinated by how real it looked — and the gel makes the cupcakes extra moist too!
Pro Tips for Making Intestine & Brain Cupcakes Recipe
- Practice Piping First: I found drawing zigzags and loops on parchment paper helps steady your hand before tackling the cupcakes.
- Chill Between Steps: Let frosting firm up after base and piping layers—it prevents smudging and keeps shapes defined.
- Use Gel Colors for Vibrancy: Gel colors pack more punch than liquid and don’t thin out your frosting.
- Avoid Overfilling Bags: Smaller amounts of frosting in piping bags mean better control and less mess.
How to Serve Intestine & Brain Cupcakes Recipe
Garnishes
I usually keep garnishes minimal to let the cupcake decorations steal the show. But a light dusting of edible glitter or shimmer dust adds a creepy ‘wet sheen’ effect that’s subtle but cool. Sometimes I toss a few edible sugar spiders or bones around the platter for a full spooky presentation—my family especially loves that when we serve these at Halloween!
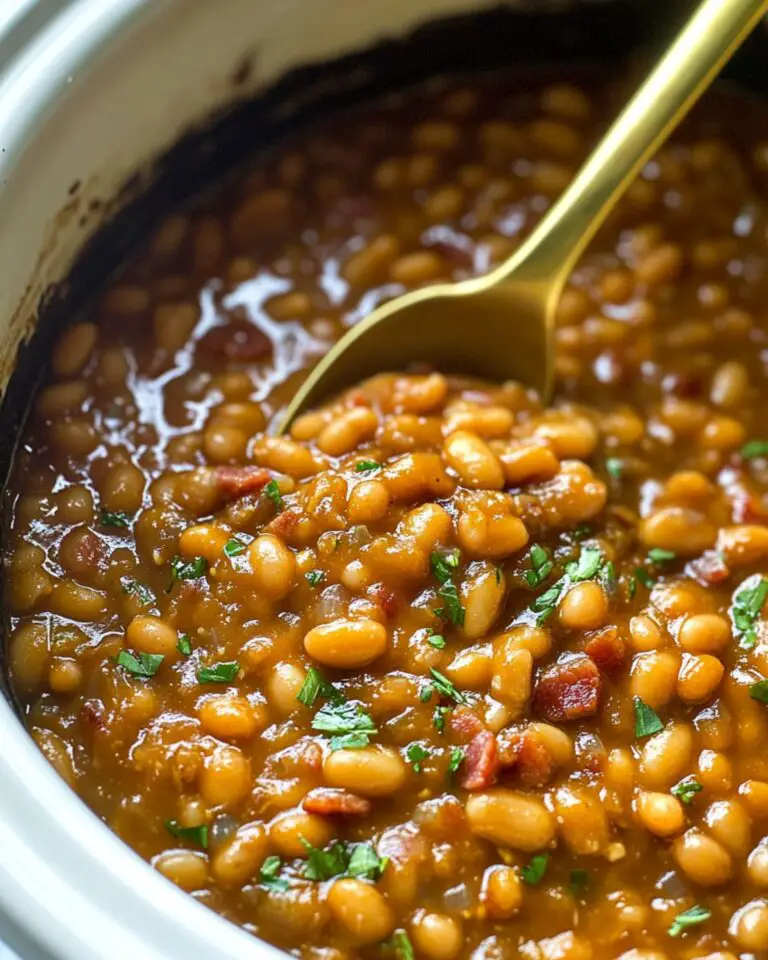
Side Dishes
These Intestine & Brain Cupcakes pair really well with drinks like fresh blood orange punch or a tangy cranberry cocktail to keep the theme going. I also like serving them alongside more neutral snacks like popcorn or simple cheese platters so guests have something to balance out the sweetness and drama of the cupcakes.
Creative Ways to Present
If you’re going all out, arrange your cupcakes on a skull-shaped platter or black cake stand to intensify the creepy vibe. For a Halloween party, I like to stick gummy worms around the intestines for an extra gross-out factor that kids and adults find hilarious. Lighting candles or using red tinted fairy lights really amps up the spooky ambience during serving time.
Make Ahead and Storage
Storing Leftovers
I keep leftover Intestine & Brain Cupcakes refrigerated in an airtight container to preserve frosting texture and freshness. They hold up well for about 2-3 days—you’ll notice the decorative details mostly stay intact if you’re gentle removing them from the container.
Freezing
Freezing these cupcakes is totally doable! I recommend freezing before piping the intestines or brains for best texture preservation. Wrapped tightly in plastic wrap and sealed in a freezer-safe container, cupcakes can keep up to a month. When you’re ready, thaw overnight in the fridge before decorating.
Reheating
When reheating, I avoid microwaves because they can melt the frosting and ruin the designs. Instead, I bring them to room temperature slowly and enjoy. If you want them soft, a few minutes in a low oven (around 300°F/150°C) wrapped loosely in foil works well—just be careful not to dry them out.
FAQs
-
Can I use store-bought frosting for this Intestine & Brain Cupcakes Recipe?
Absolutely! Store-bought creamy white decorator frosting works great as long as it’s thick enough to hold its shape when piped. If it’s too soft, you can chill it or add a bit of powdered sugar to firm it up before tinting with colors.
-
Do I need special piping tips for this recipe?
Yes, the piping tips contribute a lot to achieving the realistic looks. Tip 1A for rounded piping (brains), tip 4 for outlining and zigzags, and tip 8 for the intestines’ elongated beads are the recommended ones. If you don’t have these exact sizes, similar small round and star tips can work too.
-
How do I avoid frosting smudging while decorating?
Chilling the cupcakes between frosting layers is key! It firms up your base layer so when you pipe designs on top, they stay crisp and don’t blend or smudge. Also, work in a cool room to prevent frosting from melting too fast.
-
Can I make these cupcakes in advance?
You sure can. Bake and frost the cupcakes a day ahead, then add the piping gel “blood” just before serving for maximum freshness and shine.
-
What if I don’t want to use food coloring?
Without food coloring, you lose those signature creepy colors. But natural alternatives like beet juice powder (for red hues) or cocoa powder (for brown) can give a muted effect. Just be aware the colors won’t be as vibrant or precise.
Final Thoughts
Making the Intestine & Brain Cupcakes Recipe is one of those kitchen adventures that’s both surprisingly easy and incredibly rewarding. I still remember the first time I served these at a Halloween gathering—my family went completely wild for the look and taste! The combination of a moist cupcake base with intricately piped “organs” always sparks laughter and compliments. If you want to impress your guests with something totally unique but still delicious, I can’t recommend this recipe enough. So grab your piping bags and have fun turning your kitchen into a spooky bakery—you’ll thank me later!
Print
Intestine & Brain Cupcakes Recipe
- Prep Time: 1 hr
- Cook Time: 30 min
- Total Time: 3 hr 30 min
- Yield: 24 cupcakes
- Category: Dessert
- Method: Baking
- Cuisine: American
Description
Create spooky and fun Intestine & Brain Cupcakes perfect for Halloween or themed parties. This recipe transforms your favorite cupcake base with creatively colored icing and detailed piping to resemble realistic brains and intestines, topped with vibrant gel for a blood-red, gory finish.
Ingredients
Cupcake Base
- Favorite cupcake recipe or box mix (enough for 2 batches/24 cupcakes)
Food Coloring & Icing
- Rose Icing Color Pink Food Coloring, 1 oz
- Rose Gel Food Coloring, 1 oz
- Red-Red Icing Color, 1 oz
- Red-Red Gel Food Coloring, 1 oz
- Brown Food Coloring Icing Color, 1 oz
- Brown Gel Food Coloring, 1 oz
- Creamy Peach Icing Color, 1 oz
- Creamy Peach Gel Food Coloring, 1 oz
- Creamy White Decorator Icing, 4 lb Tub (Vanilla Flavored)
Additional
- Black baking liners
- Red piping gel, 1/2 cup
Instructions
- Bake Cupcakes: Prepare the cupcake batter according to your favorite cake recipe or box mix instructions. Line the muffin pan with black baking liners. Fill each liner with batter and bake as instructed. Allow cupcakes to cool completely at room temperature after baking.
- Prepare Tinted Frosting: In separate bowls, tint 1 cup of white icing with creamy peach and brown colors mixed together to create a peachy tone for the brains. In another bowl, tint 1 cup of white icing mixing red-red, rose, and brown colors to achieve a dark red shade for the intestines.
- Fill Piping Bags: Prepare three decorating bags: one fitted with tip 4 filled with peach brain color icing, one with tip 1A filled with the same peach brain color icing, and one with tip 8 filled with the dark red intestine color icing.
- Base Layer of Icing: Use a tapered spatula to smooth a layer of creamy white icing over the top of each cooled cupcake, creating a smooth base for decoration.
- Pipe Brains: On half of the cupcakes, use the tip 1A and peach color icing to pipe a rounded, slightly oval-shaped mound about 1 1/4 inches in size in the center. Then use tip 4 with the same peach icing to outline each half of the brain shape. Fill in the brain by piping zigzag lines, forming the characteristic squiggly texture of brain matter.
- Pipe Intestines: On the remaining cupcakes, use the tip 8 filled with dark red icing to pipe continuous elongated beads arranged into overlapping loops resembling slightly squiggly intestines.
- Chill: Place all the decorated cupcakes in the refrigerator until the icing firms up, ensuring designs hold their shape.
- Apply Blood Gel: Mix 1/2 cup of clear piping gel with red-red and a small amount of brown icing color to create a dark blood red gel. Using a small brush, carefully apply the gel over the piped intestines to give a shiny, realistic bloody appearance.
Notes
- Use black liners to enhance the eerie visual effect of the cupcakes.
- Adjust food coloring gradually to achieve the perfect shades for realistic brain and intestine colors.
- If piping tips are unavailable, small round piping nozzles can be substituted, adjusting piping technique accordingly.
- For best results, chill the cupcakes after decorating before serving to keep the frosting intact.
- This recipe is great for Halloween, medical-themed parties, or fun decorative baking challenges.
Nutrition
- Serving Size: 1 cupcake
- Calories: 320
- Sugar: 28g
- Sodium: 150mg
- Fat: 15g
- Saturated Fat: 7g
- Unsaturated Fat: 6g
- Trans Fat: 0g
- Carbohydrates: 40g
- Fiber: 1g
- Protein: 3g
- Cholesterol: 35mg


