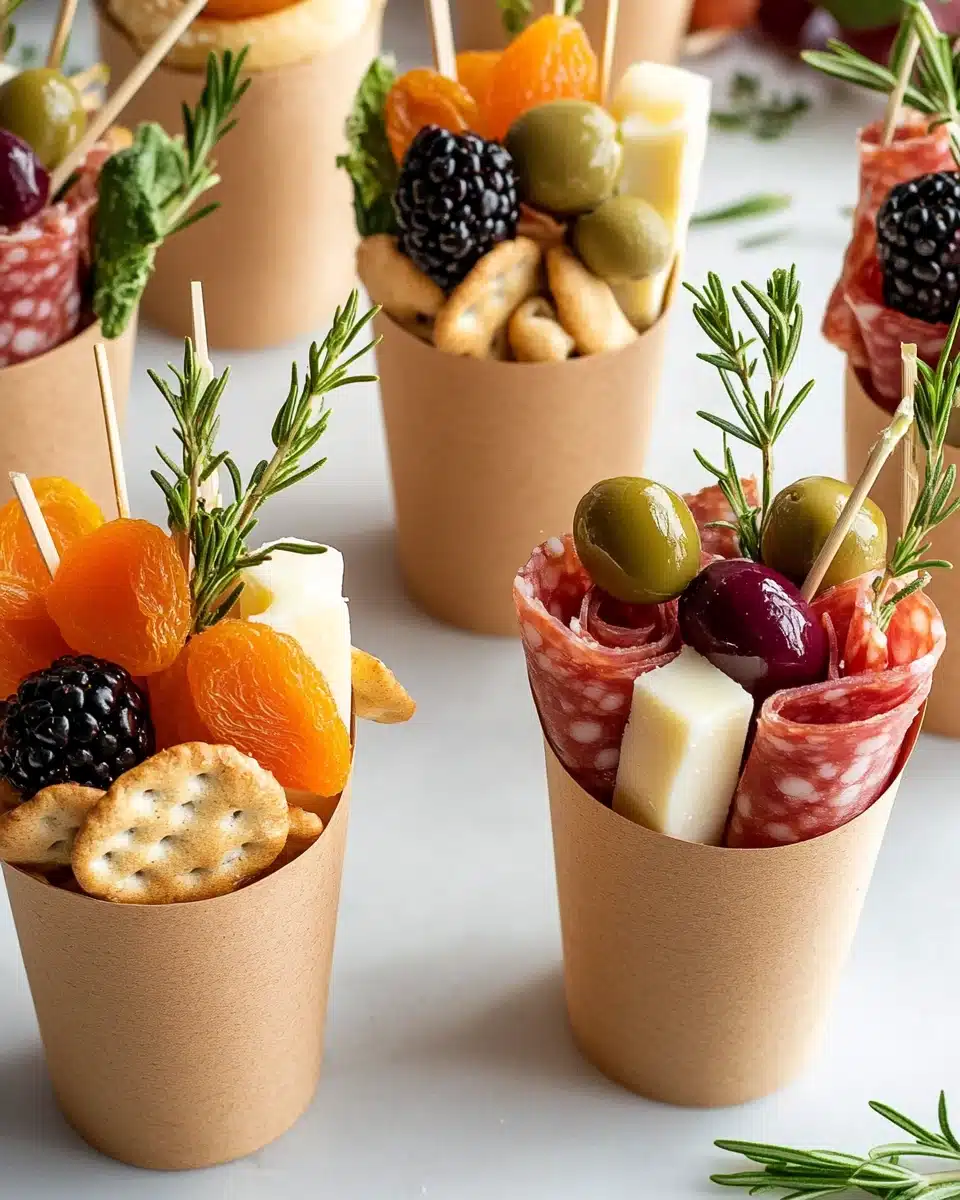
If you need a showstopping appetizer that’s both fun and fuss-free, look no further than Individual Charcuterie Cups! These adorable party starters pack all the flavor, color, and variety of a classic charcuterie board—perfectly portioned and ready to mingle.
Why You’ll Love This Recipe
- Totally Customizable: Mix and match ingredients in every cup to suit your crowd’s favorites and dietary needs with ease.
- Mess-Free Mingle Power: Guests can nibble, chat, and move around—no cheese knives or serving forks to juggle.
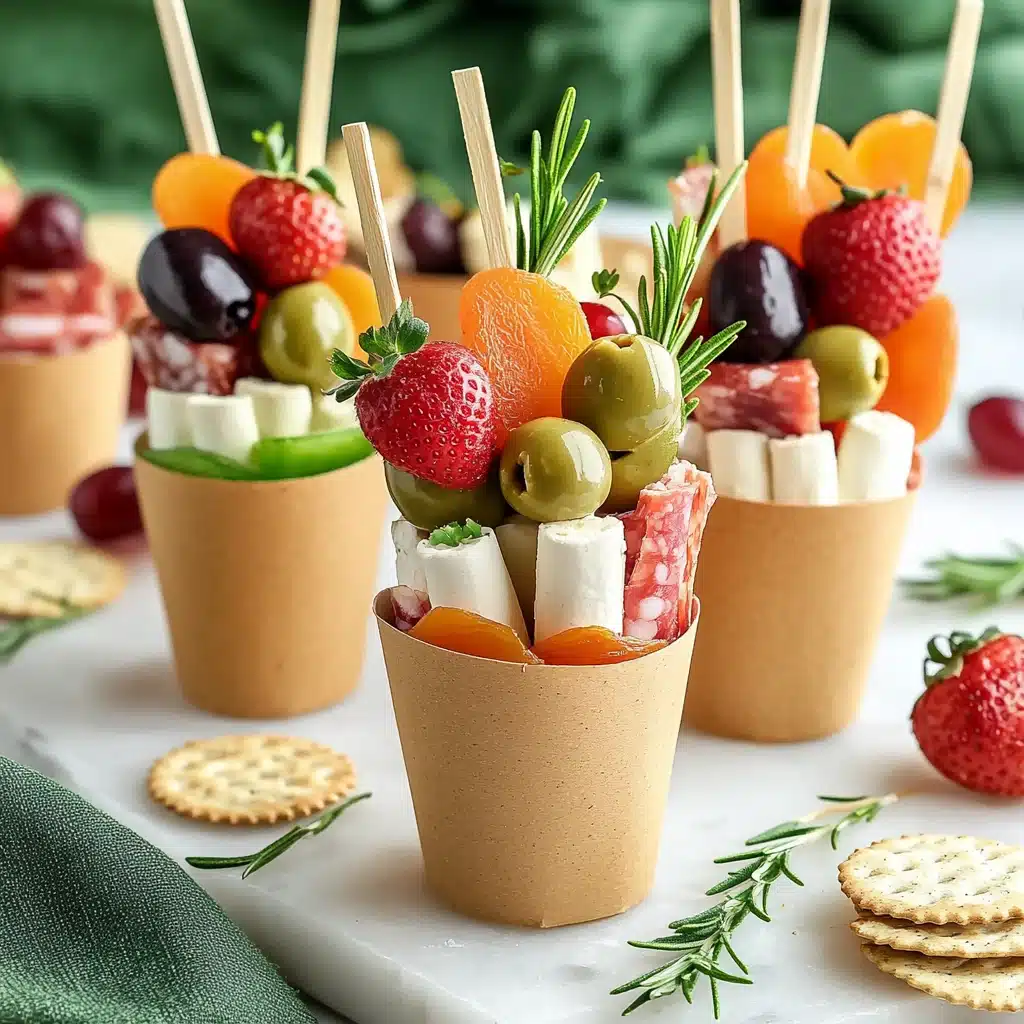
- Elegant Presentation: Individual Charcuterie Cups look gorgeous with their layers of vibrant fruit, cheese, and crisp crackers.
- Quick & Make-Ahead Friendly: Assemble these beauties in advance so you can enjoy your own party!
Ingredients You’ll Need
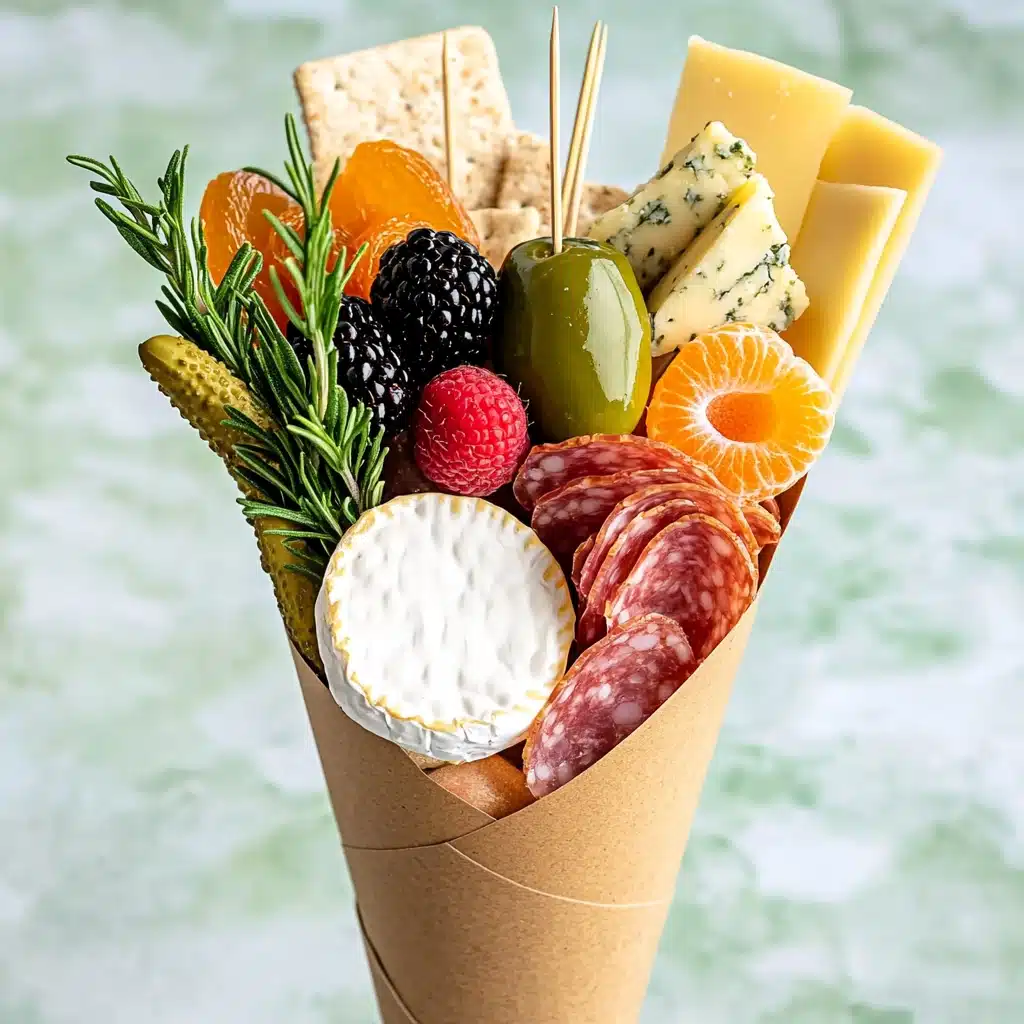
The beauty of Individual Charcuterie Cups is how each ingredient layers in bold flavor, tempting colors, and just the right bite of salty, sweet, creamy, or crunchy. Don’t stress—pick your favorites or go for a mix to dazzle every guest.
- Strawberries (halved): Juicy and vibrant, these gems add sweet contrast and lovely color.
- Blackberries: Lush and slightly tart, perfect for freshness and pop.
- Red grapes: A classic, easy-to-eat bite with juicy sweetness at the base of each cup.
- Salami (folded): For a savory punch; fold for texture and chewy ribbons.
- Brie bites: Creamy, mild, and crowd-pleasing—bite-sized indulgence.
- Gouda (cubed): Rich, nutty, and satisfyingly firm, great for skewers.
- Manchego (sliced into triangles): A Spanish classic with a buttery yet sharp flavor.
- Bread sticks (halved): Crunchy and sturdy—perfect for dipping and decorating your cup.
- Rustic Bakery Sourdough Flatbreads: Crisp, artisan crackers that hold up to cheese and spreads.
- Honey sticks: A whimsical touch of sweetness to drizzle over cheese, fruit, or enjoy straight!
- Cornichons: Tangy, tiny pickles for an acidic kick that balances richness.
- Olives: Briny, bite-sized, and irresistible between bites of cheese and bread.
- Dried apricots: Chewy, sweet, and stunningly orange, these bring color and a lovely tartness.
- Rosemary sprigs: Not only aromatic, but also a pretty green garnish that ties everything together.
Variations
Individual Charcuterie Cups are deliciously easy to adapt! Feel free to swap out ingredients based on what you have on hand, cater to allergies, or simply showcase seasonal market finds.
- Vegetarian Version: Skip the salami and add marinated mozzarella balls or flavored nuts for extra protein and crunch.
- Gluten-Free Cups: Choose gluten-free breadsticks and crackers so everyone can indulge.
- Sweet & Spicy: Add spicy candied pecans or slices of peppered salami to turn up the heat.
- Kiddie Cups: Use mild deli meats, cubes of mild cheddar, and softer fruits like apple or seedless grapes for tiny hands and taste buds.
How to Make Individual Charcuterie Cups
Step 1: Skewer and Layer the Ingredients
Start by threading your ingredients onto skewers: alternate brie bites with dried apricots for a creamy-sweet bite on some, or layer salami and gouda for savory satisfaction on others. For a fresh touch, create pretty berry skewers with strawberries and blackberries. Assembling small skewers in advance keeps things tidy and beautifully presented.
Step 2: Prep the Cups with Grapes and Crunch
Place a handful of red grapes at the bottom of each cup. This not only adds color but also creates a cushion for the rest of the treats. Next, gently tuck in sourdough flatbread crackers, breadsticks, honey sticks, and slices of manchego toward the back of each cup for vibrant texture and a dramatic, upright look.
Step 3: Add Your Skewers and Accoutrements
Arrange your prepared skewers on top of the grapes, nestling them in so they’re visible from all angles. Then pop in the olives and tangy cornichons—tuck these between the other elements for a little flavor surprise in every bite. Finish with a lush rosemary sprig for a festive, fragrant garnish.
Pro Tips for Making Individual Charcuterie Cups
- Sturdy Cups Matter: Choose clear plastic or recyclable cups with a wide base so all your delicious morsels stand tall and don’t topple over.
- Prep Ahead, Assemble Last-Minute: Prep fruit, cheese, and skewers up to a day in advance, but wait to assemble cups until 1–2 hours before serving for maximum freshness.
- Varied Heights for Visual Appeal: Layer tall items like breadsticks and honey sticks at the back, nestling shorter skewers and berries upfront for a truly eye-catching display.
- Balance Big Flavors: Try to include something sweet, something tangy and something salty in each cup for the full charcuterie experience in every bite.
How to Serve Individual Charcuterie Cups
Garnishes
Fresh rosemary sprigs are my favorite finishing touch—the pop of green and herbal aroma wows every time! You can also use edible flowers, a sprinkle of crushed pistachios, or even a drizzle of honey for extra polish and flavor atop the cheese.
Side Dishes
Pair your Individual Charcuterie Cups with sparkling wine, a vibrant salad, or a basket of warm artisan rolls on the side. These cups also shine alongside chilled soups or a simple fruit platter at brunch and picnics.
Creative Ways to Present
For an extra wow factor, arrange the cups on mirrored trays, wooden boards, or vintage cake stands. Tuck fresh herbs or flower petals between cups to carry your color theme, and don’t hesitate to label each for fun (“Team Spicy,” “Cheddar Lovers,” etc.)—guests love the personal touch!
Make Ahead and Storage
Storing Leftovers
If you find yourself with leftover Individual Charcuterie Cups (lucky you!), simply cover each cup tightly with plastic wrap and refrigerate. Most ingredients will keep fresh for up to 2 days, though crackers may soften slightly in the fridge.
Freezing
Freezing is not recommended for these cups. The juicy fruit and cheeses generally don’t thaw well, and crackers lose their snap—so it’s best to enjoy them fresh or within a day or two.
Reheating
There’s no need to reheat! All the flavors in Individual Charcuterie Cups are best enjoyed at cool room temperature. Simply pull them from the fridge about 20 minutes before serving to allow the cheese and fruit to soften slightly.
FAQs
-
Can I assemble Individual Charcuterie Cups the night before my party?
Absolutely! Prep all your ingredients and even thread your skewers the day before; just wait to assemble the actual cups until a few hours before your event. This keeps the crackers and breadsticks crisp, while fruit and cheese stay deliciously fresh.
-
What are the best cups to use for this recipe?
Look for sturdy, clear plastic cups (8–12 oz works beautifully) with a wide base. Recyclable cups or small glasses also work well and make for pretty presentations at more formal gatherings.
-
How can I make these nut-free or allergy-friendly?
Simply avoid adding nuts and always check cheese and cracker labels for allergen warnings. Customize the cups using allergy-friendly snacks—try extra fruit, seeds, or roasted chickpeas for crunch.
-
Do Individual Charcuterie Cups travel well?
They absolutely do! Arrange them in a muffin tin or box with high sides to keep them upright. Assemble at your destination for the very best look, or pack finished cups tightly to minimize shifting during transport.
Final Thoughts
Trust me: once you’ve made Individual Charcuterie Cups for a gathering, you’ll find yourself repeating this genius idea all year long. They’re fun, flexible, and oh-so-delicious—so gather your favorite cheeses, meats, and fruits, and make every guest feel totally spoiled!
Print
Individual Charcuterie Cups Recipe
- Prep Time: 15 minutes
- Cook Time: 0 minutes
- Total Time: 15 minutes
- Yield: 8 servings
- Category: Appetizer
- Method: Assembling
- Cuisine: International
- Diet: Vegetarian
Description
Elevate your snacking game with these charming Individual Charcuterie Cups, perfect for gatherings or a fancy night in. Each cup is a delightful mix of fruits, cheeses, meats, and accoutrements, beautifully presented for an elegant snacking experience.
Ingredients
Fruits:
- Strawberries, halved
- Blackberries
- Red grapes
Meat:
- Salami, folded
Cheese:
- Brie bites
- Gouda, cubed
- Manchego, sliced
Carbs:
- Bread sticks, halved
- Rustic Bakery Sourdough Flatbreads
- Honey sticks
Accoutrement:
- Cornichons
- Olives
- Dried apricots
- Rosemary sprigs
Instructions
- Skewer Assembly: Arrange apricots and brie bites on one set of skewers, followed by olives, cornichons, salami, and gouda on another set. Place blackberries and strawberries on a separate set of skewers.
- Cup Assembly: Begin by layering grapes at the bottom of each cup. Add crackers, breadsticks, honey sticks, and manchego triangles towards the back. Place the skewers on top of the grapes or nestle them in between. Garnish each cup with a tucked-in rosemary sprig.
Nutrition
- Serving Size: 1 cup
- Calories: 210
- Sugar: 8g
- Sodium: 480mg
- Fat: 12g
- Saturated Fat: 6g
- Unsaturated Fat: 4g
- Trans Fat: 0g
- Carbohydrates: 18g
- Fiber: 2g
- Protein: 8g
- Cholesterol: 30mg

