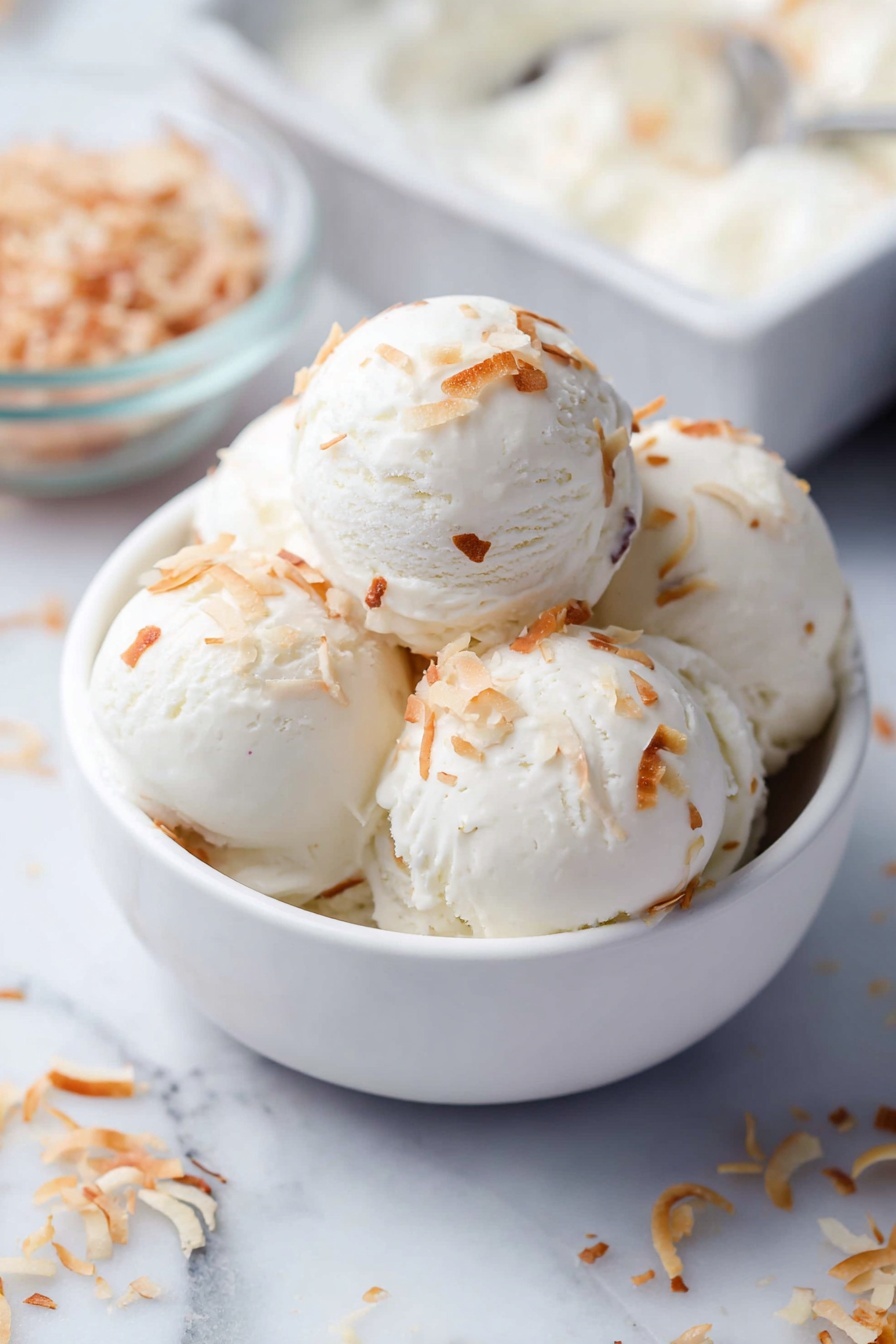
If you’re dreaming of a tropical treat that feels like a mini-vacation in a scoop, you’re in for a real delight with this Homemade Coconut Ice Cream Recipe. I absolutely love how this ice cream comes together without an ice cream maker—just a few simple ingredients, some patience, and a little folding to get that light, creamy texture. Whether you’re new to making ice cream at home or just looking for a fresh, dairy-heavy coconut flavor that my family goes crazy for, this recipe has you covered. Stick with me, and I’ll share all the handy tips to get it just right.
Why You’ll Love This Recipe
- No fancy equipment needed: You don’t need an ice cream maker—just a whisk or hand blender and a freezer.
- Rich, creamy texture: The whipped cream folds in air, giving you a delightful lightness without compromising on creaminess.
- Perfect coconut flavor: Full-fat coconut milk and toasted coconut flakes deepen the tropical taste in every bite.
- Family favorite: This ice cream wins smiles at every gathering—kids and adults alike keep coming back for more.

Ingredients You’ll Need
The magic of this Homemade Coconut Ice Cream Recipe truly lies in using cold, high-quality ingredients that come together beautifully. It’s all about balancing creamy textures and maximizing coconut flavor, so choosing full-fat coconut milk and fresh heavy cream really makes a difference.

- Heavy Cream/Whipping Cream: Using cold cream whipped to stiff peaks creates that cloud-like texture you’ll love.
- Powdered Sugar: It mixes in smoothly without lumps, sweetening the cream perfectly.
- Vanilla Extract: Adds a gentle warmth and depth to the ice cream’s flavor.
- Coconut Milk (Full Fat): This is the star for authentic coconut richness—don’t substitute with light versions.
- Sweetened Condensed Milk: Besides sweetness, it helps with creaminess and freeze stability.
- Coconut Extract (optional): For an extra boost of coconut punch, a small amount goes a long way.
- Dry Shredded Coconut/Coconut Flakes (toasted, unsweetened): Toasting these brings out a nutty, toasty flavor that complements the creaminess beautifully.
Variations
I love how versatile this Homemade Coconut Ice Cream Recipe is—you can easily tweak it to match your taste or dietary needs. Over the years, I’ve tried a few variations that totally change the vibe but still keep that luscious base intact.
- Vegan Version: Swap heavy cream and condensed milk with coconut cream and a vegan sweetener; it’s a bit different but still divine.
- Add Tropical Mix-ins: Chopped fresh pineapple or mango stirred in just before freezing adds a juicy surprise—my family adores those tropical bursts.
- Chocolate Coconut: Mixing in some cocoa powder or chocolate chips creates a dreamy coconut-chocolate combo that’s irresistible.
- Spiced Up: Adding a pinch of cinnamon or cardamom gives the ice cream a warm, fragrant twist that’s especially nice in cooler months.
How to Make Homemade Coconut Ice Cream Recipe
Step 1: Whip the Cream to Stiff Peaks
This first step is crucial for texture—grab cold heavy cream, powdered sugar, and vanilla extract and whip them with a hand blender or stand mixer until the cream doubles in volume and stiff peaks form. I learned early on that chilling your bowl and beaters beforehand helps speed this up and makes whipping way easier.
Step 2: Mix the Coconut Base
In a separate bowl, combine the cold full-fat coconut milk, sweetened condensed milk, and optional coconut extract. Stir everything until it’s smooth and uniform. This rich mixture builds flavor and creaminess—don’t skip the condensed milk as it helps the ice cream freeze into that perfect scoopable texture.
Step 3: Fold to Aerate and Combine
Take a couple of spoonfuls of the whipped cream and fold gently into the coconut mixture to lighten it up—this aerates the base. Then, in two batches, fold the coconut base back into the whipped cream. Use a spatula and fold slowly and carefully; folding too vigorously can deflate all that great air you whipped in. The folding technique is what gives this ice cream that dreamy fluffy texture you’ll get addicted to.
Step 4: Pour, Cover, and Freeze
Transfer your combined mixture to a shallow rectangular container—this helps it freeze evenly. Lay cling wrap or parchment paper directly on the surface to prevent ice crystals from forming, then seal the container tightly. Pop it into the freezer for at least 8 hours, though overnight is best. I always mark my calendar so I remember to plan ahead—this patience really pays off!
Step 5: Serving Time—Let It Soften
When you’re ready to indulge, remove the plastic wrap from the surface and let the ice cream sit for 5 minutes at room temperature. This short rest softens it just enough to scoop easily without melting too fast—perfect for that first heavenly bite.
Pro Tips for Making Homemade Coconut Ice Cream Recipe
- Chill Everything First: Keep your heavy cream, coconut milk, and bowls chilled; this helps whip better and freeze faster for creamier results.
- Gentle Folding is Key: Folding preserves the air you whip into the cream, which means lighter texture and less icy ice cream.
- Toast Your Coconut Flakes: A quick toast in a dry pan brings out a lovely nutty flavor that’s a game-changer layered in the mix.
- Avoid Over-Freezing: If frozen too hard, you’ll notice it’s tough to scoop—let it rest a few minutes at room temp before serving.
How to Serve Homemade Coconut Ice Cream Recipe
Garnishes
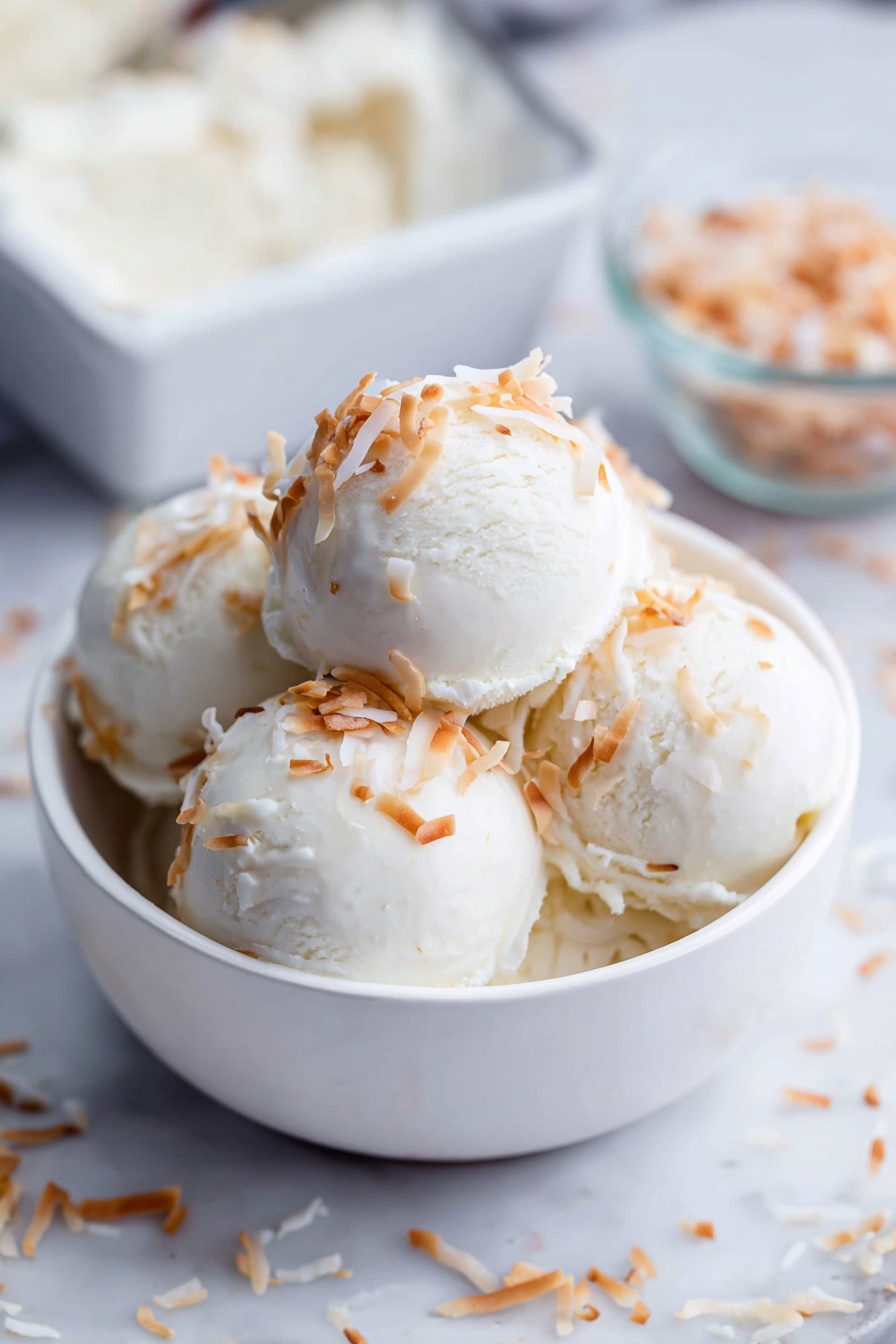
When I serve this coconut ice cream, I love topping it with extra toasted coconut flakes for texture and a drizzle of honey or caramel sauce for a sweet contrast. Fresh mango slices or a sprinkle of chopped macadamia nuts take things up a notch, giving each bite a tropical crunch worth savoring.
Side Dishes
This ice cream pairs beautifully with warm fruit crisps, especially those featuring pineapple or peaches. I’ve also spooned it over a slice of freshly baked banana bread or alongside coconut macaroons when I want to go full coconut celebration mode.
Creative Ways to Present
For a festive touch, I’ve poured the mixture into mini paper cups garnished with a small toasted coconut flake and a tiny paper umbrella—great for summer parties! You can also layer the ice cream in clear glass bowls with toasted coconut and fresh berries for a visually stunning treat that impresses guests instantly.
Make Ahead and Storage
Storing Leftovers
Store your homemade coconut ice cream in an airtight container to prevent freezer burn and absorption of other odors. I like using a shallow container with a tight-fitting lid to keep it fresh and scoop-ready. Just make sure you press plastic wrap directly on the ice cream surface before sealing to keep it smooth and creamy.
Freezing
After making the ice cream, freeze it for at least 8 hours or overnight for best texture. I’ve found that homemade coconut ice cream freezes really well without forming large ice crystals, thanks to the condensed milk and whipped cream combination. Just remember to avoid stirring or refreezing multiple times to keep that creamy consistency intact.
Reheating
While you don’t really “reheat” ice cream, letting it rest at room temperature for 5 minutes before scooping is the trick I swear by. This softens it just enough to scoop effortlessly and brings out the full coconut flavor without melting into a puddle.
FAQs
-
Can I make this Homemade Coconut Ice Cream Recipe without an ice cream maker?
Absolutely! This recipe is specifically designed to be made without any special equipment. Whipping the cream to stiff peaks and carefully folding the ingredients introduces air, which creates a creamy, scoopable texture without needing to churn.
-
Can I use light coconut milk instead of full-fat?
Full-fat coconut milk is essential for the rich creaminess in this recipe. Using light coconut milk may result in an icy, less creamy texture, so I don’t recommend substituting it here.
-
How long can I store this homemade coconut ice cream?
Stored properly in an airtight container with plastic wrap pressed on the surface, this ice cream will keep well in the freezer for up to 2 weeks without losing its flavor or texture.
-
Can I add mix-ins like nuts or fruit?
Definitely! Stir in chopped nuts, toasted coconut flakes, or small pieces of tropical fruit just before freezing for added texture and flavor. Just fold in gently to keep the airy texture intact.
-
What if I don’t have coconut extract?
No worries if you don’t have coconut extract—your ice cream will still taste delicious thanks to the coconut milk and toasted coconut flakes. The extract just amps up the coconut punch!
Final Thoughts
Honestly, this Homemade Coconut Ice Cream Recipe feels like a little slice of paradise you can whip up anytime. I remember the first time I made it—my family devoured every last scoop and begged me to make it again soon. It’s simple, rich, and comforting, with that perfect balance of sweet and coconutty that just hits the spot. If you’ve been hesitant to try making ice cream at home, give this recipe a shot—you’ll be amazed by how easy and rewarding it is to make your own creamy coconut delight. Trust me, you and everyone you serve it to will thank you!
Print
Homemade Coconut Ice Cream Recipe
- Prep Time: 15 minutes
- Cook Time: 0 minutes
- Total Time: 12 hours 15 minutes
- Yield: 10 servings
- Category: Dessert
- Method: No-Cook
- Cuisine: International
- Diet: Vegetarian
Description
This homemade coconut ice cream recipe is a creamy, tropical treat made with full-fat coconut milk, heavy cream, and a touch of vanilla and coconut extract for extra flavor. The no-churn preparation method ensures a smooth, airy texture, enhanced by folding whipped cream into the mixture, then freezing it overnight for a rich and refreshing dessert perfect for coconut lovers.
Ingredients
Ice Cream Base
- 1.5 cups Heavy Cream/ Whipping Cream, cold
- ¾ cup Powdered Sugar
- 1 teaspoon Vanilla Extract
- 2 cups Coconut Milk, full fat, cold
- ½ can Sweetened Condensed Milk, cold (from a 400 grams can)
- ⅛ teaspoon Coconut Extract (optional)
Topping
- ½ cup Dry Shredded Coconut / Coconut Flakes, toasted and unsweetened
Instructions
- Whip the Cream: In a large bowl, combine the cold heavy cream, powdered sugar, and vanilla extract. Using a hand blender, whip the mixture until it doubles in volume and stiff peaks form, creating a light and airy base.
- Prepare Coconut Mixture: In another bowl, mix together the cold coconut milk, sweetened condensed milk, and coconut extract until fully combined, ensuring the flavors meld smoothly.
- Aerate the Mixture: Take a couple of scoops of the whipped cream and fold it into the coconut milk mixture gently. This step helps aerate the mixture and lighten the base.
- Combine All Components: In two batches, fold the coconut milk mixture into the remaining whipped cream using a spatula, folding gradually and gently to retain as much air as possible for a fluffy texture.
- Transfer to Container: Pour the finished mixture into a rectangular shallow container. Place a piece of cling wrap or baking paper directly on the surface to prevent ice crystals from forming.
- Freeze: Cover the container tightly with a lid, cling wrap, or foil. Freeze the ice cream for at least 8 hours or preferably overnight to set completely.
- Serve: Before serving, remove the cling wrap from the surface. Let the ice cream rest at room temperature for about 5 minutes to soften slightly for easier scooping. Optionally, top with toasted shredded coconut flakes for added texture and flavor.
Notes
- Keeping all liquid ingredients cold helps the ice cream freeze faster and improves texture.
- Coconut extract is potent; 1/8 teaspoon provides subtle flavor, but you can increase to 1/4 teaspoon for a more intense coconut taste.
- To toast shredded coconut, spread it on a baking sheet and toast in a preheated oven at 350°F (175°C) for 5 minutes or until golden brown, stirring occasionally.
- This recipe requires no ice cream maker; folding whipped cream incorporates air for a creamy texture.
Nutrition
- Serving Size: 1/10 of recipe (approx. 100g)
- Calories: 280
- Sugar: 22g
- Sodium: 40mg
- Fat: 22g
- Saturated Fat: 18g
- Unsaturated Fat: 3g
- Trans Fat: 0g
- Carbohydrates: 18g
- Fiber: 1g
- Protein: 3g
- Cholesterol: 75mg

