
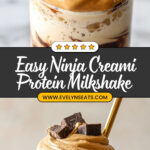
If you’re on the hunt for a delicious way to get your protein fix without sacrificing flavor, I’ve got something you’re going to love. This High-Protein Ninja Creami Milkshake Recipe is a total game-changer—I absolutely love how creamy and satisfying it turns out, and I promise you’ll find it both easy and fun to make. Whether you’re bouncing back from a workout or just craving a wholesome treat, this recipe hits the spot every time.
Why You’ll Love This Recipe
- Creamy and Protein-Packed: You get the rich, indulgent feel of a milkshake with plenty of muscle-fueling protein.
- Quick and Simple to Make: With just a few wholesome ingredients and your Ninja Creami, you’re minutes away from deliciousness.
- Customizable Flavors: Whether you want chocolatey sweetness or a nutty boost, there’s room to tweak it however you like.
- Perfect for Meal Prep: Freeze ahead and enjoy a protein shake that feels like a treat whenever you want.

Ingredients You’ll Need
The magic of this High-Protein Ninja Creami Milkshake Recipe is in how these ingredients come together — creamy oat milk, rich peanut butter, and protein powder blend seamlessly to keep you fueled.
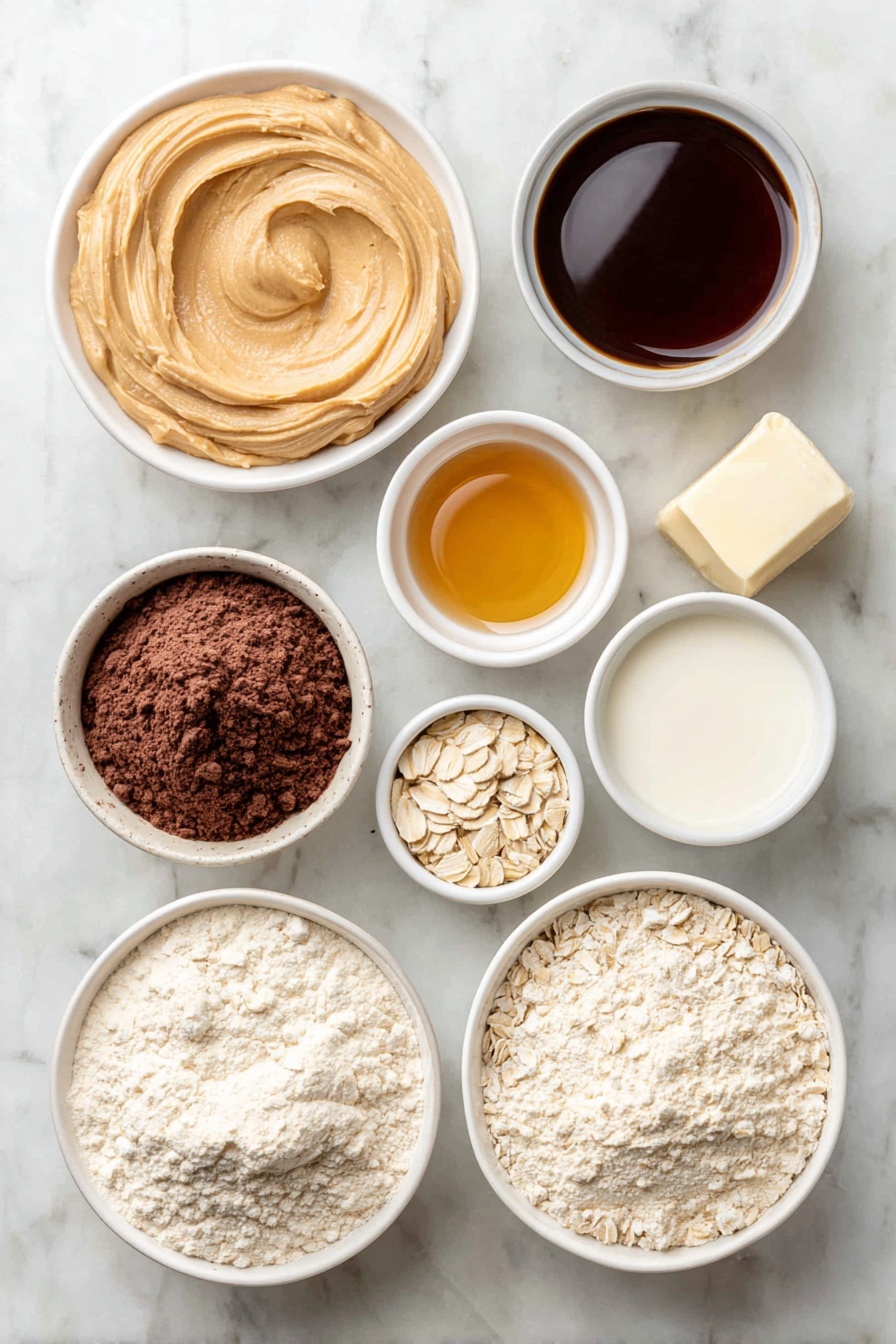
- Oat Milk: I prefer oat milk because it adds natural creaminess without overpowering flavors, and it’s great if you want dairy-free.
- Peanut Butter: Choose a good-quality creamy peanut butter for that smooth texture and nutty flavor that balances sweetness.
- Maple Syrup: It’s my go-to sweetener in this recipe because it brings natural sweetness with a bit of depth.
- Vanilla Extract: Just a teaspoon—this amps up the flavor, giving it that comforting vanilla note we all love.
- Vanilla Protein Powder: Pick your favorite brand—whey, plant-based, or collagen—to boost the protein and add body.
- Chocolate Syrup: I always recommend a lower-sugar or sugar-free version to keep it balanced and guilt-free.
Variations
I love tinkering with this High-Protein Ninja Creami Milkshake Recipe depending on what I’m in the mood for or what I have on hand. You’ll enjoy how versatile it is—don’t hesitate to get creative!
- Swap Oat Milk for Soy Milk: When I need a bit more protein, I switch to soy milk — it keeps the creaminess but ups the nutrition.
- Add a Scoop of Cocoa Powder: For an intense chocolate fix, boost this shake with unsweetened cocoa powder; my kids love it!
- Try Almond Butter Instead of Peanut Butter: Almond butter gives it a milder nutty flavor that’s equally delicious.
- Use Different Protein Powders: Whether it’s dairy-based or plant-based, the protein you choose can subtly shift the flavor and texture, so experiment a bit.
How to Make High-Protein Ninja Creami Milkshake Recipe
Step 1: Whisk Together Your Ice Cream Base
Start by combining 2 cups of oat milk, 1/4 cup peanut butter, 1/4 cup maple syrup, 1 teaspoon vanilla extract, and 1/4 cup vanilla protein powder in a bowl. Whisk everything thoroughly until smooth—the peanut butter should fully blend in with no lumps. This smooth base is key to having a creamy milkshake later, so take your time here.
Step 2: Freeze the Base in Your Ninja Creami Pint Container
Pour the whisked base into a Ninja Creami pint container and seal it with the lid. Then place it in your freezer for at least 12 hours, ideally up to 24 hours. I used to rush this part and ended up with texture issues, so don’t skip the freezing — patience pays off here!
Step 3: Mix Add-Ins and Use the Milkshake Setting
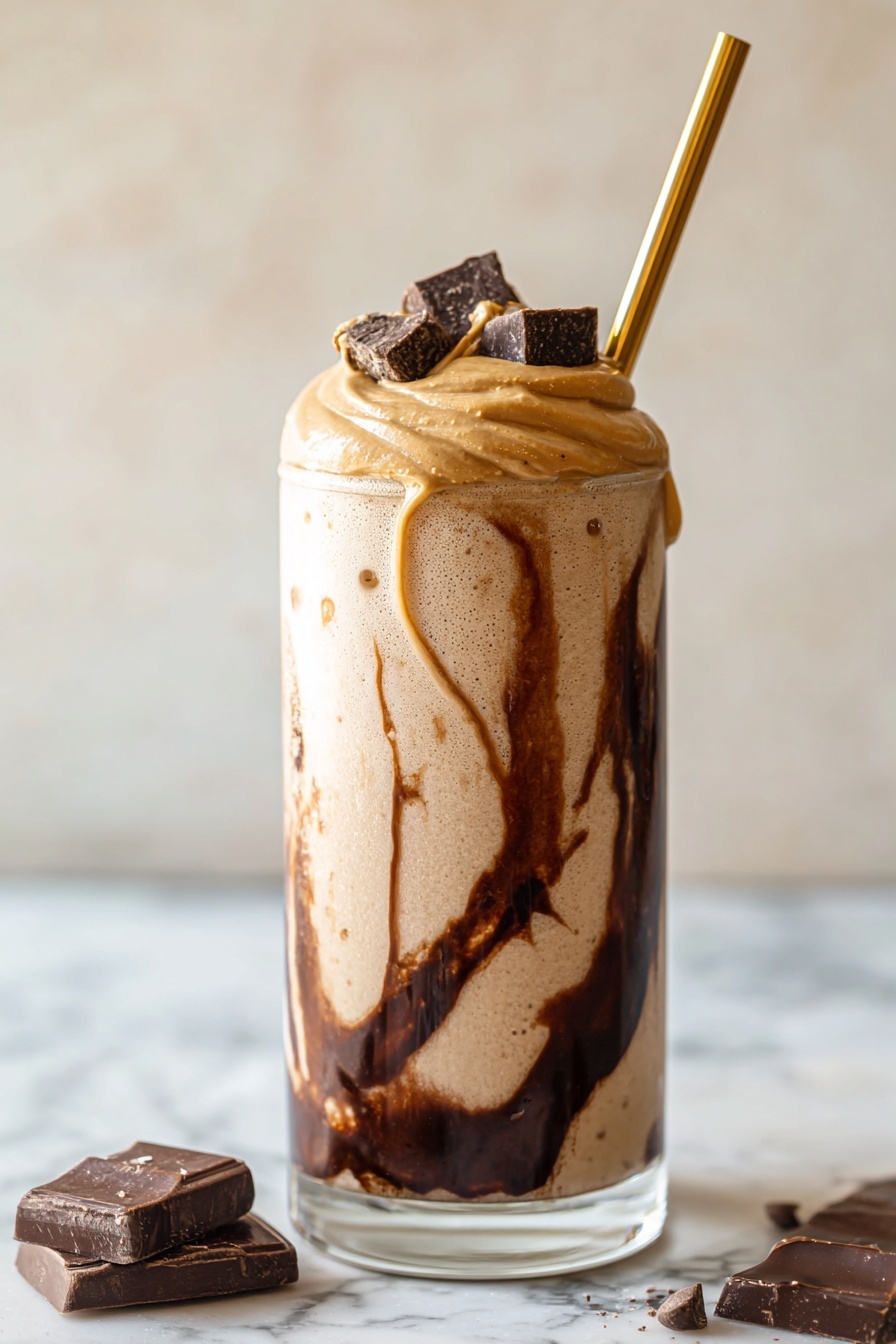
Once fully frozen, remove the lid. Add 1/2 cup oat milk and 2-3 tablespoons of chocolate syrup on top. Pop the pint into your Ninja Creami, select the milkshake setting, and blend. After the first spin, take it out, give it a good stir, then put it back on the milkshake setting for a second spin. You’ll get a thick, smooth milkshake consistency that just melts in your mouth.
Pro Tips for Making High-Protein Ninja Creami Milkshake Recipe
- Use Smooth Peanut Butter: Chunky textures can make blending tricky, so a smooth variety ensures a silky result.
- Freeze Overnight for Best Texture: I learned that shorter freezes result in a less creamy shake—longer freeze time is worth it.
- Don’t Skip the Stir Between Spins: It helps incorporate air and evenly distribute add-ins for that perfect milkshake consistency.
- Avoid Overfilling the Pint: Give your ingredients room to spin so the motor doesn’t get strained.
How to Serve High-Protein Ninja Creami Milkshake Recipe
Garnishes
I’m a fan of topping this shake with a light sprinkle of cacao nibs or crushed peanuts—adds that nice little crunch and a boost of texture. A few dark chocolate chips work wonders too for extra flair and flavor.
Side Dishes
Pair your shake with a fresh fruit salad or a handful of trail mix. I sometimes serve it alongside a small bowl of Greek yogurt with honey—that keeps the protein punch going and balances the sweetness perfectly.
Creative Ways to Present
For a fun twist, serve this shake in your favorite mason jar topped with a paper straw and fresh mint leaves. I’ve even layered it in parfait glasses with granola and sliced bananas for a make-ahead breakfast treat that impresses every time.
Make Ahead and Storage
Storing Leftovers
If you have leftovers (which doesn’t happen often at my house!), just pop them back into a Ninja Creami pint container and freeze for up to one week. I always label mine so I know when it was made—freshness is key for the best taste.
Freezing
Frozen leftovers keep really well. The texture stays creamy after a quick respin, so it’s a great recipe to make ahead for busy days. Just make sure your pint container is sealed tight to prevent ice crystals.
Reheating
This shake isn’t one you heat — but when you want to enjoy leftovers, I let it sit at room temperature for about 10-15 minutes, add a tablespoon of oat milk, then respin on the milkshake setting to refresh the texture. Works like a charm every time.
FAQs
-
Can I use other types of milk for the High-Protein Ninja Creami Milkshake Recipe?
Absolutely! While oat milk offers a creamy texture that’s perfect here, you can swap in soy milk for extra protein or almond milk if you prefer a lighter shake. Just keep in mind that thinner milks might make the shake less creamy, so adding a bit more peanut butter or protein powder can help balance the texture.
-
What’s the best protein powder to use in this recipe?
Choose whichever protein powder suits your dietary preferences—whey protein powder blends smoothly and gives a nice texture, but plant-based powders like pea or brown rice protein work well too. The vanilla flavor is ideal to keep the taste balanced, but feel free to experiment!
-
Can I make this recipe without a Ninja Creami?
You could try blending the base before freezing and then stirring it every 30 minutes while freezing to help avoid ice crystals. However, the Ninja Creami’s specialized spinning delivers a uniquely smooth milkshake texture that’s tough to replicate otherwise.
-
How long does this milkshake keep in the freezer?
It stays great for up to a week when stored in an airtight Ninja Creami pint container. Beyond that, it might get icy or lose some creaminess.
Final Thoughts
This High-Protein Ninja Creami Milkshake Recipe has become my go-to whenever I want a treat that feels indulgent but really fuels my day. It’s amazing how just a few simple ingredients—and your trusty Ninja Creami—turn into something so creamy and satisfying. Honestly, I think you’ll enjoy making this as much as eating it, and it just might become a staple in your kitchen like it did in mine. Give it a try, and let me know how it turns out—I’m betting your family will go crazy for it too!
Print
High-Protein Ninja Creami Milkshake Recipe
- Prep Time: 10 minutes
- Cook Time: 12 hours (freezing time)
- Total Time: 12 hours 10 minutes
- Yield: 3 servings
- Category: Beverage
- Method: Blending
- Cuisine: American
- Diet: Vegetarian
Description
This Ninja Creami Protein Milkshake combines creamy oat milk, peanut butter, maple syrup, and vanilla protein powder to create a delicious and satisfying high-protein treat. Using the Ninja Creami appliance, this milkshake transforms from a frozen base to a thick, indulgent shake perfect for a nutritious snack or post-workout boost. With options to add chocolate syrup and easy customization tips, it’s a quick, wholesome recipe for anyone seeking a flavorful protein shake.
Ingredients
Ice Cream Base
- 2 cups oat milk
- 1/4 cup peanut butter
- 1/4 cup maple syrup
- 1 teaspoon vanilla extract
- 1/4 cup vanilla protein powder
Milkshake Add-Ins
- 1/2 cup oat milk
- 2-3 Tablespoons chocolate syrup (lower-sugar or sugar-free option preferred)
Instructions
- Prepare Ice Cream Base: Whisk together 2 cups oat milk, 1/4 cup peanut butter, 1/4 cup maple syrup, 1 teaspoon vanilla extract, and 1/4 cup vanilla protein powder until fully combined.
- Freeze Mixture: Pour the ice cream base into a Ninja Creami pint container and freeze flat for 12-24 hours, allowing it to solidify completely.
- Add Milkshake Ingredients: Remove the lid from the frozen pint, add 1/2 cup oat milk and 2-3 tablespoons chocolate syrup on top.
- Spin in Ninja Creami: Place the pint in the Ninja Creami appliance and select the milkshake setting to process the mixture into a thick milkshake.
- Stir and Respin: Remove the pint, stir the milkshake thoroughly to blend ingredients evenly, then respin on the milkshake setting to achieve a creamy, smooth consistency.
- Serve or Store: Enjoy immediately for a thick milkshake that melts quickly. Leftovers can be refrozen and respun when ready to serve again.
Notes
- Tip: For a creamier texture and higher protein, substitute oat milk with soy milk.
- Store leftovers in a Ninja Creami pint container in the freezer for up to one week.
- Before serving leftovers, let sit at room temperature for 10-15 minutes, add 1 tablespoon milk, and respin on milkshake setting for best texture.
Nutrition
- Serving Size: 1 serving (approx. 1 cup)
- Calories: 280
- Sugar: 14g
- Sodium: 150mg
- Fat: 14g
- Saturated Fat: 3g
- Unsaturated Fat: 10g
- Trans Fat: 0g
- Carbohydrates: 24g
- Fiber: 4g
- Protein: 15g
- Cholesterol: 0mg

