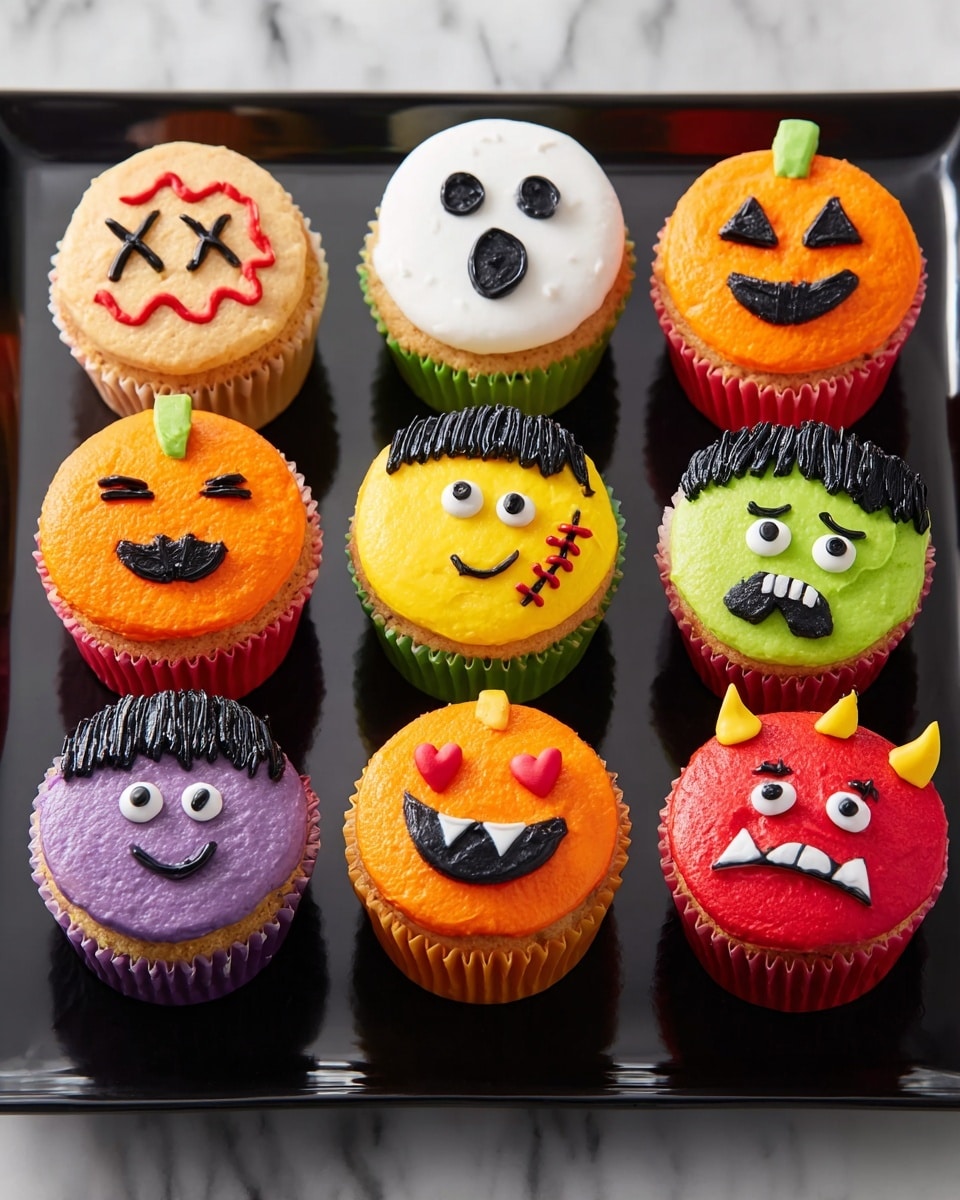
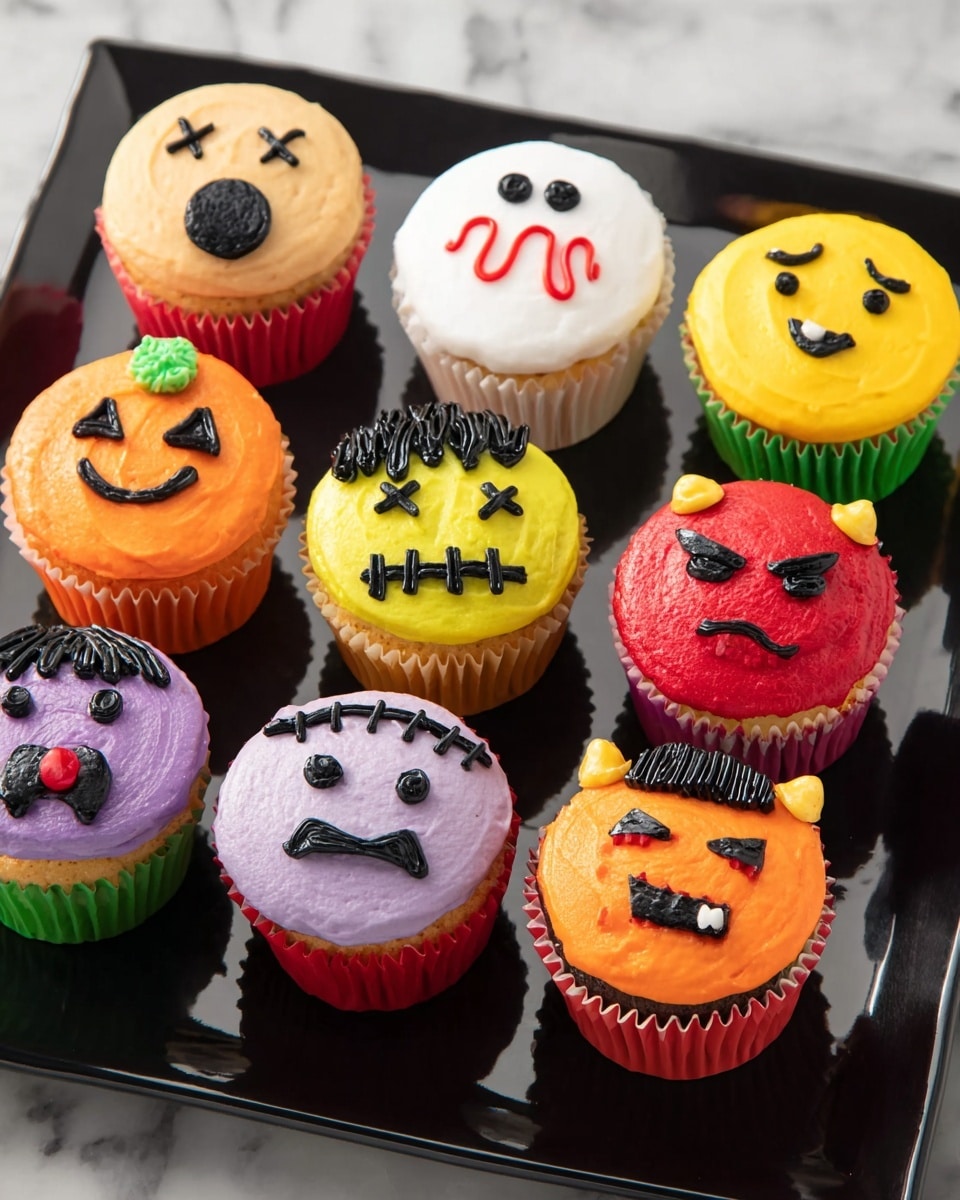
If you’re looking for a treat that’s as fun to make as it is to eat, I’ve got just the thing for you: a Halloween Emoji Cupcakes Recipe that’s packed with personality and bursting with color. These cupcakes are not only delicious but also wonderfully festive with their cute holiday emoji faces that will make your party guests smile—and maybe even laugh out loud! Trust me, when I first tried this Halloween Emoji Cupcakes Recipe, I couldn’t believe how easy it was to turn regular cupcakes into little works of art without needing fancy skills or tools. Stick with me, and I’ll show you exactly how you can wow everyone this season.
Why You’ll Love This Recipe
- Super Fun & Festive: Each cupcake is a mini Halloween emoji that delights kids and adults alike.
- Easy to Customize: You can change colors and faces to fit your style or dietary needs.
- Great for Parties: These cupcakes bring smiles and serve as conversation starters at any Halloween gathering.
- Uses Simple Ingredients: With a basic cake mix and decorator icing colors, anyone can make this happen.

Ingredients You’ll Need
I like to start with a good-quality cake mix or my go-to homemade cake batter because it bakes up light, fluffy, and neutral enough to let my colorful icing really shine. The rainbow of decorator icing colors makes it simple to craft those emoji faces just the way you want.
- Favorite Cake Mix or Recipe: Choose your favorite flavor—vanilla works beautifully as a base for festive colors.
- Lemon Yellow Icing Color: Great for bright highlights and blending to lighter greens.
- Leaf Green Icing Color: Perfect for spooky stems and Frankenstein’s skin tone.
- Brown Icing Color: Adds depth for features or hair.
- Ivory Icing Color: Softens browns or works as a cream base.
- Black Icing Color: Essential for outlining faces and creating spooky details.
- Rose Icing Color: Adds a warm pink touch to cheeks or vampire lips.
- Violet Icing Color: Brings a mysterious purple hue for ghostly shading.
- Orange Icing Color: Classic pumpkin color, can’t go Halloween without it.
- Christmas Red Icing Color: For blood drips and vampire accents.
- Red-Red Icing Color: Bright red tones for heart eyes and other details.
- White Decorator Icing: Foundation for ghosts and teeth.
- Creamy White Decorator Icing: Smooth and easy to pipe, perfect for details.
Variations
The beauty of this Halloween Emoji Cupcakes Recipe is how easy it is to make it your own. I love switching up colors or adding new faces based on what we have on hand or my kids’ requests. These cupcakes really invite creativity!
- Allergy-Friendly Version: I once swapped the cake mix for a gluten-free one and used dairy-free icing; the cupcakes were just as stunning and tasty.
- Flavor Twists: Try adding a teaspoon of pumpkin spice or cinnamon to the batter for that extra autumn touch.
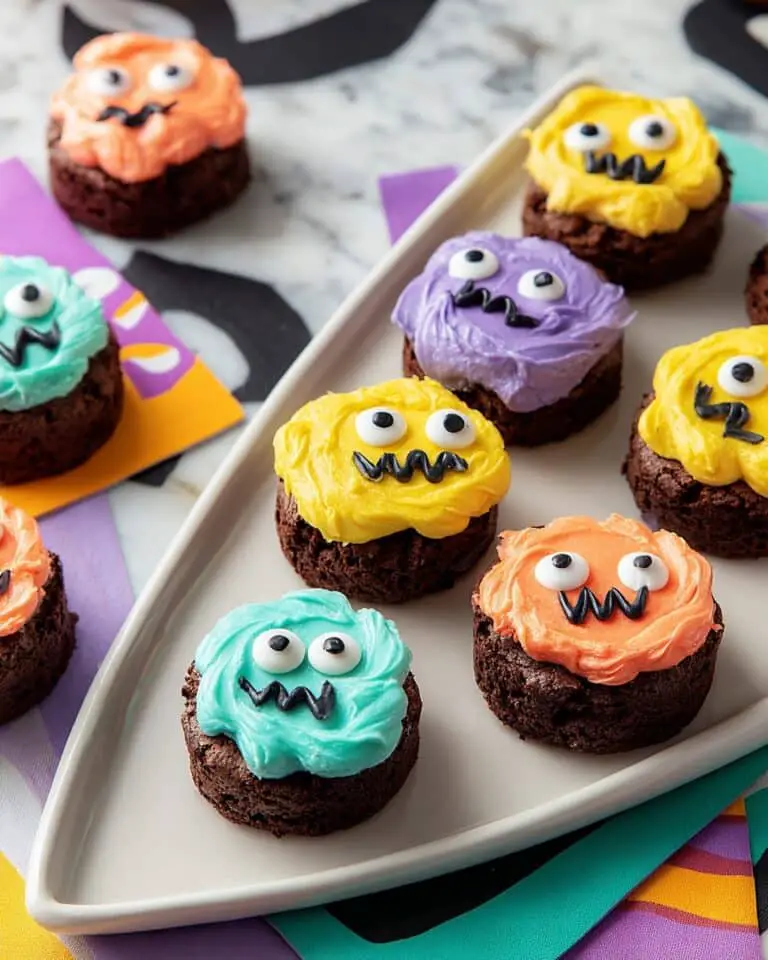
- Face Variations: Beyond the classic Halloween emojis, you could do silly monsters or cute animals using the same coloring techniques.
How to Make Halloween Emoji Cupcakes Recipe
Step 1: Bake Your Cupcakes in Festive Cups
Start by preparing your cake batter according to your chosen recipe or mix instructions. I recommend using Halloween-themed cupcake liners in colors like purple, green, and orange to add an instant festive touch. Bake as directed, usually around 18-22 minutes, until a toothpick inserted comes out clean. Let them cool completely before moving on—this really helps your icing stay clean and neat.
Step 2: Tint Your Icing Colors Just Right
I love this part because it feels a little like being an artist mixing paint. Combine your icing colors in pairs to get the perfect hues: mixing Leaf Green with Lemon Yellow gives a vibrant green for stems, blending Red-Red with Christmas Red creates a rich red for vampire hearts and blood drips, and so on. Be sure to mix small batches—about 1/4 cup each—so you don’t waste any icing. Save the rest white for ghost shapes and teeth.
Step 3: Smoothly Ice Each Cupcake
Using a spatula, spread each cupcake’s top with the colored icing to create a smooth canvas. This is where your base colors come alive! For example, orange icing over the cupcake for pumpkins, green for Frankenstein, and red for devils. Take your time smoothing—it’s worth it for that professional look before adding your emoji faces.
Step 4: Pipe Those Adorable Halloween Faces
This is the fun part where you turn these cupcakes into mini cartoons! Equip your decorating bags with the various icing colors and tips as indicated—tip 6 for ghost shapes and tip 3 or 5 for details. Outline ghosts in white, then fill and smooth. Use black icing to pipe eyes, mouths, teeth, and other facial features. For pumpkins, green icing makes great stems, and black icing brings out the facial expressions. Little details like scars or hearts add personality.
Step 5: Final Touches and Presentation
Once all the faces are piped and you’re happy with how they look, let the cupcakes sit for at least 30 minutes so the icing firms up a bit. This also helps if you’re transporting or arranging them for a party plate. Trust me, I’ve learned that this little waiting game saves many icing smudges and keeps your cupcakes looking picture-perfect.
Pro Tips for Making Halloween Emoji Cupcakes Recipe
- Consistent Icing Texture: I always make sure my decorator icing is creamy but not too runny—it pipes cleanly and holds shape better.
- Small Batches of Color: Mixing icing colors in small amounts means you waste less and can tweak shades easily.
- Use Quality Decorating Tips: Switching between tip sizes lets you add everything from smooth coverage to fine details without frustration.
- Let Cupcakes Cool Completely: Warm cupcakes cause icing to melt or slide off, so patience here pays off big time.
How to Serve Halloween Emoji Cupcakes Recipe
Garnishes
I love adding a few extra sprinkles shaped like bats or pumpkins around the cupcakes for a little sparkle and texture. A simple edible glitter or candy eyeballs can also make faces pop even more. Sometimes I also lightly dust with powdered sugar for a ghostly fog effect—it’s subtle but super cute.
Side Dishes
These cupcakes pair wonderfully with simple drinks like spiced apple cider or hot cocoa. If you’re hosting, I like serving alongside savory mini sandwiches or a cheese platter to balance out the sweetness.
Creative Ways to Present
For Halloween parties, I’ve arranged these cupcakes on a tiered stand surrounded by faux cobwebs and plastic spiders for that spooky vibe. Another hit was placing each cupcake in a mini decorative cauldron or witch’s hat container—kids loved the theme! Presentation turns this recipe into a complete festive experience.
Make Ahead and Storage
Storing Leftovers
I store leftover cupcakes in an airtight container at room temperature if I plan to eat them within two days. If your home tends to be warm, refrigeration is safer, though I do bring them back to room temp before serving so the icing softens up nicely.
Freezing
Freezing decorated cupcakes can be tricky because some icing colors might shift or bleed. However, I’ve had success freezing undecorated cupcakes first, then decorating after thawing. If you’re in a pinch, wrap each cupcake well in plastic wrap and place in a freezer-safe container.
Reheating
Since these cupcakes are best served at room temperature, I recommend removing from the fridge about 30 minutes prior to serving. If frozen, let them thaw completely. Avoid microwaving as it can melt your lovely icing artwork.
FAQs
-
Can I use homemade cake instead of cake mix for this Halloween Emoji Cupcakes Recipe?
Absolutely! Homemade cake batter works just as well and lets you customize flavors. Just make sure to bake cupcakes in similar-sized liners and cool them fully before decorating to avoid melting the icing.
-
What if I don’t have all the icing colors mentioned in the recipe?
No worries! You can mix basic colors to get close to the shades you want. For example, mix yellow and blue to get green, or red and white to get pink. This recipe is forgiving with color variations.
-
How do I avoid my icing melting or sliding off the cupcakes?
Make sure your cupcakes are completely cooled before icing. Use decorator icing that’s thick enough to hold its shape, and pipe in a cool room if possible. Letting cupcakes sit to firm up also helps maintain your designs.
-
Can I make these cupcakes ahead of time?
Yes! Bake the cupcakes and store them airtight for a day or two, then decorate on the day you want to serve. This keeps the colors fresh and icing neat.
-
What tips do you have for piping facial features if I’m new to decorating?
Practice on parchment paper first to get comfortable with squeezing the bag. Use smaller tips for fine lines and bigger tips for filling areas. Don’t worry about perfection—charm is in the imperfections, especially for Halloween!
Final Thoughts
I absolutely love how this Halloween Emoji Cupcakes Recipe brings a sparkle of joy and whimsy to my kitchen and party table every year. The smiles and laughter when my family sees the little faces never get old, and the best part is how simple it is to pull off. Trust me, once you try this, you’ll find yourself looking for any reason to bake these charming cupcakes again! Don’t hesitate—grab your favorite cake mix, some colorful icing, and let the decorating fun begin. You’ve got this!
Print
Halloween Emoji Cupcakes Recipe
- Prep Time: 25 minutes
- Cook Time: 18 minutes
- Total Time: 43 minutes
- Yield: 24 cupcakes
- Category: Dessert
- Method: Baking
- Cuisine: American
Description
Celebrate Halloween with these fun and festive Halloween Emoji Cupcakes, decorated with colorful icing to create spooky characters like ghosts, devils, pumpkins, Frankenstein, Dracula, and zombies. Perfect for parties, these cupcakes combine classic cake baking with creative icing techniques to bring your favorite Halloween emojis to life.
Ingredients
Cake and Icing Colors
- Favorite Cake Mix or Recipe
- Lemon Yellow Icing Color, 1 oz.
- Lemon Yellow Gel Food Coloring, 1 oz.
- Leaf Green Icing Color, 1 oz.
- Leaf Green Gel Food Coloring, 1 oz.
- Brown Icing Color, 1 oz.
- Brown Gel Food Coloring, 1 oz.
- Ivory Icing Color, 1 oz.
- Ivory Gel Food Coloring, 1 oz.
- Black Icing Color, 1 oz.
- Black Gel Food Coloring, 1 oz.
- Rose Icing Color, 1 oz.
- Rose Gel Food Coloring, 1 oz.
- Violet Icing Color, 1 oz.
- Violet Gel Food Coloring, 1 oz.
- Orange Icing Color, 1 oz.
- Orange Gel Food Coloring, 1 oz.
- Christmas Red Icing Color, 1 oz.
- Christmas Red Gel Food Coloring, 1 oz.
- Red-Red Icing Color, 1 oz.
- Red-Red Gel Food Coloring, 1 oz.
- White Decorator Icing – 4.5 lb.
- Creamy White Decorator Icing, 4 lb. Tub
Instructions
- Bake Cupcakes: Prepare your cake batter according to your favorite cake mix or recipe instructions. Portion the batter into cupcake liners colored purple, green, and orange for a festive look, then bake until a toothpick inserted comes out clean. Let the cupcakes cool completely before decorating.
- Tint Icing: To create the colors needed for decorating, mix the following color combinations in 1/4 cup increments each: Leaf Green and Lemon Yellow to get green; Red-Red and Christmas Red for red; Violet and Rose for purple; Brown and Ivory for brown. Separately, tint 1/4 cup each of icing orange and black using the respective colors. Reserve the remaining icing as white for details.
- Decorate Cupcakes: Smoothly ice each cupcake using a spatula and the colored icings in red, green, purple, orange, and brown. Use a decorating bag fitted with tip 6 filled with white icing to outline and fill ghost shapes, smoothing with a spatula.
- Prepare Decorating Bags: Fill four decorating bags with tip 3 with small amounts of green, black, white, and red icing separately. Fill three decorating bags with tip 5 with remaining red, green, and black icing separately, preparing them for detailed piping work.
- Devil Cupcakes: Pipe facial features using black icing with decorating tip 3 to give your devil cupcakes their signature look.
- Ghost Cupcakes: Use white icing with tip 6 to pipe eyes. Add facial features with black icing using tip 3 for an eerie ghostly effect.
- Pumpkin Cupcakes: Pipe stems with green icing using tip 5, and use black icing with tip 3 to create expressive pumpkin facial features.
- Frankenstein Cupcakes: Use black icing with tip 5 to pipe hair, green icing with tip 3 for the scar, white icing with tip 6 for the mouth, and black icing with tip 3 for facial features and teeth to craft Frankenstein’s iconic look.
- Dracula Cupcakes: Pipe hair and facial features with black icing, using tip 5 for hair and tip 3 for features. Use red icing with tip 3 to add heart-shaped eyes, and white icing with tip 3 to detail teeth.
- Zombie Cupcakes: Create blood effects by piping red icing with tip 5, and use black icing with tip 3 to add zombie facial features for a spooky finish.
Notes
- Use stiff decorator icing for best piping results.
- Cooling cupcakes completely before icing prevents melting and sliding of icing.
- Experiment with different cake flavors to match your party theme.
- Tip sizes are essential for creating precise decorations; ensure you have the correct sizes before starting.
- Store decorated cupcakes in a cool place or refrigerate to maintain icing texture and prevent melting.
- If you don’t have all colors, use gel food coloring to mix your desired shades.
Nutrition
- Serving Size: 1 cupcake
- Calories: 280
- Sugar: 24g
- Sodium: 180mg
- Fat: 12g
- Saturated Fat: 3.5g
- Unsaturated Fat: 6g
- Trans Fat: 0g
- Carbohydrates: 38g
- Fiber: 1g
- Protein: 2g
- Cholesterol: 35mg
