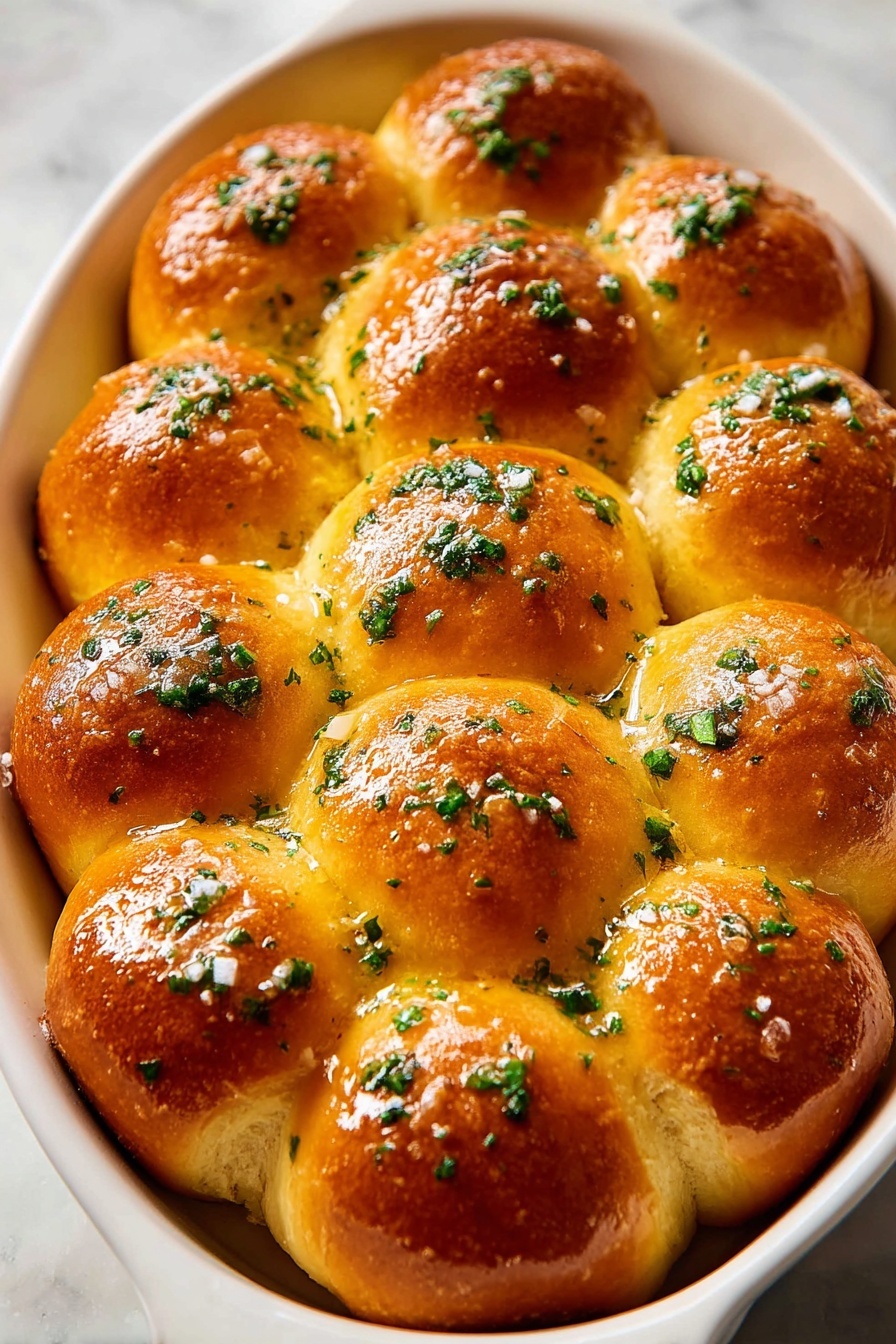
If you’ve ever wished for the perfect homemade roll to accompany your dinner, you’re going to adore this Garlic Butter Dinner Rolls Recipe. I absolutely love how soft, fluffy, and buttery these rolls turn out every single time. They’re comforting and flavorful—exactly what I want on my dinner table, especially on cozy nights or when guests come over. Stick around, and I’ll guide you step-by-step so your rolls come out bakery-worthy, even if you’ve never kneaded dough before!
Why You’ll Love This Recipe
- Soft and Fluffy Texture: The rolls are delicately tender inside thanks to the warm milk and yeast combination.
- Bursting with Garlic Butter Flavor: Brushing the rolls with a fresh garlic butter and parsley mixture right out of the oven gives them unbeatable aroma and taste.
- Easy to Make: Whether you use your hands or a stand mixer, the dough is soft and forgiving, perfect for beginners.
- Perfect for Any Occasion: These rolls can elevate a weeknight meal or impress at a holiday feast.

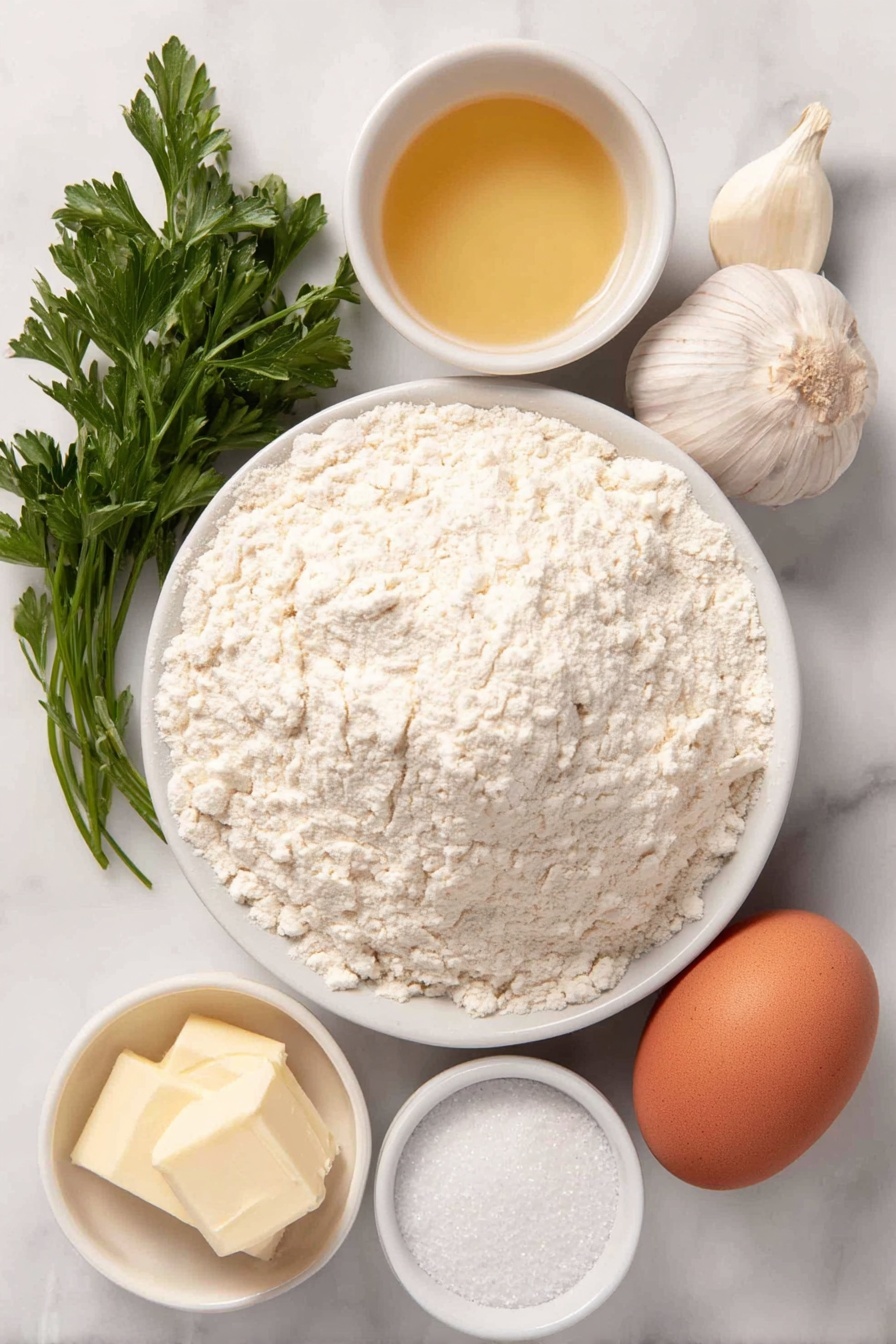
Ingredients You’ll Need
The magic of these garlic butter dinner rolls starts with simple, quality ingredients that work beautifully together. You’ll want fresh yeast—that’s where the fluffiness begins—and fresh garlic for that punch of flavor. I always pick whole milk for richness, but skimmed works just fine if you want something lighter.
- Warm Milk: It activates the yeast; make sure it’s warm to the touch but not boiling.
- Sugar: Feeds the yeast and helps the dough rise nicely.
- Active Dry Yeast: The secret to the soft, fluffy texture.
- Vegetable Oil: Keeps the rolls moist and extends freshness.
- Egg: Adds softness and richness to the dough.
- Salt: Brings out flavors and balances sweetness.
- Bread Flour (or All-Purpose Flour): Bread flour’s higher protein content delivers better dough elasticity.
- Butter: Used for melting with garlic—adds that irresistible aroma and shine.
- Garlic Clove: Freshly pressed garlic gives that authentic savory zing you want.
- Fresh Parsley: Adds a fresh, herbaceous note on top of the buttery richness.
Variations
I love how flexible this Garlic Butter Dinner Rolls Recipe is—you can tweak it in small ways to suit your family’s taste or dietary needs. I sometimes swap out fresh parsley for rosemary or add a little grated parmesan to the butter mixture for an extra savory kick.
- Herb Variations: I enjoy adding thyme or oregano with the parsley for a more aromatic roll experience.
- Vegan Option: Swap the egg with a flaxseed “egg” and use vegan butter instead of regular butter—still tastes fantastic.
- Whole Wheat Flour: For a heartier option, I’ve used whole wheat flour in half the quantity, which adds a nutty flavor without sacrificing softness.
- Cheesy Butter Rolls: Stir in shredded cheddar or mozzarella into the dough or butter topping for cheesy goodness that my family always requests.
How to Make Garlic Butter Dinner Rolls Recipe
Step 1: Bloom That Yeast
This first step is where the magic starts—mix your warm milk, sugar, and active dry yeast in a small bowl and let it sit for about 5 minutes. You’ll see the yeast foam and bubble up, which tells you it’s alive and kicking. If it doesn’t bubble, your yeast might be expired or the milk too hot, so swap it out.
Step 2: Mix and Knead the Dough
After your yeast blooms, stir in vegetable oil, salt, and one egg, then gradually add this liquid mixture to the flour. Mix until it forms a rough dough, then knead it on a floured surface until it’s smooth and elastic—about 8 to 10 minutes if you’re using your hands. I used to hate kneading, but I discovered that a lightly floured countertop and a little patience make all the difference! If you’re using a stand mixer, hook it up and knead for about 5 minutes—easy peasy.
Step 3: First Rise—Patience is Key
Once your dough is kneaded perfectly (soft but not sticky to the touch), oil your bowl lightly, pop the dough back in, cover with plastic wrap and a towel, and set it somewhere warm. I learned that letting the dough triple in size is a more reliable way to know it’s ready, rather than relying strictly on time. This usually takes 1 to 1.5 hours, depending on your kitchen temperature.
Step 4: Shape and Second Rise
After the dough has doubled or tripled, turn it out onto a floured surface, divide into 16 equal pieces (weighing them helps but isn’t necessary). Roll each piece into a smooth ball and place them spaced out into a well-buttered 9×13 inch baking pan. Cover with a tea towel and let them rise again for about 30 minutes—this little proof allows the rolls to puff up perfectly!
Step 5: Bake and Garlic Butter Finish
Brush your rolls with a beaten egg—that’s what gives them the beautiful golden color—and bake at 180°C (350°F) for about 20-25 minutes until they’re golden and irresistible. While they bake, melt your butter and press your garlic directly into it; then stir in the fresh parsley. As soon as the rolls are out of the oven, generously brush them with this garlic butter mixture. Trust me, this step makes them next-level delicious and irresistible.
Pro Tips for Making Garlic Butter Dinner Rolls Recipe
- Milk Temperature Matters: Too hot will kill the yeast, too cold won’t activate it—about 110°F (43°C) is perfect.
- Dough Consistency: Knead until your dough feels soft yet springy. I gently press the dough with my finger, and if it springs back, you’re good to go.
- Don’t Rush the Proofing: Watching your dough triple in size is your best visual cue—air temperature influences timing more than the clock.
- Brush Immediately After Baking: For that ultra-soft crust and to lock in flavor, apply the garlic butter the moment the rolls come out warm from the oven.
How to Serve Garlic Butter Dinner Rolls Recipe

Garnishes
I usually sprinkle a little more fresh chopped parsley on top after brushing with garlic butter—it adds a pop of color and freshness. Sometimes a tiny pinch of flaky sea salt right after baking makes the buttery rolls shine even more. If you’re feeling indulgent, grated parmesan over the top is divine, too.
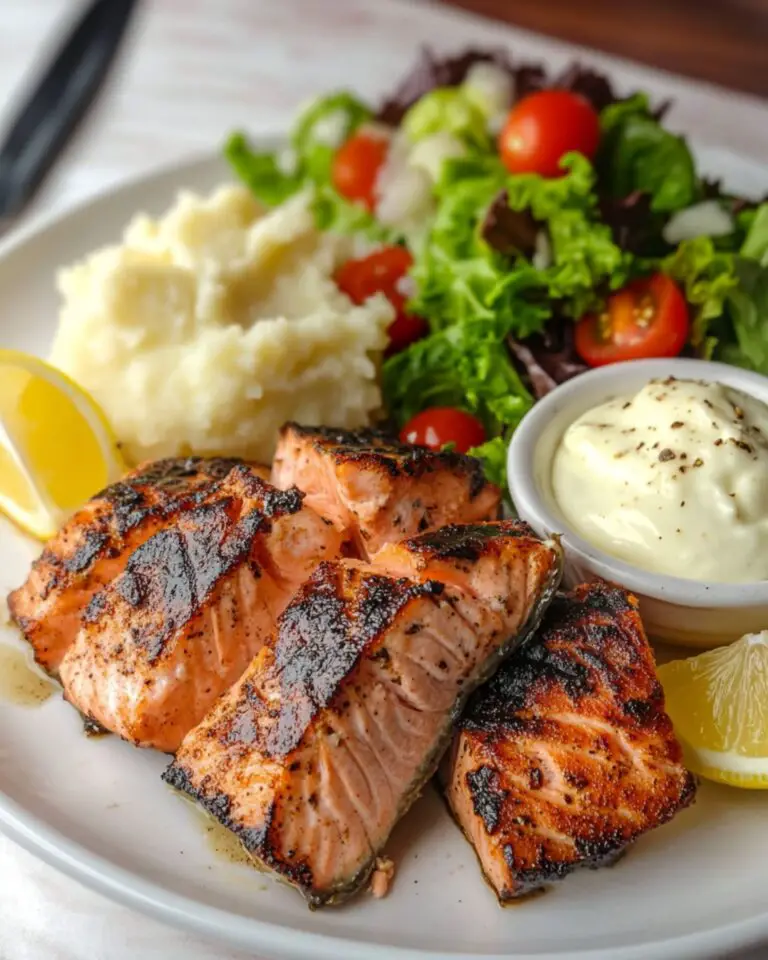
Side Dishes
My family goes crazy for these rolls alongside hearty soups, especially creamy tomato soup or classic chicken noodle. They also pair brilliantly with a good roast, chili, or even spaghetti night to soak up all those sauces.
Creative Ways to Present
For holiday dinners, I like to place these rolls in a round baking dish, forming a “flower” shape, so they pull apart easily and look fancy. Lining a bread basket with a linen napkin and stacking them warm makes for an inviting centerpiece. You could also turn this into garlic pull-apart rolls by baking them closer together in a cast-iron skillet.
Make Ahead and Storage
Storing Leftovers
If you have leftovers, I recommend storing your rolls in an airtight container or zip-top bag at room temperature. They’ll stay soft and fresh for about 2 days. For longer storage, refrigeration tends to dry them out, so I avoid the fridge when possible.
Freezing
These rolls freeze wonderfully! I like to freeze them before the second rise—shape them, place on a tray, flash freeze, and then transfer to freezer bags. When I want fresh rolls, I let them thaw and rise again before baking. You can also freeze fully baked rolls, then reheat when needed.
Reheating
To reheat, I wrap rolls in foil and warm them in the oven at 325°F (160°C) for about 10 minutes. This helps retain moisture and brings back that just-baked softness. Reapplying a bit of melted garlic butter after reheating is a little trick I learned that brings the flavor right back to life.
FAQs
-
Can I use all-purpose flour instead of bread flour for this Garlic Butter Dinner Rolls Recipe?
Yes, you can! Bread flour has more protein, which creates a stronger gluten structure for a chewier texture, but all-purpose flour works perfectly fine if that’s what you have on hand. The rolls might be a touch less chewy but still soft and delicious.
-
What’s the best way to tell if the yeast is active?
The yeast should bubble and foam in the warm milk and sugar mixture within 5 minutes. It looks a bit frothy or creamy on top. If this doesn’t happen, the yeast might be old or the milk temperature was off. Try with fresh yeast and correct milk temperature.
-
Can I make these rolls ahead of time?
Absolutely! You can prepare the dough and let it rise, then shape the rolls and refrigerate them overnight before baking. This slow rise enhances flavor and means you can bake fresh rolls with minimal morning effort.
-
Can I add cheese or other flavors to the dough?
Yes! Adding shredded cheese right into the dough or sprinkling it on top before the second rise creates a delicious twist. You can also incorporate herbs like rosemary or thyme depending on your mood.
-
How do I keep the rolls soft after baking?
Brushing them immediately after baking with garlic butter not only infuses flavor but also keeps the crust soft. Storing rolls covered in a clean kitchen towel also helps trap moisture and prevent drying.
Final Thoughts
I honestly can’t recommend this Garlic Butter Dinner Rolls Recipe enough. It’s one of those comfort recipes that’s both impressive and approachable, perfect whether you’re baking for your family or bringing something special to a potluck. I think you’ll love the way these rolls fill your kitchen with that irresistible garlic butter aroma and how satisfying it is to pull apart a warm, soft roll. Try it out—I’m confident it’ll become a staple in your recipe collection too!
Print
Garlic Butter Dinner Rolls Recipe
- Prep Time: 25 minutes
- Cook Time: 20 minutes
- Total Time: 2 hours 15 minutes
- Yield: 16 rolls
- Category: Bread
- Method: Baking
- Cuisine: American
Description
These Garlic Butter Dinner Rolls are soft, fluffy, and infused with rich garlic and parsley butter, making them the perfect accompaniment to any meal. Made with simple ingredients and an easy kneading process, these rolls rise twice for a light texture and are baked to a golden perfection before being brushed with aromatic garlic butter.
Ingredients
For the Dough
- 220ml / 1 cup warm milk, whole or skimmed
- 1½ tsp sugar
- 7g / 1 tbsp active dry yeast
- 3 tbsp vegetable oil
- 1 large egg
- ½ tsp salt
- 400g / 3 cups bread flour or all-purpose flour
For the Topping
- 1 egg, beaten (for brushing)
- 1 tbsp butter, melted
- 1 clove garlic, pressed
- 1 tbsp fresh parsley, chopped
Instructions
- Activate Yeast: In a small bowl, combine the warm milk, active dry yeast, and sugar. Let it stand for 5 minutes until the yeast blooms and becomes frothy, indicating it is active.
- Mix Wet Ingredients: Add the vegetable oil, salt, and one large egg to the yeast mixture. Mix well using a fork until combined.
- Form Dough: Pour the wet ingredients into the flour and mix until a rough dough forms. Transfer the dough onto a floured surface and knead by hand for 8-10 minutes until it becomes smooth and elastic. Alternatively, use a stand mixer with a dough hook: knead on low speed for 1 minute, then medium speed for 4 more minutes.
- First Proof: Lightly oil a clean bowl, place the dough inside, cover with plastic wrap and a towel. Let it rise in a warm place for 1 to 1.5 hours, until the dough triples in size.
- Preheat Oven: Preheat your oven to 180°C (350°F) while the dough is rising.
- Shape Rolls: Once risen, punch down the dough and turn it out onto a floured surface. Divide the dough into 16 equal portions. Shape each into smooth balls and place them evenly spaced (about 1 inch apart) in a well-buttered 9×13 inch baking pan.
- Second Proof: Cover the pan with a tea towel and let the dough balls rise again for 30 minutes until puffy.
- Prepare Garlic Butter: Melt 1 tablespoon of butter and mix in the pressed garlic and chopped fresh parsley. Set aside.
- Egg Wash and Bake: Brush the risen rolls with the beaten egg to give them a golden shine. Bake in the preheated oven for 20-25 minutes or until they turn golden brown on top.
- Brush with Garlic Butter: Remove the rolls from the oven and immediately brush the tops generously with the prepared garlic butter mixture to infuse flavor and soften the crust.
Notes
- Accurate measurement of ingredients is crucial for perfect dough texture and rising.
- A stand mixer with a dough hook makes kneading easier, but hand kneading is straightforward due to the soft dough.
- The dough should be soft and not sticky after kneading; adjust flour slightly if necessary.
- Proofing time depends on ambient temperature; the dough should triple in volume as the main indicator, not just time.
- Bread flour produces the best texture, but all-purpose or whole wheat flour can be used as alternatives.
- Brush the rolls with garlic butter while still hot to enhance flavor and soften the crust.
Nutrition
- Serving Size: 1 roll (about 50g)
- Calories: 150 kcal
- Sugar: 2 g
- Sodium: 180 mg
- Fat: 5 g
- Saturated Fat: 2 g
- Unsaturated Fat: 3 g
- Trans Fat: 0 g
- Carbohydrates: 22 g
- Fiber: 1 g
- Protein: 4 g
- Cholesterol: 30 mg


