
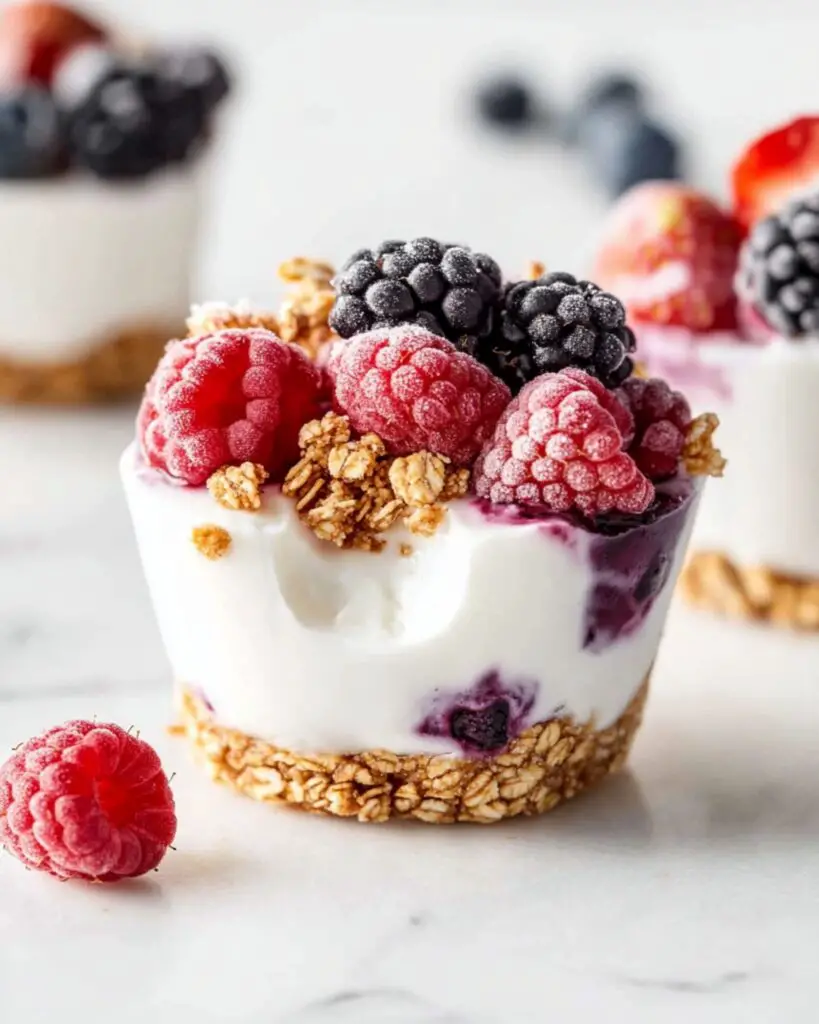
Fresh, fruity, and absolutely delightful, these Frozen Yogurt Granola Cups are about to become your go-to snack or breakfast for busy mornings. Imagine creamy Greek yogurt nestled over a chewy, naturally sweet granola base, finished with a crown of your favorite berries. They’re ready in minutes, incredibly simple to assemble, and make eating healthy downright irresistible. Plus, since you can keep them in the freezer, it’s like having a personal stash of wholesome treats just waiting for you at any time!
Why You’ll Love This Recipe
- Effortless Preparation: With just one bowl and a muffin pan, these granola cups come together in about 15 minutes—no oven required, and barely any cleanup.
- Customizable and Wholesome: Switch up the yogurt, fruit, or nut butter to suit your cravings and dietary needs. Each bite is loaded with nourishing oats, protein-rich Greek yogurt, and a drizzle of honey for that perfect whisper of sweetness.
- Perfect for Meal Prep: Make a batch ahead and enjoy a quick breakfast, snack, or even a healthy dessert all week long, straight from the freezer.
- Fun and Kid-Friendly: Colorful berries and finger-friendly portions make these an instant hit with kids (and adults who still love playing with their food).

Ingredients You’ll Need
Here’s everything you’ll want to gather for these easy frozen yogurt cups, plus a few notes and tips:
-
Oats: Old-fashioned rolled oats work best for heartiness and structure. Not instant oats!
Give the cups that classic, chewy granola bite. - Cinnamon: Adds a subtle warmth and makes everything smell inviting.
- Almond Butter: Acts as the binder for the granola base; creamy or crunchy both work. Try peanut or sunflower seed butter if you prefer.
- Honey: Sweetens naturally, but maple syrup or agave can be swapped in. Use a little more if your sweet tooth insists.
- Vanilla Extract: Enhances the overall flavor. Go extra on vanilla for a dessert vibe!
-
Greek Yogurt: Thick and protein-packed. Use plain for tanginess, vanilla for added sweetness, or a dairy-free alternative if needed.
For extra decadence, swirl in a little fruit puree or jam. -
Berries: Blueberries, raspberries, sliced strawberries—fresh or frozen work great. Let your favorites shine!
Other toppings, like chopped nuts, shredded coconut, or a handful of mini chocolate chips, are also fantastic.
Note: You’ll find the complete list of ingredients, along with their exact measurements, in the printable recipe card at the bottom of this post.
Variations
These cups are so easy to make your own:
- Nut Butter Swap: Use cashew or peanut butter, or a nut-free butter for allergies. Each adds its own special twist.
- Fruit Medley: Swap in diced peaches, kiwi, mango, or cherries instead of traditional berries.
- Yogurt Flavors: Try honey or coconut Greek yogurt for a new layer of flavor.
- Crunch Factor: Sprinkle in toasted pepitas, chia seeds, or slivered almonds into the granola mix.
- Choco Lovers: Stir mini chocolate chips into the oats for decadence, or drizzle melted dark chocolate over the cups before freezing.
How to Make Frozen Yogurt Granola Cups
Step 1: Mix Up Your Granola Base
In a mixing bowl, stir together your oats, cinnamon, almond butter, honey, and vanilla extract. You want the mixture to be sticky—if it’s dry, simply add a touch more almond butter or honey. The goal is a dough that holds when pressed but isn’t too wet.
Step 2: Form the Bases
Line a muffin pan with cupcake liners (this is essential for easy removal later). Add a spoonful of granola mixture to each liner and press down firmly with your fingers. You want a dense, even base that can hold up to the creamy yogurt on top.
Step 3: Layer the Yogurt
Spoon a generous dollop of Greek yogurt over each granola base. Smooth out the top with the back of your spoon for even coverage.
Step 4: Top with Berries
Now for the fun part—scatter berries across each cup. Push them in slightly so they stick as the cups freeze. If you’ve got leftover granola, sprinkle it on top for a little extra crunch.
Step 5: Freeze Until Set
Place your pan in the freezer and let everything set for at least 4 hours. This is the most challenging part: waiting! Once firm, remove and let thaw for a few minutes before serving—just enough so they’re perfectly creamy and easy to bite into.
Pro Tips for Making the Recipe
- Press the Granola Firmly: Use the bottom of a small cup or your fingers to pack the base tight—this makes a sturdy crust that won’t crumble.
- Line Your Pan: Don’t skip the muffin liners; they guarantee the cups release easily once frozen.
- Adjust Sweetness: Taste your yogurt before assembling. If it’s low in sugar, a drizzle of honey between layers can balance things out.
- Freeze Flat: Place the muffin pan on a level surface in your freezer to prevent any tipping or yogurt overflow.
How to Serve
Serve these delightful cups directly from the freezer after letting them thaw for a few minutes—they’re deliciously cold, creamy, and almost ice cream-like! Pair them with a hot coffee for breakfast-on-the-go, add to a packed lunch for a midday pick-me-up, or plate them on a platter for a brunch spread. For a swoon-worthy dessert, drizzle with extra honey or melted chocolate just before serving.
Make Ahead and Storage
Storing Leftovers
Keep leftovers in a sealed bag or container in the freezer. The cups stay fresh for up to 2 weeks and are always ready for snacking.
Freezing
Store in the freezer in a single layer until solid. Once frozen, transfer to a storage container or zip bag.
Reheating
No reheating needed! Just let them sit at room temperature for 5–10 minutes before eating for the ideal creamy texture.
FAQs
-
Can I use regular yogurt instead of Greek yogurt?
Absolutely. Regular yogurt works, but keep in mind it’s less thick, so the layers may be a bit softer and might need a little longer in the freezer to firm up.
-
How do I keep the granola base from sticking to the liners?
Using paper liners helps a lot, but if you still have trouble, silicone muffin moulds are fantastic for easy release—or lightly spray liners with nonstick spray.
-
Can I make these dairy-free?
Yes! Swap Greek yogurt for coconut, almond, or any plant-based yogurt you like. Choose a nut-free seed butter if you want to go totally nut-free, too.
-
Do I need to thaw them before eating?
It’s best to let the cups thaw for about 5 minutes after taking them out of the freezer—this softens the texture slightly and keeps the layers creamy, not icy.
Final Thoughts
Frozen Yogurt Granola Cups are the kind of recipe that makes taking care of yourself feel truly joyful. Quick to build, endlessly customizable, and just as satisfying for breakfast as for dessert, these cups are made for real life—busy mornings, after-school snacking, or treating yourself. Give them a try this week, and don’t be surprised if you find yourself reaching for one every day!
Print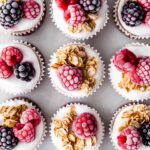
Frozen Yogurt Granola Cups Recipe
- Prep Time: 15 minutes
- Cook Time: 0 minutes
- Total Time: 15 minutes (plus 4 hours freezing time)
- Yield: 8–10 cups
- Category: Snacks
- Method: No-cook
- Cuisine: American
- Diet: Vegetarian
Description
Frozen Yogurt Granola Cups are a delicious and healthy make-ahead snack or breakfast option, featuring a simple homemade granola base, creamy Greek yogurt, and a fruity berry topping. These chilled cups are easy to prepare, customizable, and perfect for meal prep or satisfying cravings on hot days.
Ingredients
Granola Base
- 3/4 cup oats
- 1/2 tsp cinnamon
- 1/4 cup almond butter
- 3-4 tbsp honey (to taste)
- 1 tsp vanilla extract
Filling & Topping
- 1 1/2 cups Greek yogurt*
- Berries of choice for topping
Optional
- Additional granola for sprinkling on top
Instructions
- Make the Granola Base: In a mixing bowl, combine oats, cinnamon, almond butter, honey, and vanilla extract. Stir until the mixture forms a sticky dough. If it seems dry, add a bit more almond butter or honey to help it come together.
- Prepare the Muffin Pan: Line a muffin pan with muffin liners. Place a spoonful of the granola mixture into the bottom of each liner. Press down firmly with your fingers to create a compact and sturdy granola base for each cup.
- Add the Yogurt Layer: Spoon a generous amount of Greek yogurt over the granola base in each muffin cup, smoothing out the surface.
- Top with Berries: Add your choice of fresh berries onto the yogurt layer. If you have leftover granola, sprinkle it over the top for added crunch.
- Freeze: Place the muffin pan in the freezer and let the cups set for at least 4 hours, or until firm.
- Serve: Before serving, let the cups sit at room temperature for a few minutes to soften slightly for easier eating. Serve chilled and enjoy!
Notes
- *You can use any type of Greek yogurt, including flavored or non-dairy alternatives according to your preference.
- Add other toppings like chopped nuts, seeds, or shredded coconut for extra texture and flavor.
- For a vegan version, use plant-based yogurt and maple syrup instead of honey.
- Cups can be stored in an airtight container in the freezer for up to 2 weeks.
- To prevent sticking, make sure to use muffin liners or silicone cups.
Nutrition
- Serving Size: 1 cup
- Calories: 120
- Sugar: 7g
- Sodium: 20mg
- Fat: 4g
- Saturated Fat: 0.5g
- Unsaturated Fat: 3g
- Trans Fat: 0g
- Carbohydrates: 15g
- Fiber: 2g
- Protein: 5g
- Cholesterol: 2mg
