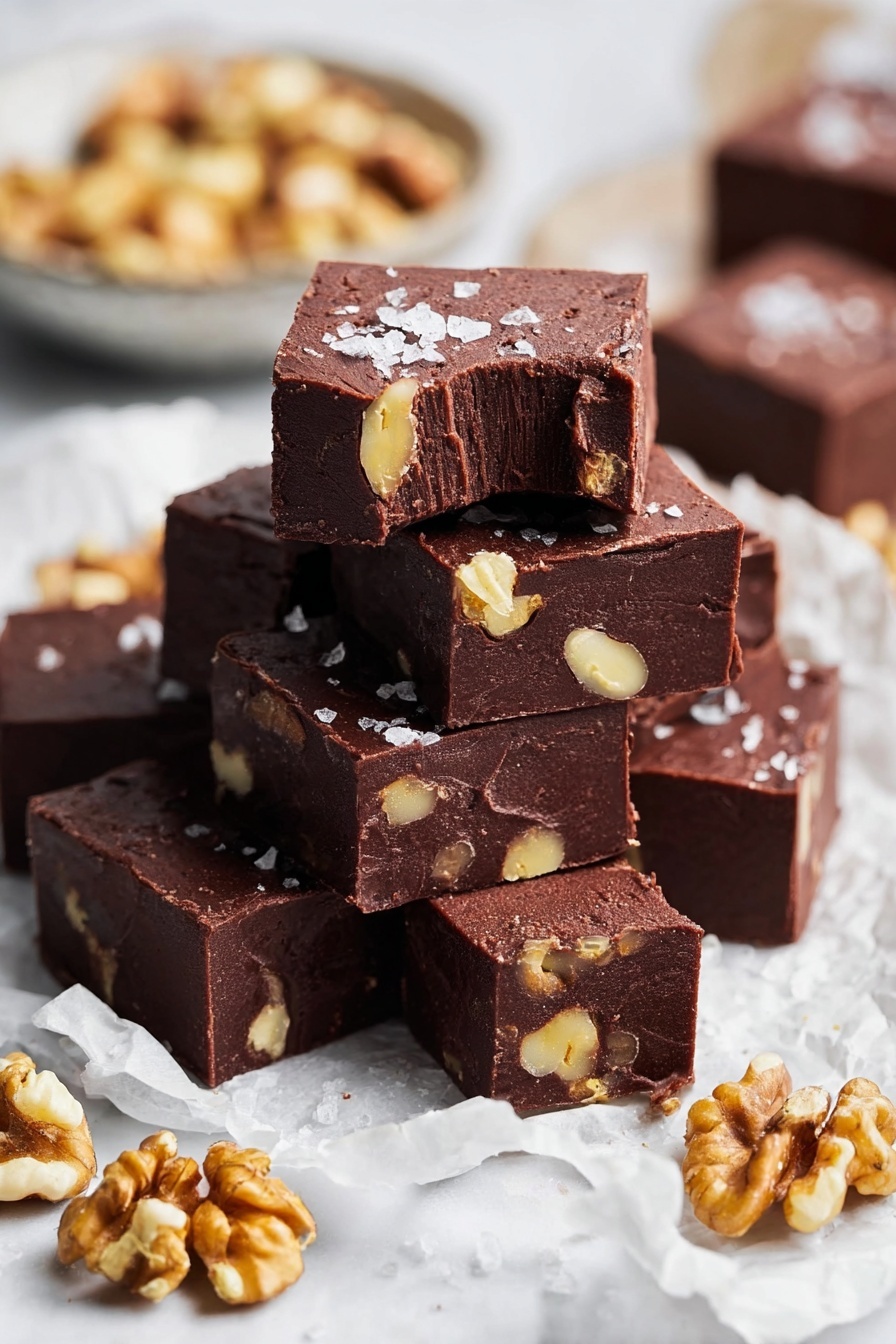
If you’ve ever wanted to make rich, creamy fudge without the hassle or guesswork, I’ve got just the thing for you. This Foolproof Chocolate Fudge Recipe is exactly that—foolproof! It’s the recipe I turn to when I want a guaranteed crowd-pleaser that’s smooth, decadent, and melts in your mouth every single time. Stick around, because I’m about to share all my tips and tricks so you can nail this sweet treat like a pro.
Why You’ll Love This Recipe
- Super Simple: Just a handful of ingredients come together with minimal effort.
- Reliable Results: I’ve made it dozens of times and it turns out perfectly every time.
- Rich & Creamy Texture: The combination of sweetened condensed milk and butter gives it a luscious mouthfeel.
- Endless Customization: Easily add nuts, sea salt, or your favorite mix-ins to make it your own.

Ingredients You’ll Need
The magic of this Foolproof Chocolate Fudge Recipe lies in how simple yet rich the ingredients are. Using sweetened condensed milk instead of evaporated milk gives the fudge its creamy sweetness, while good quality semi-sweet chocolate ensures a perfect balance of chocolatey flavor without being too bitter or too sweet.
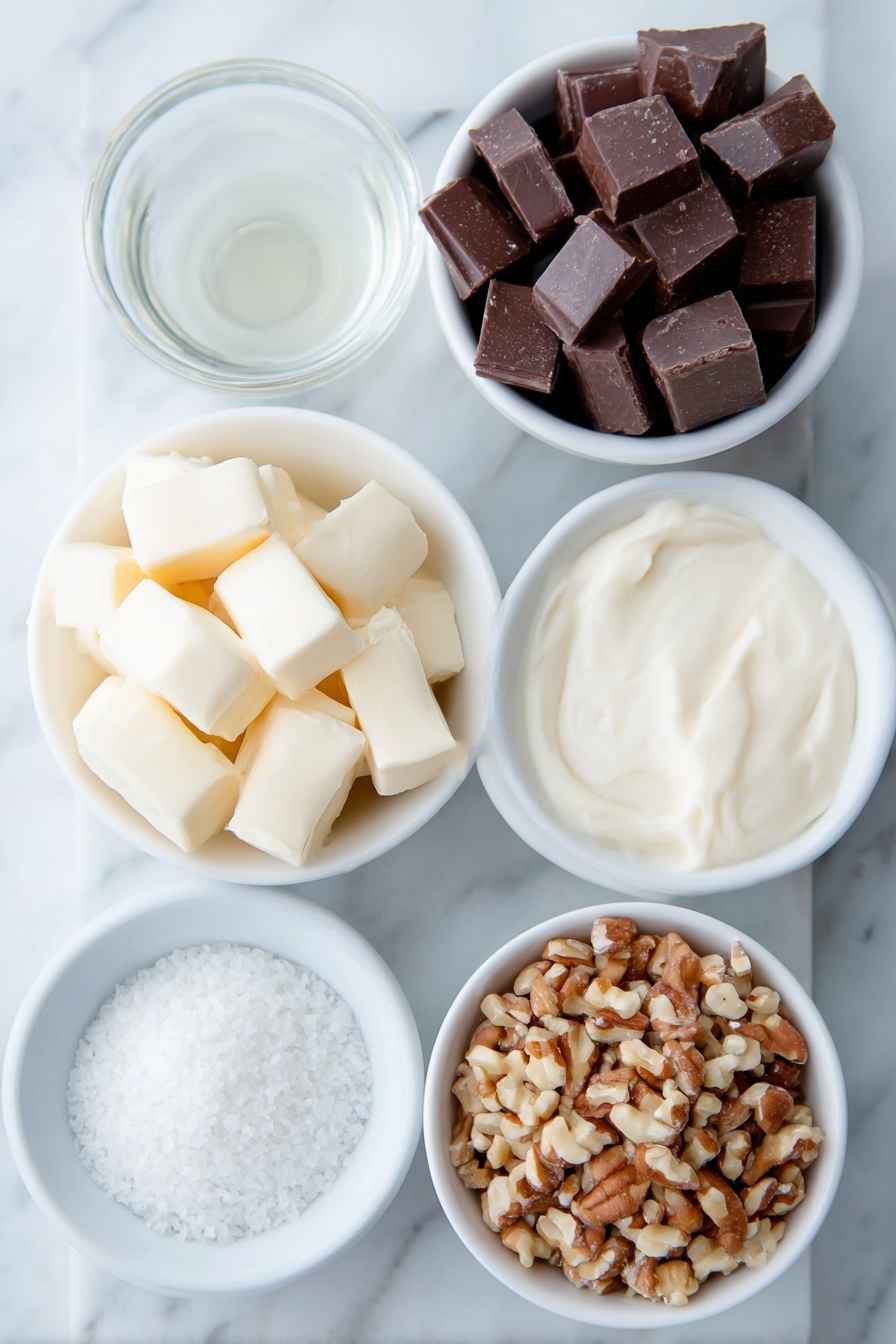
- Sweetened Condensed Milk: This is the sweet, creamy base of your fudge—make sure it’s not evaporated milk, which won’t give the right texture.
- Pure Vanilla Extract: Adds depth and warmth to the chocolate, bringing out more complex flavors.
- Semi-Sweet Chocolate: I recommend chopping your own for even melting—pre-chopped chips can work but the texture won’t be quite as smooth.
- Unsalted Butter: Adds richness and helps bind everything together smoothly.
- Flaky Sea Salt (optional): A sprinkle on top can jazz up the flavor by balancing out the sweetness.
- Chopped Nuts or Crushed Candies (optional): For texture and extra flavor—choose your favorites like pecans, walnuts, or crushed peppermint.
Variations
I love tweaking this Foolproof Chocolate Fudge Recipe depending on the occasion or mood. Honestly, it’s so versatile that experimenting with mix-ins or toppings keeps it exciting, and it always turns out great.
- Nutty Delight: Adding toasted pecans or walnuts gives it a wonderful crunch—my family goes crazy for this version during the holidays.
- Mint Chocolate: Stir in crushed peppermint candies or a drop of peppermint extract for a festive twist.
- Salted Caramel: Swirl in some caramel sauce before chilling, then sprinkle flaky sea salt on top—a personal favorite that feels extra fancy.
- Dairy-Free Version: Try coconut condensed milk and vegan butter substitutes if you’re avoiding dairy, but results will be a bit different.
How to Make Foolproof Chocolate Fudge Recipe
Step 1: Prep Your Pan and Ingredients
Start by lightly greasing an 8×8-inch baking pan and lining it with parchment paper or aluminum foil, leaving some overhang on the sides. This overhang is going to be your best friend when it’s time to lift the fudge out—you’ll thank me later. Also, have all your ingredients measured and ready to go because fudge waits for no one!
Step 2: Melt Your Fudge Base Using a Double Boiler
In a heatproof bowl, combine the sweetened condensed milk, vanilla extract, chopped chocolate, and butter. Fill a saucepan with about a quarter of water and bring it to a gentle simmer. Place your bowl on top of the saucepan to create a double boiler—avoid letting the bottom of the bowl touch the water. Stir constantly with a rubber spatula as the chocolate begins to melt, keeping an eye on the texture.
This part is key: stop heating when the chocolate is almost completely melted but still has a few tiny pieces left—this usually takes around 4 minutes. If you let it go too long, your fudge could separate and get greasy, which is what happened to me the first time I rushed this step!
Step 3: Stir Until Smooth and Pour
Remove the bowl from the heat and keep stirring for another 2 minutes until the mixture is perfectly silky and smooth. Now’s the time to fold in any mix-ins you like—nuts, crushed candies, or just leave it plain for classic chocolate fudge. Then, scrape the fudge into your prepared pan, spreading it evenly with your spatula.
Step 4: Chill and Cut
Refrigerate the fudge for at least 2 hours, or until it’s completely set. When it’s ready, run a butter knife gently around the edges of the pan to loosen the fudge. Lift it out using the parchment overhang and peel off the paper. Then, slice your fudge into bite-sized squares—or bigger, if you prefer. Pro tip: warming your knife under hot water and drying it before cutting helps achieve cleaner cuts.
Pro Tips for Making Foolproof Chocolate Fudge Recipe
- Use a Double Boiler: It keeps your chocolate from burning and gives you a smooth texture every time; direct heat is your fudge’s enemy.
- Don’t Overheat: Removing the bowl when chocolate is almost melted prevents graininess and greasy texture.
- Line Your Pan: For easy removal, always line with parchment or foil, with some overhang on the sides.
- Cutting Clean Slices: Warm your knife under hot water and wipe it dry before slicing fudge to get neat, clean edges.
How to Serve Foolproof Chocolate Fudge Recipe

Garnishes
I usually sprinkle a little flaky sea salt right after spreading the fudge but before chilling—it adds that perfect salty-sweet contrast that I find irresistible. If I’m feeling festive, I toss some crushed peppermint candies or a few whole toasted almonds on top. This simple step makes your fudge look special and tastes even better.
Side Dishes
While fudge is a treat on its own, I love pairing it with fresh fruit like strawberries or a scoop of vanilla ice cream. It’s also fantastic alongside a hot cup of coffee or rich cocoa, turning any snack time into a little celebration.
Creative Ways to Present
For gift-giving or parties, I like placing fudge squares in mini cupcake liners lined up on a pretty platter or inside a decorative box tied with ribbon. For a special touch, drizzle some white chocolate over the top before chilling. It’s these small extras that always earn compliments!
Make Ahead and Storage
Storing Leftovers
Once cut, keep your fudge stored in an airtight container in the fridge to preserve its freshness and texture—it’ll stay perfect for up to one month. I use stacked containers with parchment paper between layers to avoid sticking.
Freezing
If you want to keep fudge longer, it freezes beautifully. Wrap pieces individually in plastic wrap and place them in a freezer-safe airtight container. When you’re ready, just thaw in the fridge overnight for rich, creamy fudge that tastes freshly made.
Reheating
I typically eat fudge cold or at room temperature, but if you want it softer, warming it for a few seconds in the microwave (about 5-8 seconds) works well. Just be careful to avoid overheating or it may become too soft and lose its texture.
FAQs
-
Can I use chocolate chips instead of chopped chocolate for this fudge?
Absolutely! Chocolate chips can work in a pinch, but I prefer chopping a chocolate bar because it melts more evenly and gives your fudge a perfectly smooth texture. Chips often contain stabilizers that can affect the melting process.
-
Why is my fudge grainy or crumbly?
Grainy or crumbly fudge usually happens when the chocolate overheats or if it’s stirred too aggressively during melting. Using a double boiler and removing the mixture when the chocolate is almost melted helps prevent this. Also, stir gently to keep the mixture smooth and avoid seizing.
-
Can I add flavors like espresso or chili powder?
Yes! Fudge is a fantastic base for experimenting with flavors. A teaspoon of espresso powder amplifies the chocolate taste, while a pinch of chili powder adds a warm, unexpected kick. Just add them when stirring the smooth mixture before pouring into the pan.
-
How do I prevent fudge from sticking to the pan?
Lining your pan with parchment paper or foil and greasing it lightly ensures your fudge lifts right out without sticking. The overhanging edges also make removal super easy, so you don’t disturb your perfect surface when cutting.
Final Thoughts
This Foolproof Chocolate Fudge Recipe has truly become my go-to whenever I want a reliable, fuss-free treat that always gets rave reviews. I remember the first time I nailed it—and how proud I felt bringing it to a family gathering where everyone asked for the recipe. Now, I’m sharing all my secrets with you so you can enjoy making it as much as eating it. Give it a try—it’s one of those recipes that’ll keep you coming back for more.
Print
Foolproof Chocolate Fudge Recipe
- Prep Time: 10 minutes
- Cook Time: 10 minutes
- Total Time: 2 hours 20 minutes
- Yield: 1 – 8-inch pan, approximately 16 small squares
- Category: Dessert
- Method: Stovetop
- Cuisine: American
Description
This Foolproof Chocolate Fudge recipe creates a rich, creamy, and perfectly smooth homemade fudge that’s easy to make using simple ingredients like sweetened condensed milk, semi-sweet chocolate, and butter. The fudge is gently melted in a double boiler to prevent burning and ensure a velvety texture. Optional additions such as chopped nuts or a sprinkle of flaky sea salt add delightful texture and flavor contrast. Perfect for gifting or enjoying as a decadent treat, this fudge sets in the refrigerator and can be stored for up to a month or frozen for longer preservation.
Ingredients
Fudge Base
- 1 14-ounce can sweetened condensed milk (NOT evaporated milk)
- 1 teaspoon pure vanilla extract
- 20 ounces semi-sweet chocolate, roughly chopped
- 3 tablespoons unsalted butter, cut into 1/2-inch pieces, at room temperature
Optional Mix-ins
- Flaky sea salt, for sprinkling
- 1/2 cup chopped nuts or crushed candies
Instructions
- Prepare the Pan: Lightly grease an 8×8-inch baking pan, then line it with parchment paper or aluminum foil, allowing the excess paper to overhang the sides for easy removal later. Set aside.
- Combine Ingredients: In a large, heatproof bowl, combine sweetened condensed milk, vanilla extract, chopped semi-sweet chocolate, and unsalted butter. Set the bowl aside.
- Heat Water for Double Boiler: Fill a saucepan about 1/4 full with water and bring it to a boil. Once boiling, reduce the heat to a barely simmering level.
- Melt the Mixture: Place the heatproof bowl containing the fudge ingredients over the saucepan, ensuring the bottom of the bowl does not touch the water. Stir continuously with a rubber spatula until the chocolate is almost fully melted, leaving just a few small pieces, about 4 minutes. Be careful not to overheat or melt fully on the heat to avoid greasy fudge caused by separation.
- Finish Melting and Smooth: Remove the bowl from the heat and continue stirring until the chocolate is completely melted and the mixture is smooth, approximately 2 more minutes.
- Add Mix-ins and Transfer: Stir in any optional mix-ins (chopped nuts or crushed candies) if using. Then scrape the fudge mixture into the prepared baking pan and spread evenly with a spatula.
- Chill to Set: Refrigerate the fudge until completely set, about 2 hours.
- Cut and Serve: Once set, gently run a butter knife around the edges of the pan to loosen the fudge. Lift the fudge out using the overhanging parchment or foil, peel off the lining, and transfer to a cutting board. Slice into squares and serve. Store leftovers in the refrigerator for up to 1 month or freeze in an airtight container for up to 2 months.
Notes
- Use sweetened condensed milk, not evaporated milk, for the proper creamy texture and sweetness.
- Do not overheat the chocolate mixture in the double boiler to prevent the fudge from becoming greasy due to chocolate separation.
- Allow the fudge to set thoroughly in the refrigerator for best slicing results.
- Optional flaky sea salt on top enhances the chocolate flavor with a savory contrast.
- Experiment with mix-ins like nuts or crushed candies to customize your fudge.
- Store fudge well-wrapped or in an airtight container to maintain freshness.
Nutrition
- Serving Size: 1 small square (approx. 30g)
- Calories: 130
- Sugar: 18g
- Sodium: 35mg
- Fat: 6g
- Saturated Fat: 4g
- Unsaturated Fat: 2g
- Trans Fat: 0g
- Carbohydrates: 20g
- Fiber: 1g
- Protein: 2g
- Cholesterol: 15mg


