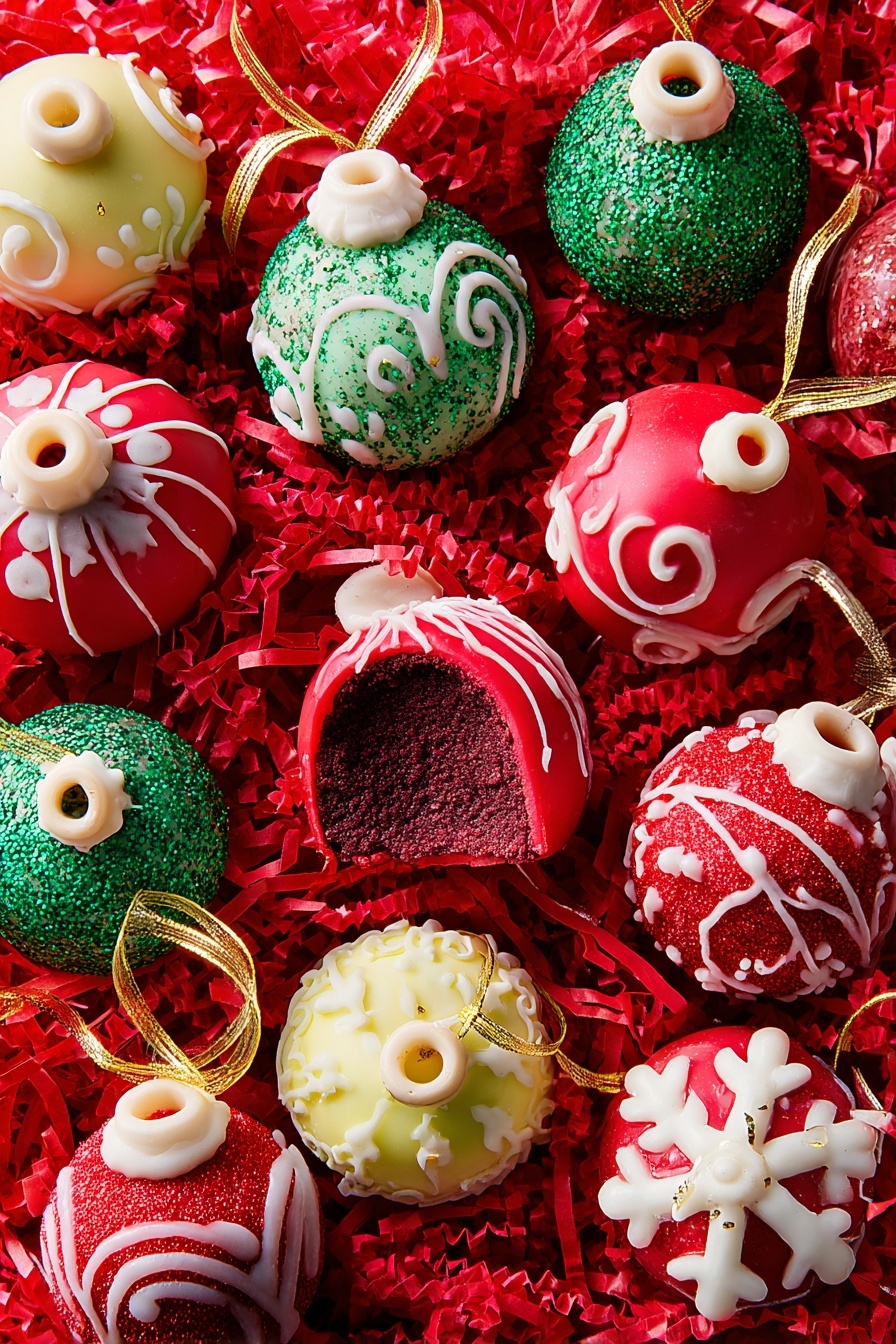
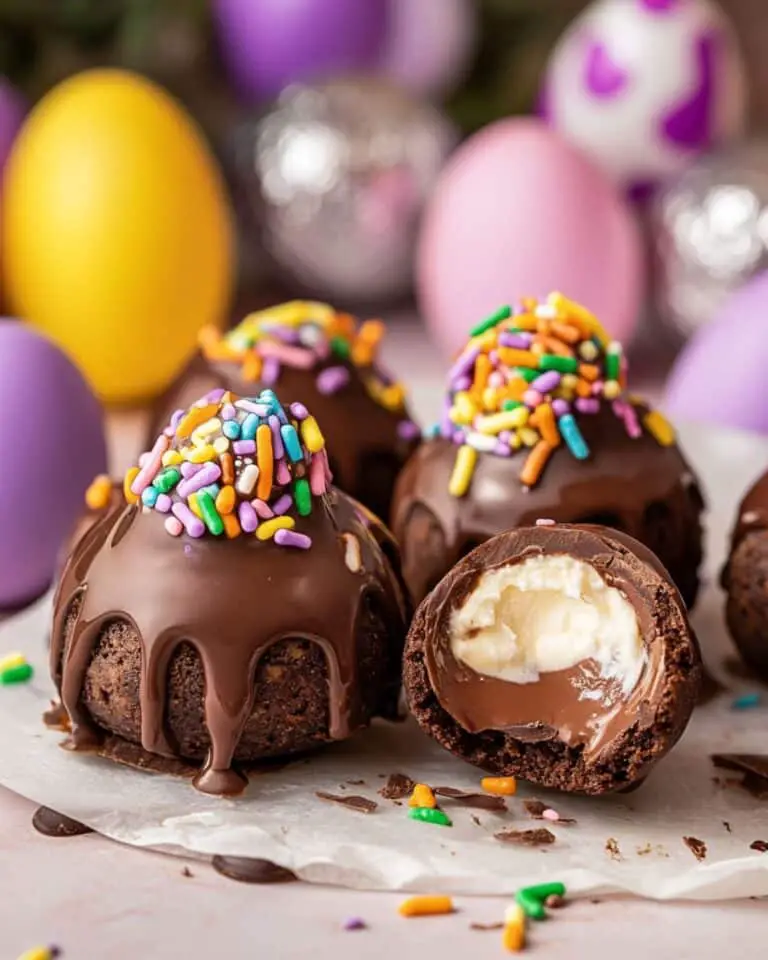
If you’re looking for a fun, festive treat that doubles as charming holiday decor, I’m excited to share this deliciously creative Festive Cake Ball Ornaments Recipe with you! These colorful, bite-sized cake balls shaped like ornaments are not only adorable but also melt-in-your-mouth delightful. Trust me, once you try these, you’ll want to make them every holiday season — plus, they’re a total hit whether you’re gifting them, decorating your table, or snacking throughout the party.
Why You’ll Love This Recipe
- Fun and Festive: These cake ball ornaments are playful, colorful, and perfect for holiday cheer or gifting.
- Simple Ingredients: You probably have everything on hand—or can easily get it—for a quick festive treat.
- Kid-Friendly Activity: Decorating these is a fun way to involve little helpers during the holidays.
- Deliciously Moist and Creamy: The cream cheese frosting folded into the cake balls adds a luscious texture and flavor you’ll crave.

Ingredients You’ll Need
These ingredients come together to create that iconic festive look with classic flavors. You’ll appreciate using red velvet cake for a vibrant base, then turning those cake crumbs into festive bites coated in candy melts with fun finishes. When shopping, pick good-quality candy melts, as they give the prettiest shine and smooth finish.
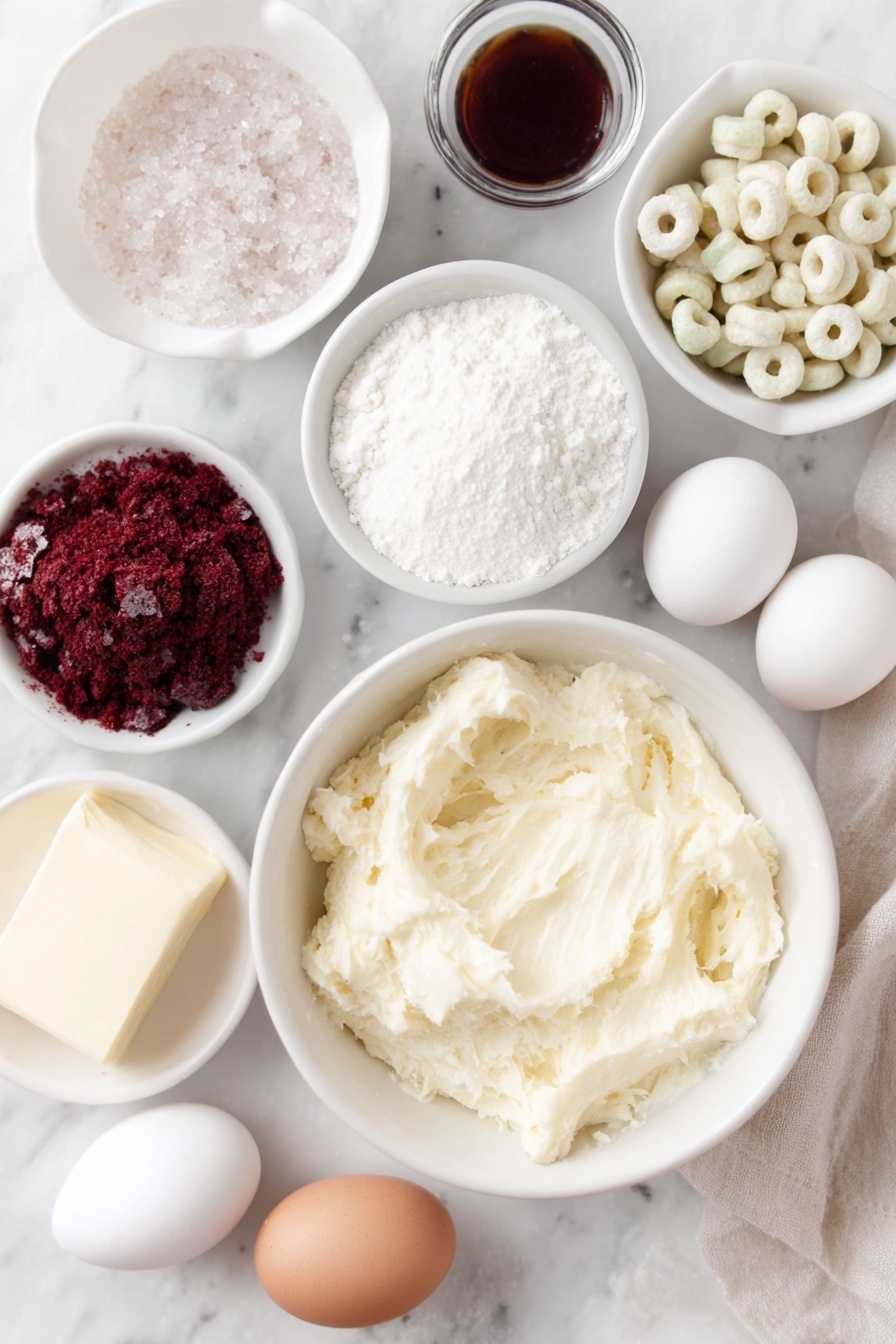
- Red velvet cake mix: This gives the cake balls their beautiful color and tasty foundation, plus it keeps things quick.
- Cream cheese: Adds creaminess and a slight tanginess that balances the sweetness perfectly.
- Unsalted butter: Softened for smooth mixing into your frosting – it helps bind the balls well.
- Confectioners’ sugar: Sweetens and thickens the frosting to the right consistency.
- Pure vanilla extract: A classic flavor enhancer to brighten all the sweetness.
- Kosher salt: Just a pinch to cut through the sugar and deepen the flavor.
- Frosted Cheerios: The secret to making those tiny ornament hooks – you’ll see why they’re perfect!
- Green, red, and white candy melts: These melt smoothly and snap to create a perfect candy shell coating.
- Sanding sugar: For a little sparkle and texture on your finished ornaments.
- Cooking spray: For greasing the cake pan and preventing sticking.
Variations
I love mixing things up with this Festive Cake Ball Ornaments Recipe because it’s so versatile. You can easily customize colors, flavors, or decorative touches to fit your holiday vibe or dietary needs. Feel free to experiment and make it your own!
- Flavor swaps: Try using a chocolate cake mix or spice cake for a different festive twist—I once made peppermint cake balls that were a huge hit!
- Dip colors: Feel free to replace candy melts with other colors (like metallic golds or silvers) to match your tree décor.
- Decoration extras: Add edible glitter, mini sprinkles, or crushed candy canes to the coating before it hardens for extra holiday flair.
- Dairy-free option: Use vegan cream cheese and dairy-free butter substitutes to keep these festive balls inclusive for all friends.
How to Make Festive Cake Ball Ornaments Recipe
Step 1: Bake the Cake Base
Preheat your oven to 350°F and grease a 13” x 9” pan with cooking spray to prevent sticking. Prepare the red velvet cake mix according to the box directions—this makes it super easy and foolproof. Pour the batter into the pan and bake for 25 to 30 minutes until a toothpick inserted in the center comes out clean. The key here is not to overbake; you want a moist cake to ensure your cake balls won’t be dry. Let the cake cool completely before the next step, or you’ll risk melting your frosting later.
Step 2: Make Your Creamy Frosting Mix
In a large bowl, beat together the softened cream cheese and unsalted butter using a handheld mixer at medium-high speed. I like to beat it for around 2-3 minutes until it turns light and fluffy — that extra fluffiness makes the cake balls so tender. Then add the confectioners’ sugar gradually, incorporating it smoothly. Lastly, stir in the pure vanilla extract and a pinch of kosher salt to balance the sweetness.
Step 3: Combine Cake Crumbs and Frosting
Once your cake is cool, crumble it finely into the frosting mixture. The crumbles should be pretty small so the balls can hold their shape well. Using your hands or a spoon, mix everything together until it’s completely combined and holds together when pressed. Then, roll the mixture into 1 1/2-inch balls—this recipe should make about 34. Arrange them on a baking sheet and pop them in the fridge for at least an hour to firm up. This chilling step is crucial: it helps the cake balls stay intact during dipping.
Step 4: Create Your Cereal Hooks
Here’s a little cupcake hack I discovered: those Frosted Cheerios make perfect tiny hooks for your ornaments. Place 34 cereal pieces flat on a baking sheet. Take one of the remaining pieces, hold it upright, and dip the bottom in some melted white candy melts—this acts like glue. Attach it to the center of a flat cereal piece and let it set. This way, you get adorable little hooks that can even be used for hanging light ornaments or as fun edible decorations!
Step 5: Dip and Decorate the Cake Balls
Divide your cake balls into thirds. Dip one-third into melted green candy melts, another third into melted red, and the last third into white candy melts, gently tapping off any excess coating. Don’t worry if the first coat looks a little thick—when the candy hardens, it’ll create a pretty smooth shell. While the coating is still wet, sprinkle some sanding sugar on a few for extra glittery effect. Return them to the baking sheet to completely set—this usually takes 15 to 20 minutes.
Step 6: Pipe Details and Add Hooks
Pour about three-quarters of your leftover white melted candy into a small resealable bag and snip a tiny corner to pipe on delicate designs. I love swirling little lines or polka dots to mimic ornament patterns, which make them look super professional and festive. Before the candy hardens, sprinkle a little more sanding sugar for extra sparkle. Dip the bottoms of your cereal hooks into the melted candy and attach them right on top of the cake balls—this way, your ornaments are complete and ready to dazzle!
Pro Tips for Making Festive Cake Ball Ornaments Recipe
- Keep your hands cool: If the cake mixture feels too sticky to roll, chill your hands or the mixture a bit more to avoid a mess.
- Use high-quality candy melts: They melt smoother and give a shinier, sturdier finish for prettiest ornament looks.
- Work quickly during decorating: Candy melts harden fast, so have your sanding sugar and piping bag ready before dipping.
- Avoid overbaking cake: Overly dry cake makes crumb mixture tough to bind—check early with a toothpick.
How to Serve Festive Cake Ball Ornaments Recipe
Garnishes
I love sprinkling sanding sugar on these balls for that frosty, glittery effect—it really elevates the ornament look. Sometimes, I add tiny edible pearl sprinkles or crushed candy cane pieces for a peppermint twist. Whatever garnish you choose, it adds charming sparkle and a little extra texture you and your guests will enjoy.
Side Dishes
These cake ball ornaments pair beautifully with a warm cup of spiced hot cocoa or even a fresh pot of holiday tea. I often serve them alongside a cheese platter or spiced nuts at parties to balance the sweetness. They also make an excellent sweet ending after a cozy holiday meal.
Creative Ways to Present
I’ve arranged these festive cake balls on a decorative platter shaped like a wreath, surrounded by fresh pine sprigs and cinnamon sticks. Sometimes, I even hang the cereal hooks on small branches of my Christmas tree for a playful edible decoration! Wrapping them individually in clear bags tied with ribbon also makes an adorable, thoughtful gift. Presentation really brings the festive magic alive.
Make Ahead and Storage
Storing Leftovers
I keep leftover festive cake ball ornaments in an airtight container in the fridge to maintain their freshness and firmness. They usually last well for up to 5 days this way. Keeping them chilled also helps prevent the candy coating from melting or becoming sticky.
Freezing
Yes, you can freeze these — I like to wrap each cake ball individually in plastic wrap and then place them in a freezer-safe bag or container. Freeze for up to three months. When ready to eat, thaw them in the fridge overnight to preserve their shape and flavor.
Reheating
No reheating needed here—these cake ball ornaments are perfect served chilled or at room temperature. Just take them out of the fridge about 10 minutes before serving so they lose some chill but keep their delightful firmness and glossy candy shell.
FAQs
-
Can I use homemade cake instead of box mix for this recipe?
Absolutely! Homemade cake works great, especially if it’s a moist variety like red velvet, chocolate, or vanilla. Just make sure your cake isn’t too dry to help the balls hold together nicely.
-
How do I prevent the candy melts from clumping when dipping?
Heating candy melts gently in short bursts and stirring often helps them melt smoothly. If too thick, add a small amount of vegetable oil or shortening to loosen the consistency for easier dipping.
-
Can I make these cake ball ornaments in advance?
Yes! You can prep the cake balls up to a day ahead and keep them chilled. After dipping and decorating, store in an airtight container in the fridge until ready to serve.
-
What if I don’t have Frosted Cheerios for the hooks?
You could try using mini pretzel twists or small candy canes as ornament hooks, but the cereal works best due to its size and shape. Alternatively, you can skip the hooks and simply enjoy the cake balls as festive sweets.
-
My cake balls fall apart during dipping—how do I fix that?
This usually means the mixture needs more chilling time or the cake balls are too soft. Make sure to refrigerate for at least an hour before dipping, and avoid overly moist cake or too little frosting in the mixture.
Final Thoughts
I absolutely love how this Festive Cake Ball Ornaments Recipe brings the joy of the holidays into my kitchen—not just through taste, but with the fun of crafting these sweet little spheres. Whether you’re making them for family gatherings, gifting neighbors, or just spicing up your holiday dessert table, they’re sure to be a crowd-pleaser. Give this recipe a try, and I promise you’ll find yourself adding it to your festive traditions, just like I have!
Print
Festive Cake Ball Ornaments Recipe
- Prep Time: 20 minutes
- Cook Time: 30 minutes
- Total Time: 2 hours 15 minutes
- Yield: Approximately 34 cake balls
- Category: Dessert
- Method: Baking
- Cuisine: American
Description
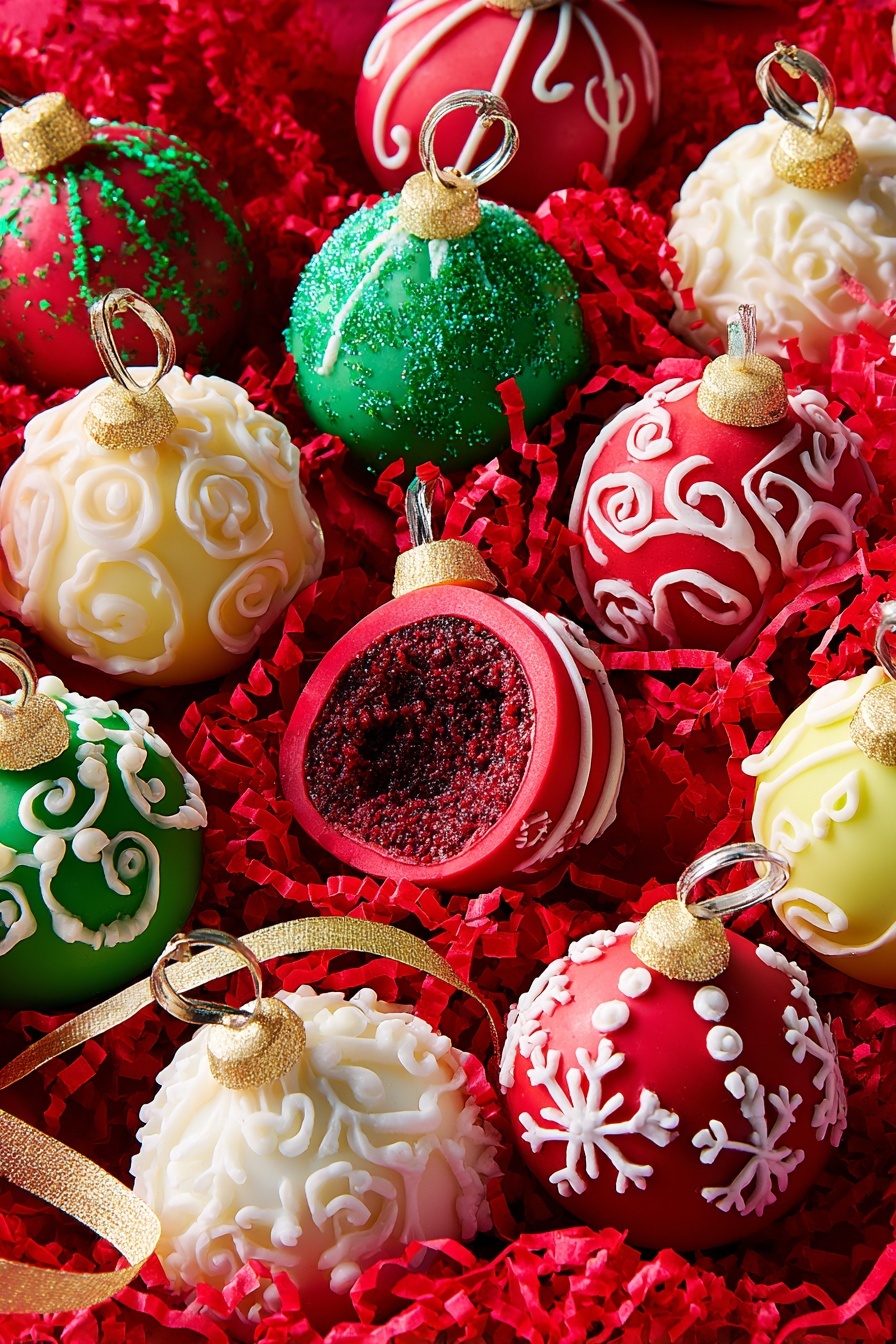
Celebrate the holidays with festive Christmas Cake Ball Ornaments! Made from moist red velvet cake combined with a creamy buttercream frosting, these cake balls are dipped in colorful candy melts and decorated to resemble beautiful Christmas ornaments—perfect as a sweet treat or edible decoration for your holiday gatherings.
Ingredients
Cake Balls
- Cooking spray
- 1 (15.25-oz.) box red velvet cake mix, plus ingredients called for on box
- 4 oz. cream cheese, softened
- 4 Tbsp. unsalted butter, softened
- 1 1/2 cups (170 g) confectioners’ sugar
- 1/2 tsp. pure vanilla extract
- Kosher salt, a pinch
Assembly
- 1/4 cup Frosted Cheerios (about 70 pieces)
- 1 (12-oz.) bag green candy melts, melted
- 1 (12-oz.) bag red candy melts, melted
- 2 (12-oz.) bags white candy melts, melted
- Sanding sugar, for decorating
Instructions
- Prepare the Cake: Preheat oven to 350°F. Grease a 13″ x 9″ baking pan with cooking spray. In a large bowl, prepare the red velvet cake mix according to the package directions. Pour the batter into the prepared pan evenly.
- Bake the Cake: Bake the cake for 25 to 30 minutes, or until a toothpick inserted in the center comes out clean. Remove from oven and let cool completely.
- Make the Frosting: In a large bowl, using a handheld mixer on medium-high speed, beat the softened cream cheese and unsalted butter until light and fluffy, about 2 to 3 minutes. Add the confectioners’ sugar and mix until combined. Beat in the vanilla extract and a pinch of kosher salt until smooth.
- Combine Cake and Frosting: Crumble the cooled cake into the bowl with the frosting mixture. Mix well until fully combined into a dough-like consistency. Form the mixture into 1 1/2″ balls, about 34 in total. Arrange the cake balls on a baking sheet and refrigerate until firm, approximately 1 hour.
- Make the Hooks: On a baking sheet, place 34 Frosted Cheerios flat. Take the remaining cereal pieces and dip the bottom of one piece into melted white candy melts, then attach it upright to the center of a flat cereal piece to create ornament hooks. Repeat with all pieces and set aside to harden.
- Dip Cake Balls: Dip one-third of the chilled cake balls into the melted green candy melts, another third into melted red candy melts, and the remaining third into melted white candy melts, tapping off excess candy. Before the coating hardens, sprinkle some with sanding sugar for sparkle. Return cake balls to the baking sheet and allow the coatings to set for 15 to 20 minutes.
- Decorate Cake Balls: Transfer three-quarters of the remaining melted white candy into a resealable plastic bag, cut off a tiny corner, and pipe decorative designs onto the cake balls. Sprinkle with sanding sugar before the designs harden.
- Attach Hooks: If needed, reheat the remaining white candy melts. Dip the bottom of each prepared cereal hook into the white candy and carefully top each cake ball with a hook, pressing gently to adhere. Allow to set completely before serving or displaying.
Notes
- Make sure the cake is completely cooled before mixing with frosting to ensure proper texture and shape of the cake balls.
- Use a small ice cream scoop or spoon to get uniformly sized cake balls for even coating and presentation.
- Store cake balls in an airtight container in the refrigerator; they can last up to 5 days.
- To soften candy melts that have hardened, melt gently in short bursts in the microwave, stirring between each burst to prevent burning.
- For added fun, use different colored sanding sugars or edible glitter to customize your ornament look.
Nutrition
- Serving Size: 1 cake ball (approx. 30g)
- Calories: 150 kcal
- Sugar: 18 g
- Sodium: 120 mg
- Fat: 6 g
- Saturated Fat: 3.5 g
- Unsaturated Fat: 2 g
- Trans Fat: 0 g
- Carbohydrates: 24 g
- Fiber: 0.5 g
- Protein: 1.5 g
- Cholesterol: 20 mg

