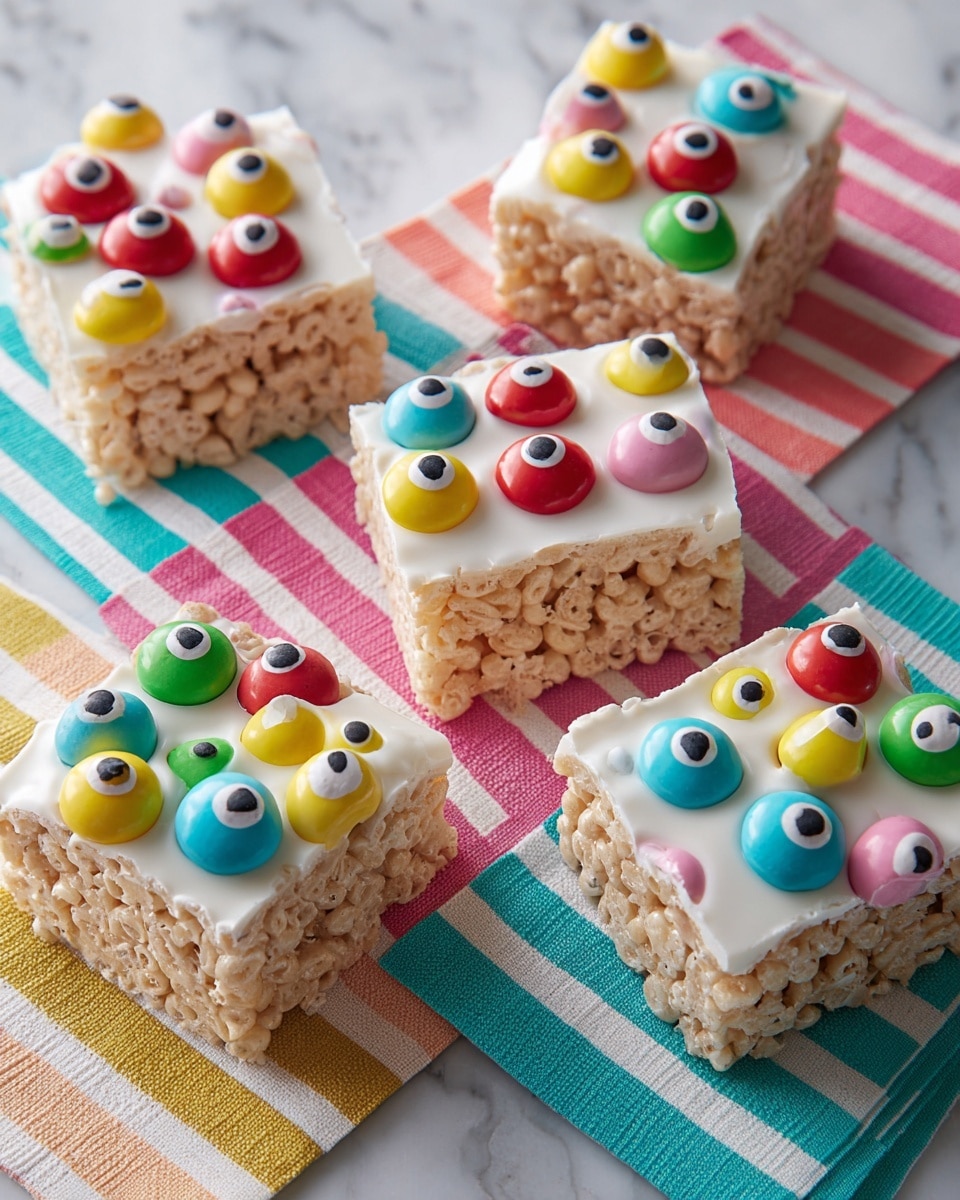
If you’re on the hunt for a treat that’s as fun to make as it is to eat, then you’re in for a real treat with this Eye Spy Rice Cereal Treats with Colorful Candy Eyes Recipe. I absolutely love how these playful bites bring a burst of color and whimsy to any snack table. Whether you’re making them for a kid’s party, a festive gathering, or just because you want a cheerful little pick-me-up, these treats won’t disappoint. Let me walk you through everything so you can nail this recipe and maybe even wow a few friends along the way!
Why You’ll Love This Recipe
- Super Fun & Kid-Friendly: Kids’ eyes light up not just from the colors but the fun candy eyeballs everywhere.
- Quick & Simple: Classic rice cereal treats with a colorful twist—you won’t spend hours fussing.
- Customizable Colors: Use your favorite candy melts to make these treats your own signature style.
- Perfect for Parties & Gifts: These treats are a showstopper that’s easy to package and share.

Ingredients You’ll Need
When it comes to the best Eye Spy Rice Cereal Treats with Colorful Candy Eyes Recipe, it’s all about pairing that classic crispy treat base with bright, melty candy eyes that give the “eye spy” effect. You’ll want easy-to-melt candy melts and an array of colorful candy eyeballs—trust me, the more colors, the more fun!
- Rice Cereal Treats Base: Use your favorite homemade or store-bought recipe as the foundation—soft but sturdy works best.
- Bright White Candy Melts: These form the initial coating and help the colors pop against the rice treats.
- Dark Green, Red, Blue, Pink, Yellow, Turquoise, Vibrant Green Candy Melts: Variety is key for the colorful dot decorations and candy eyes.
- Large Candy Eyeballs: Essential for that whimsical, “eye spy” look that makes these treats so special.
- Large Edible Black & White Candy Eyeball Sprinkles: Perfect for adding intricate details if you want to get creative.
Variations
I love mixing things up with this Eye Spy Rice Cereal Treats with Colorful Candy Eyes Recipe, and I encourage you to do the same! Whether it’s swapping colors for holidays or tweaking textures, you can make these your own.
- Chocolate Lovers’ Twist: Swap out some candy melts for melted chocolate to add richness—my family couldn’t get enough of this version.
- Gluten-Free Option: Just be sure your rice cereal is gluten-free, which I’ve done often to make this treat party-friendly.
- Seasonal Themes: Use red and green melts for Christmas or pastels for Easter for festive flair.
- Mini-Eyes Mix: Combine large eyeballs with smaller sprinkles for extra fun detail—I discovered this trick to make the treats even more eye-catching.
How to Make Eye Spy Rice Cereal Treats with Colorful Candy Eyes Recipe
Step 1: Prep and Shape Your Rice Cereal Treats
The first thing you’ll want to do is prepare your base rice cereal treats. I recommend following your go-to recipe, pressing the mixture firmly into a cookie pan so the treats hold together well. I like to press them evenly to about an inch thick—that way, they’re just right for cutting into neat 2½” x 4″ rectangles after they’ve cooled. If you don’t let them cool properly, the treats will be messy and hard to handle. Patience here really pays off!
Step 2: Melt and Coat with Bright White Candy
Next, melt your bright white candy melts according to package directions—usually using a microwave in short bursts or a double boiler works best to prevent burning. Transfer the melted candy to a decorating bag with a medium-sized hole cut at the tip. Place the rice treats on a cooling rack over a cookie sheet or wax paper, then pipe the melted candy to cover the top and sides, leaving about an inch of the bottom uncovered so you have a nice contrast. Pop them in the fridge for 10 to 15 minutes to set the coating—it should firm up but still be smooth.
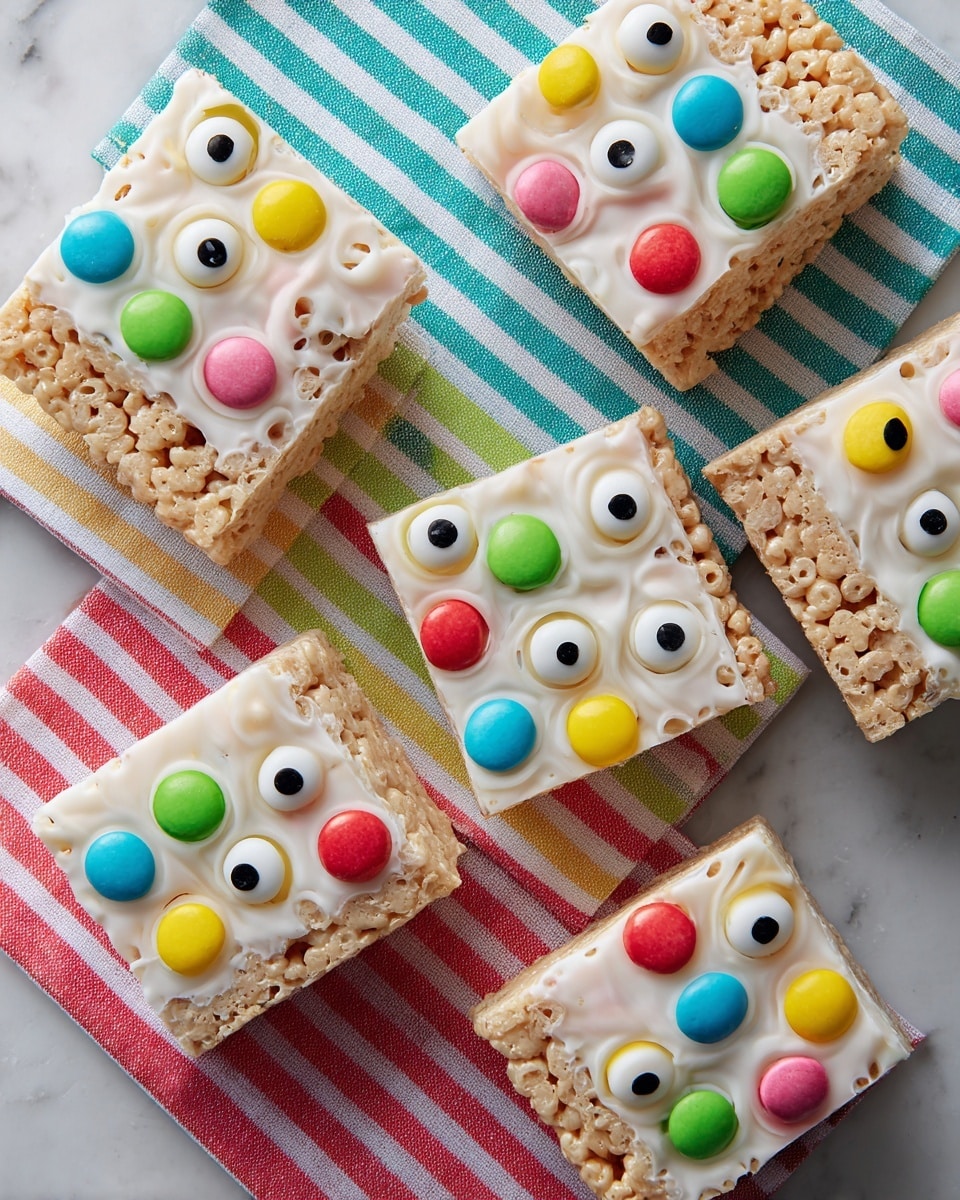
Step 3: Decorate with Colorful Candy Eyes
This is where the magic happens: melt each additional color of candy melts separately in decorating bags. Kneading the warm melted candy inside the bags helps mix and smooth them perfectly—that was a game-changer for me. Cut small holes in each bag’s tip and work with one color at a time. Pipe colorful dots onto the white candy-coated part of the treats, then gently press a candy eyeball into the center of each dot before the candy hardens. Alternate your colors to cover the treat entirely in a fun, vibrant pattern. Chill again for 10 to 15 minutes until everything is set and your colorful candy eyes hold steady.
Pro Tips for Making Eye Spy Rice Cereal Treats with Colorful Candy Eyes Recipe
- Melt Candy Slowly: I learned that melting candy slowly in 20-second bursts keeps it smooth and prevents graininess.
- Use a Cooling Rack: Placing treats on a rack over wax paper helps the excess candy drip and keeps your workspace tidy.
- Work Quickly With Dots: The candy sets fast, so pipe and press eyes onto dots promptly for best adhesion.
- Store Properly: Avoid sogginess by storing treats in an airtight container at room temperature, and keep them away from humidity.
How to Serve Eye Spy Rice Cereal Treats with Colorful Candy Eyes Recipe
Garnishes
Whenever I serve these treats, I like to add a little extra pizzazz with sprinkles or edible glitter around the plate. It’s simple but makes snack time feel like a celebration. You might also try adding tiny edible stars or sugar confetti that complement your chosen eye colors for a fun, festive touch.
Side Dishes
These colorful treats go wonderfully with a simple glass of milk or a fresh fruit platter to balance sweetness. I’ve also paired them with a cup of hot chocolate for chilly days or party punch for gatherings—the vibrant candy eyes really brighten the whole table.
Creative Ways to Present
I’ve had great success stacking these treats on a tiered cake stand to create an eye-catching centerpiece. Wrapping each treat in clear cellophane with a colorful ribbon also makes for adorable party favors. For Halloween, I even laid them out on a black platter with spiderweb decorations—those candy eyes looked like creepy little creatures!
Make Ahead and Storage
Storing Leftovers
I’ve found that storing leftover Eye Spy Rice Cereal Treats with Colorful Candy Eyes Recipe in an airtight container at room temperature keeps them chewy and fresh for several days. Just be sure to layer them between sheets of parchment paper to keep the candy eyes intact and prevent sticking.
Freezing
Freezing isn’t my go-to with these because the candy coating can sometimes change texture, but if you must, wrap them tightly in plastic wrap and a freezer bag. When thawing, leave them at room temperature in the wrapping to avoid condensation, which can dull the shine of your candy eyes.
Reheating
Since these treats are best enjoyed at room temperature, I don’t recommend reheating. But if they seem a touch stiff, let them sit out for 10-15 minutes to soften naturally. That way, you keep the candy eyes sharp and the marshmallow softness intact.
FAQs
-
Can I use store-bought rice cereal treats as a base?
Absolutely! Store-bought treats work fine as long as they’re firm enough to cut neatly and hold the candy coating. Just give them a little chill to make slicing easier.
-
What’s the best way to melt candy melts?
I find the microwave method easiest—heat in 20-30 second bursts, stirring in between—to avoid overheating. You can also melt them in a double boiler over simmering water for gentle heat.
-
How do I keep the candy eyes from falling off?
Press them gently but firmly into the freshly piped candy dots before the candy sets. Working quickly is the secret because once the candy cools, it’s much harder for the eyes to stick.
-
Can I make these treats vegan or dairy-free?
You can! Use dairy-free butter and marshmallows in the rice cereal base and pick vegan-friendly candy melts. Some specialty brands offer vegan candy melts, so just check labels carefully.
Final Thoughts
Making these Eye Spy Rice Cereal Treats with Colorful Candy Eyes Recipe became a favorite ritual for me and my family—especially during festive seasons or when we need a cheerful pick-me-up. The best part? They’re surprisingly quick, endlessly customizable, and just so darn fun to decorate. I hope you enjoy making and sharing these as much as I do. Trust me, once you try them, you’ll be going back for seconds—and probably thirds!
Print
Eye Spy Rice Cereal Treats with Colorful Candy Eyes Recipe
- Prep Time: 15 minutes
- Cook Time: 0 minutes (no cooking, only melting and setting)
- Total Time: 40 minutes
- Yield: 6 Treats
- Category: Dessert
- Method: No-Cook
- Cuisine: American
Description
Eye Spy Rice Cereal Treats are colorful, fun, and festive snacks made by coating classic rice cereal treats with melted candy and decorating them with vibrant candy eyeballs. Perfect for parties or Halloween, these treats combine the crispy sweetness of rice cereal with a playful candy coating in multiple bright colors for a whimsical finish.
Ingredients
Rice Cereal Treat Base
- Favorite rice cereal treats recipe, enough to fill a cookie pan
Candy Melts
- Bright White Candy Melts – quantity as needed for coating (approx. 8 oz)
- Dark Green Candy Melts – quantity as needed for decorating
- Red Candy Melts – quantity as needed for decorating
- Blue Candy Melts – quantity as needed for decorating
- Pink Candy Melts – quantity as needed for decorating
- Yellow Candy Melts – quantity as needed for decorating
- Turquoise Candy Melts – quantity as needed for decorating
- Vibrant Green Candy Melts – quantity as needed for decorating
Decorations
- Candy Eyeballs (small and large sizes), approximately 1 to 2 oz total depending on treat size
Instructions
- Prepare rice cereal treats: Prepare your favorite rice cereal treats according to your chosen recipe. Press the mixture into a cookie pan lined with parchment paper or a nonstick surface, then allow it to cool completely. Once cooled, remove from the pan and cut into rectangles measuring approximately 2 1/2 inches by 4 inches.
- Melt and coat with white candy: Melt the Bright White Candy Melts according to package instructions, ensuring a smooth consistency. Transfer the melted candy into a decorating bag fitted with a medium-sized hole at the tip. Place the cut treats on a cooling rack set over a cookie sheet or waxed paper to catch drips. Pipe melted white candy over the top and sides of each treat, leaving about one inch of the bottom uncoated. Carefully transfer the candy-coated treats onto a waxed paper-covered cake board. Refrigerate the treats until the candy coating is set, approximately 10 to 15 minutes.
- Melt additional candy colors: Separately melt Dark Green, Red, Blue, Pink, Yellow, Turquoise, and Vibrant Green Candy Melts in individual decorating bags. Knead each bag gently to mix and ensure smooth flow. Cut a very small hole in each bag’s tip for fine piping.
- Decorate with candy dots and eyeballs: Using one color at a time, pipe small dots of melted candy onto the coated portion of each treat. Immediately press a candy eyeball into the center of each piped dot to create an eye effect. Repeat this alternation of colors and eyeballs to cover the entire candy-coated surface of the treats in a playful pattern. Once decorated, chill the treats again until all candy decorations are fully set, about 10 to 15 minutes.
Notes
- Use a cooling rack to allow excess candy to drip off for a neat coating.
- Work quickly when piping melted candy to avoid it hardening before placement of eyeballs.
- Store treats in an airtight container at room temperature for up to 3 days.
- Ensure candy melts do not overheat to prevent burning or clumping.
- Large candy eyeballs can be substituted with edible black and white eyeball sprinkles for smaller decorations.
Nutrition
- Serving Size: 1 treat (approx. 60g)
- Calories: 220 kcal
- Sugar: 18 g
- Sodium: 90 mg
- Fat: 8 g
- Saturated Fat: 5 g
- Unsaturated Fat: 2 g
- Trans Fat: 0 g
- Carbohydrates: 33 g
- Fiber: 0.5 g
- Protein: 1 g
- Cholesterol: 5 mg


