If you’re looking for a failproof way to elevate your holiday feast, I’ve got just the thing for you. This Easy Turkey Gravy from Drippings Recipe is hands down one of my favorite secrets to making every bite of turkey melt-in-your-mouth perfect. The rich, silky gravy made straight from those precious roasting drippings will have you wondering why you ever settled for the canned stuff. Trust me, once you try this, you’ll never go back.
Why You’ll Love This Recipe
- Super Simple: Just four main ingredients and straightforward steps make it beginner-friendly.
- Deep Flavor: Using turkey drippings adds a rich, authentic taste that store-bought gravy can’t match.
- Versatile: Perfect for holidays but so easy you can whip it up anytime.
- Make-Ahead Friendly: Reheats beautifully so you can prepare in advance without stress.

Ingredients You’ll Need
The beauty of this Easy Turkey Gravy from Drippings Recipe lies in its simplicity—each ingredient pulls its weight to create a luscious, silky gravy. Choosing quality butter and fresh turkey drippings can really boost the flavor, so keep an eye out for those when prepping your turkey.
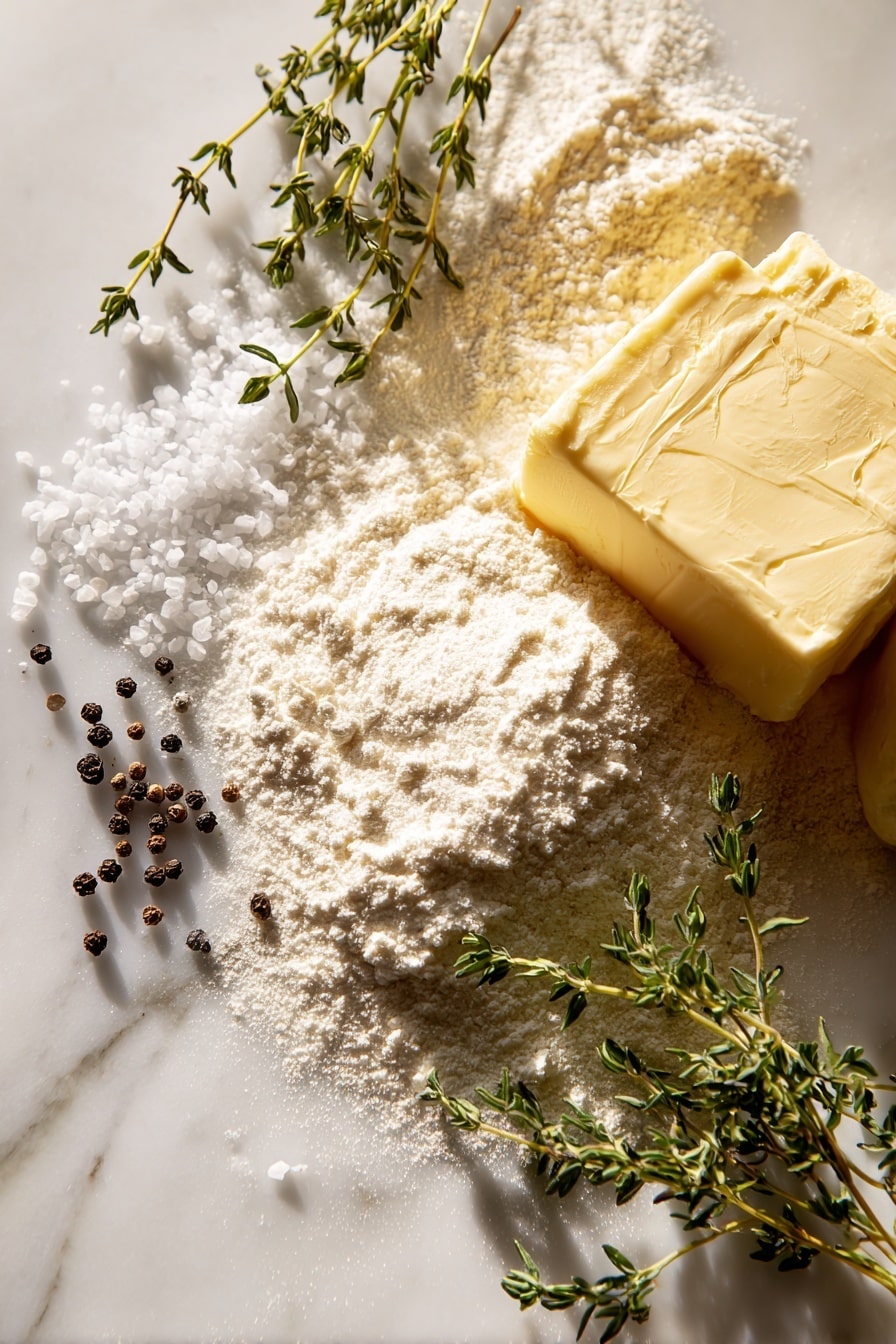
- Turkey Drippings: These are pure gold—make sure you strain them well and skim off the fat for the best flavor and texture.
- Salted Butter: This helps form the roux, and I prefer salted for that extra layer of seasoning but you can use unsalted as well.
- All-Purpose Flour: This thickens the gravy perfectly; if you need gluten-free, swap for a 1:1 gluten-free blend.
- Salt and Pepper: Essential for seasoning—always taste your gravy before serving to adjust these to your liking.
Variations
One of the things I love about this Easy Turkey Gravy from Drippings Recipe is that it’s a fantastic base you can tweak easily. Whether you want it richer, lighter, or even add a bit of herbs, the gravy adapts beautifully.
- Herb-Infused: I like adding fresh thyme or sage while melting the butter for a subtle herbal aroma that reminds me of cozy holidays.
- Spicy Kick: For a twist, a pinch of cayenne or smoked paprika adds warmth, perfect if you like a little heat.
- Vegetarian Version: While you won’t have drippings here, you can substitute with mushroom broth and brown butter for a vegetarian take.
How to Make Easy Turkey Gravy from Drippings Recipe
Step 1: Strain and Skim the Turkey Drippings
After your turkey is done roasting, pour the pan drippings into a fine metal mesh strainer placed over a bowl. This part is crucial—if there’s a layer of liquid fat on top, I use a turkey baster to carefully remove and discard it. This trick keeps your gravy from getting greasy and heavy, ensuring a smooth and flavorful finish.
Step 2: Make the Roux
In a 4-quart saucepan, melt the salted butter over medium heat. Once melted, whisk in the all-purpose flour to create a roux. Keep whisking as it cooks for about 1 minute until it thickens and just begins to turn golden brown. This step is where you build the gravy’s body and that toasty, nutty flavor that makes it comforting.
Step 3: Incorporate the Drippings and Cook
Slowly pour the strained turkey drippings into the roux while whisking continuously to prevent lumps. Increase your heat to medium-high and keep stirring frequently. You’ll see the mixture thicken beautifully in about 5 to 10 minutes. Don’t rush this part—patience here means gravy that’s perfectly smooth and glossy.
Step 4: Season and Serve
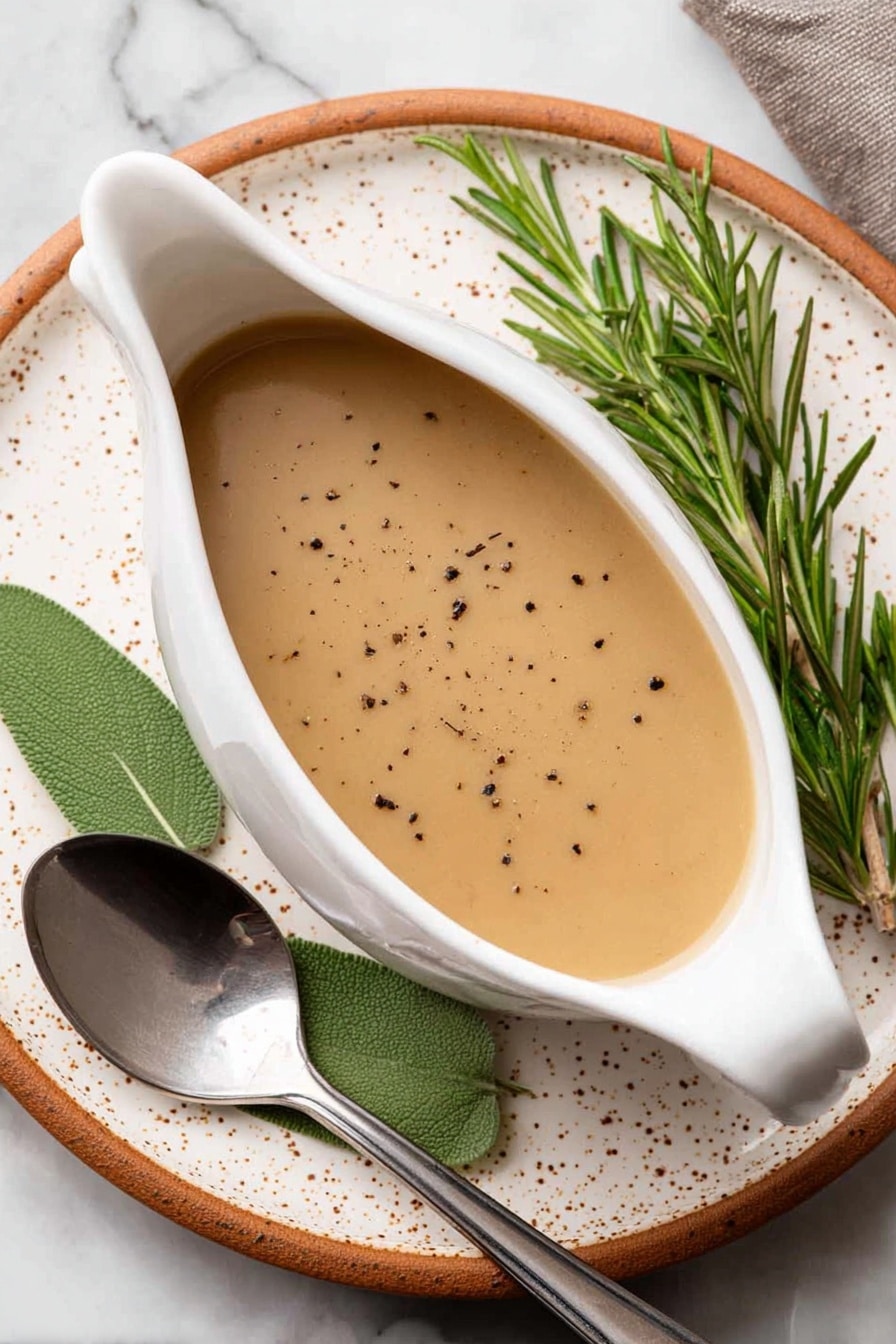
Finally, taste your gravy and season with salt and pepper as needed. Pour it into a gravy boat or serving dish, and you’ve got a luscious, traditional gravy ready to impress your family.
Pro Tips for Making Easy Turkey Gravy from Drippings Recipe
- Skim the Fat Thoroughly: I always remove as much fat as possible from the drippings to avoid greasy gravy—using a baster is a game changer.
- Slow and Steady Whisking: Pour drippings gradually into the roux while whisking to prevent lumps—it really makes all the difference.
- Don’t Skip the Roux Brown: Cooking the roux just a minute or so till light brown adds a nutty depth that’s worth the wait.
- Taste Before Seasoning: Drippings can be salty, so always taste before adding salt to keep your gravy balanced.
How to Serve Easy Turkey Gravy from Drippings Recipe
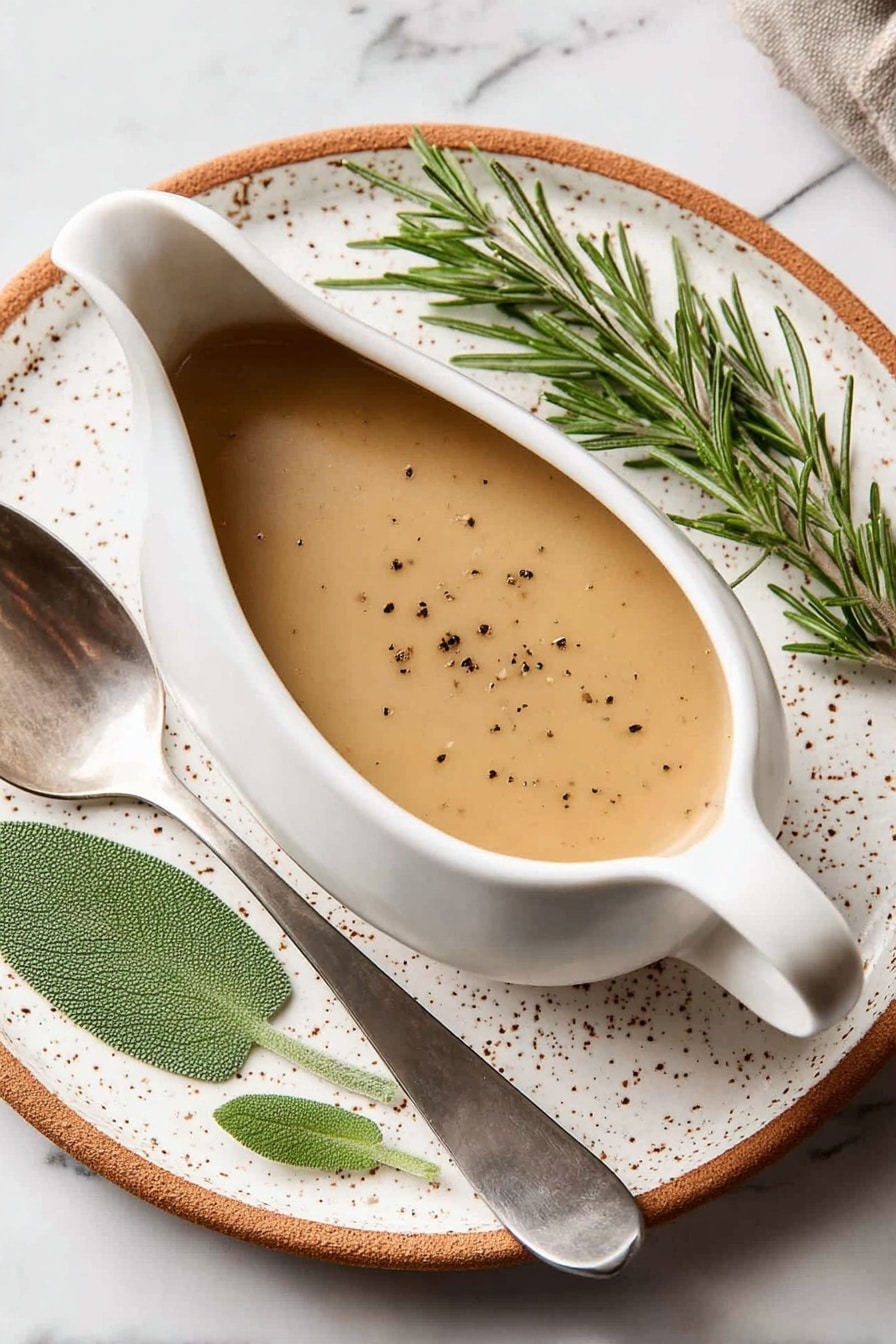
Garnishes
I usually keep garnishes simple—fresh chopped parsley adds a nice pop of color and a hint of freshness that contrasts beautifully with the rich gravy. Sometimes a few sprigs of thyme on the side feel festive and inviting too.
Side Dishes
This gravy pairs perfectly with mashed potatoes, roasted vegetables, and, of course, the turkey itself. My family also loves it drizzled over stuffing or even biscuits for a comforting twist.
Creative Ways to Present
For special dinners, I like serving this gravy in a beautiful vintage gravy boat with a detailed ladle, surrounded by fresh herbs on the platter. It makes your guests feel like they’re in a cozy, warm kitchen—exactly as it should be.
Make Ahead and Storage
Storing Leftovers
I store leftover gravy in a glass jar with a tight-fitting lid in the fridge. It keeps fresh up to a week, which is perfect for enjoying those turkey sandwiches the next day without any waste.
Freezing
If I make too much, I freeze the gravy in small airtight containers or freezer bags. When thawed, it still tastes as fresh and smooth as the first day, just give it a good whisk when reheating.
Reheating
Because this gravy thickens when chilled, I usually reheat it gently on the stovetop over low heat, stirring constantly to bring it back to that lovely pourable consistency. You can also microwave leftovers by covering them and stirring every 30 seconds to prevent hot spots.
FAQs
-
Can I use store-bought broth instead of turkey drippings?
While you can, the flavor won’t be quite as intense or authentic. Turkey drippings bring a rich, savory depth that’s hard to replicate with broth alone. If you do use broth, consider adding browned butter for a more robust flavor.
-
What if my gravy is too thick?
No worries! Simply whisk in a little warm water or broth a tablespoon at a time until you reach your desired consistency. It’s much easier to thin down gravy than to thicken it after cooking.
-
How do I prevent lumps in turkey gravy?
Whisking continuously while adding the drippings slowly into the roux is the key. Also, making sure the roux is cooked properly before adding liquids helps the flour absorb evenly, resulting in smooth gravy.
-
Can I make this Easy Turkey Gravy from Drippings Recipe ahead of time?
Absolutely! You can prepare the gravy a day or two in advance, then store it in the fridge. Just reheat gently before serving, and it will taste freshly made.
Final Thoughts
Making this Easy Turkey Gravy from Drippings Recipe reminds me every year that sometimes the simplest things bring the most joy to our tables. It’s a recipe that turned my holiday dinners from good to unforgettable, and I can’t recommend it enough. So next time you roast your turkey, hold onto those drippings and give this gravy a whirl—you and your guests will thank me later!
Print
Easy Turkey Gravy From Drippings Recipe
- Prep Time: 5 minutes
- Cook Time: 20 minutes
- Total Time: 25 minutes
- Yield: 24 servings
- Category: Sauce
- Method: Stovetop
- Cuisine: American
Description
This easy turkey gravy made from the drippings of a roasted turkey is the perfect savory addition to your holiday meal. Using a simple roux of butter and flour combined with rich turkey drippings, this gravy is smooth, flavorful, and easy to prepare. It enhances the taste of your turkey and sides with its classic, comforting flavor.
Ingredients
Turkey Gravy Ingredients
- 4 cups turkey drippings*
- ¼ cup salted butter
- ¼ cup all-purpose flour
- Salt and pepper to taste
Instructions
- Strain the drippings: Strain the turkey drippings through a fine metal mesh strainer into a bowl to remove solids. If there is a layer of liquid fat on top, use a turkey baster to remove and discard it carefully, which is an important step for the gravy’s texture and flavor.
- Melt the butter: In a 4-quart saucepan, melt the salted butter over medium heat to prepare the base for the roux.
- Make the roux: Add the all-purpose flour to the melted butter, whisking continuously. Cook this mixture for about 1 minute until it thickens and just begins to brown, which develops a nutty flavor for the gravy.
- Add the drippings: Slowly pour the strained turkey drippings into the roux while whisking constantly to avoid lumps and ensure a smooth mixture.
- Cook and thicken: Cook the mixture on medium-high heat, stirring frequently, until the gravy thickens, about 5 to 10 minutes. This step helps deepen the flavors and achieve the perfect consistency.
- Season to taste: Taste the gravy and add salt and pepper as desired to enhance the flavor.
- Serve: Pour the finished turkey gravy into a gravy boat or serving dish and serve warm alongside your turkey and side dishes.
Notes
- Ingredient Substitutions: For gluten-free gravy, substitute all-purpose flour with a 1:1 gluten-free flour blend. Unsalted butter can be used if preferred, but salted butter adds depth of flavor.
- Storage: Store leftover gravy in an airtight container, preferably a glass jar with a lid, in the refrigerator for up to 1 week.
- Reheating: Reheat gravy by warming leftover portions in the microwave or oven. To reheat a larger amount, warm it gently in a saucepan over low heat until liquid again.
- Removing excess fat from drippings is critical to avoid greasy gravy.
- Use aromatics in the turkey roasting process to maximize flavorful drippings for the best results.
Nutrition
- Serving Size: 1/4 cup (60ml)
- Calories: 45
- Sugar: 0g
- Sodium: 150mg
- Fat: 3g
- Saturated Fat: 2g
- Unsaturated Fat: 1g
- Trans Fat: 0g
- Carbohydrates: 3g
- Fiber: 0g
- Protein: 0.5g
- Cholesterol: 8mg


