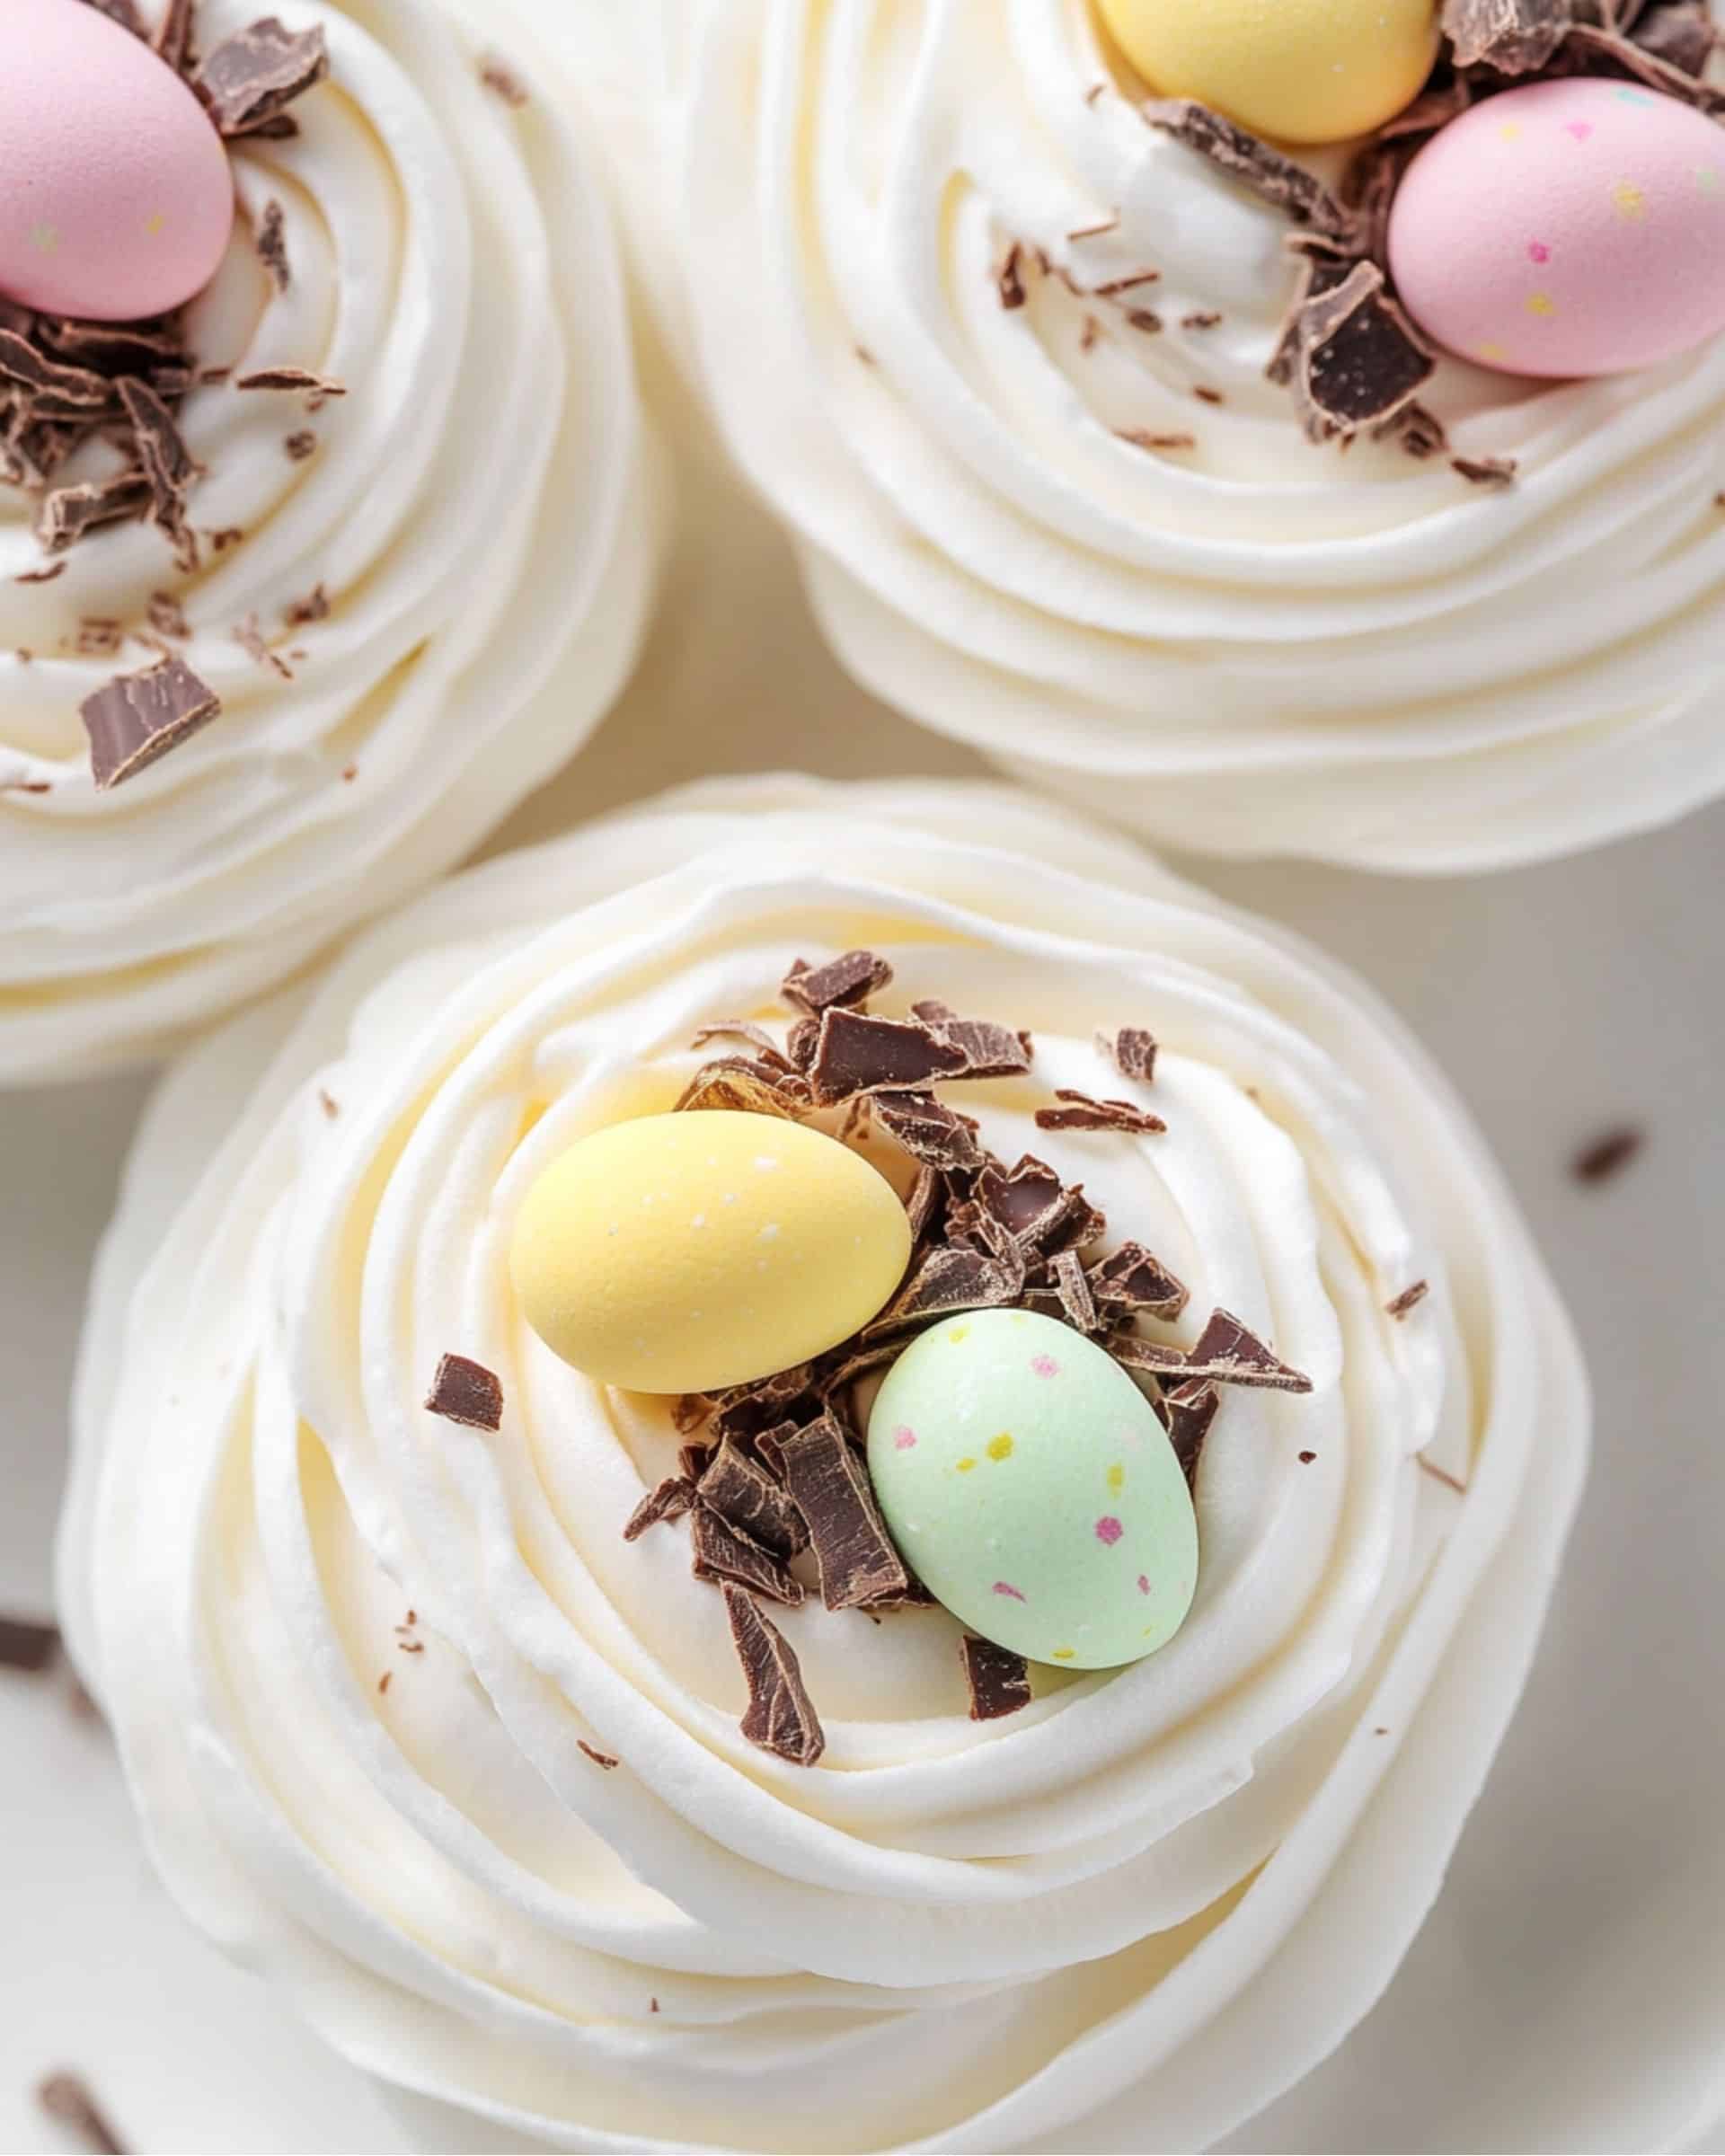
Get ready to impress your family and friends with these adorable Easter Meringue Nests! These delightful treats are not only visually stunning but also incredibly delicious. Crisp, airy meringue shells cradle a luscious cream cheese filling, topped with grated chocolate and colorful mini eggs. It’s the perfect dessert to celebrate the arrival of spring and the Easter season.
Why You’ll Love This Recipe
- Show-stopping Presentation: These meringue nests are guaranteed to be the centerpiece of your Easter table.
- Customizable: You can easily switch up the colors and toppings to suit your preferences or match your holiday theme.
- Make-Ahead Friendly: The meringue shells can be prepared in advance, making assembly a breeze on the day of your celebration.
- Surprisingly Simple: Don’t let their elegant appearance fool you – these nests are easier to make than you might think!

Ingredients You’ll Need
- Egg Whites: The foundation of our meringue, providing structure and airiness.
- Cream of Tartar: A stabilizer that helps achieve those perfect stiff peaks.
- White Sugar: Sweetens the meringue and contributes to its crisp texture.
- Cream Cheese: Adds a tangy richness to the filling.
- Whipping Cream: Creates a light, fluffy texture in the filling.
- Vanilla Paste: Infuses the filling with intense vanilla flavor.
- Powdered Sugar: Sweetens the filling and helps stabilize the whipped cream.
- Chocolate: Grated for a delightful sprinkle of sweetness.
- Mini Cadbury Eggs: The perfect festive topping for our Easter-themed nests.
Note: You’ll find the complete list of ingredients, along with their exact measurements, in the printable recipe card at the bottom of this post.
Variations
- Fruit-filled Nests: Replace the cream cheese filling with fresh berries or a fruit compote.
- Nutella Lovers: Swirl some Nutella into the cream cheese filling for a chocolatey twist.
- Lemon Meringue Nests: Add lemon zest to the meringue and fill with lemon curd instead of cream cheese.
- Vegan Version: Use aquafaba instead of egg whites and coconut cream for the filling.
How to Make Easter Meringue Nests
Step 1: Prepare the Meringue
Preheat your oven to 175°F. In a clean mixing bowl, combine egg whites and cream of tartar. Whip until foamy, then gradually add sugar while beating until stiff peaks form.
Step 2: Shape the Nests
Transfer the meringue to a piping bag with a star tip. Pipe nest shapes onto a lined baking sheet, creating a base and walls for each nest.
Step 3: Bake the Meringues
Dry the meringues in the oven for 1.5-2 hours. Resist the urge to open the oven door for the first hour!
Step 4: Make the Filling
While the meringues cool, whip together cream cheese, whipping cream, vanilla paste, and powdered sugar until fluffy.
Step 5: Assemble and Decorate
Pipe the cream cheese filling into each meringue nest. Top with grated chocolate and mini eggs.
Pro Tips for Making the Recipe
- Ensure your mixing bowl and beaters are completely clean and dry before making the meringue.
- Add sugar slowly to the egg whites for a stable meringue that won’t weep.
- Let the meringues cool completely in the oven to prevent cracking.
How to Serve

These Easter Meringue Nests are best served shortly after assembly to maintain their crisp texture. They’re perfect as a standalone dessert or as part of a larger Easter spread. Pair them with a cup of coffee or tea for an indulgent afternoon treat.
Make Ahead and Storage
Storing Leftovers
Store assembled nests in an airtight container in the refrigerator for up to 2 days. Note that the meringue may soften over time.
Freezing
Meringue nests can be frozen without filling for up to 1 month. Thaw at room temperature before filling and decorating.
Make Ahead
Bake the meringue nests up to 5 days in advance and store in an airtight container at room temperature. Fill and decorate just before serving.
FAQs
Can I make these meringue nests without a piping bag?
Absolutely! You can use a zip-top bag with a corner snipped off, or even spoon the meringue into nest shapes.
Why did my meringue crack?
Cracking often occurs due to rapid temperature changes. Try leaving the meringues in the oven to cool completely after baking.
Can I use regular eggs instead of mini Cadbury eggs?
Of course! Feel free to use any Easter-themed candies or even jelly beans as a topping.
How long will these meringue nests stay crisp?
For best results, serve within a few hours of assembly. The moisture from the filling will gradually soften the meringue.
These Easter Meringue Nests are a delightful way to celebrate the season. With their crisp exterior, creamy filling, and festive toppings, they’re sure to become a new holiday tradition. Don’t be intimidated by the meringue – with a little patience, you’ll create a dessert that’s as impressive to look at as it is to eat. Happy baking, and happy Easter!
Print
Easter Meringue Nests Recipe
- Prep Time: 5 minutes
- Cook Time: 1 hour 30 minutes
- Total Time: 1 hour 35 minutes
- Yield: 10 servings
- Category: Desserts
- Method: Baking
- Cuisine: American
Description
Delightful Easter Meringue Nests with a crisp exterior, marshmallow-like interior, filled with creamy cheese mixture, and topped with chocolate and mini eggs. Perfect for spring celebrations!
Ingredients
- 1/3 tsp cream of tartar
- 3 egg whites
- 1 cup white sugar
- 1/2 cup cream cheese
- 1/2 cup whipping cream
- 1 tsp vanilla paste
- 4 tbsp powdered sugar
- 2 ounces sweet or semi-sweet chocolate, grated
- 30 mini Cadbury eggs
Instructions
- Prepare the oven: Preheat the oven temperature to 175°F (80°C). This low temperature is crucial for slowly drying out the meringue without browning it.
- Make the meringue: In a clean mixing bowl, combine cream of tartar and egg whites. Using an electric mixer with a whisk attachment, whip until light foam appears. Gradually add sugar, 2 tablespoons at a time, beating at high speed until you achieve stiff peaks and a glossy meringue.
- Shape the nests: Transfer meringue to a pastry bag fitted with a large star tip. Pipe onto a silicone mat or parchment-lined baking sheet, forming a base and sides to create nest shapes.
- Bake the meringues: Place in the preheated oven and bake for 1.5-2 hours. Do not open the oven door for the first hour. After an hour, check for doneness by gently pressing the meringue. If soft or bouncy, continue baking for 30-60 minutes more.
- Prepare the filling: While meringues are cooling, mix cream cheese, whipping cream, vanilla paste, and powdered sugar in a large bowl until fluffy and thick.
- Assemble the nests: Pipe the cream cheese mixture into the center of each meringue nest using a piping bag with a star tip.
- Decorate: Sprinkle grated chocolate over the filled nests and place a few mini chocolate eggs in the center of each.
Notes
- If you don’t have a pastry bag, use a large zip-top plastic bag with a corner snipped off and insert the star tip.
- Ensure all utensils are clean and free from grease for the best meringue results.
- Store in an airtight container in a cool, dry place for up to 3 days.
Nutrition
- Serving Size: 1 serving
- Calories: 250kcal
- Sugar: 30g
- Sodium: 80mg
- Fat: 12g
- Saturated Fat: 7g
- Unsaturated Fat: 4g
- Trans Fat: 0g
- Carbohydrates: 35g
- Fiber: 1g
- Protein: 3g
- Cholesterol: 35mg


