If you’re looking for a show-stopping dessert that’s as fun to make as it is to eat, I’m thrilled to share this Dreadful Drip Cake Recipe with you! It’s a wickedly delightful treat that brings together rich chocolate, smooth buttercream, and that irresistible dripping effect that makes you want to grab a fork immediately. Trust me, once you try this, you’ll find it’s a dazzling centerpiece for any party or just a sweet way to treat yourself — so keep reading because this recipe is fan-freaking-tastic!
Why You’ll Love This Recipe
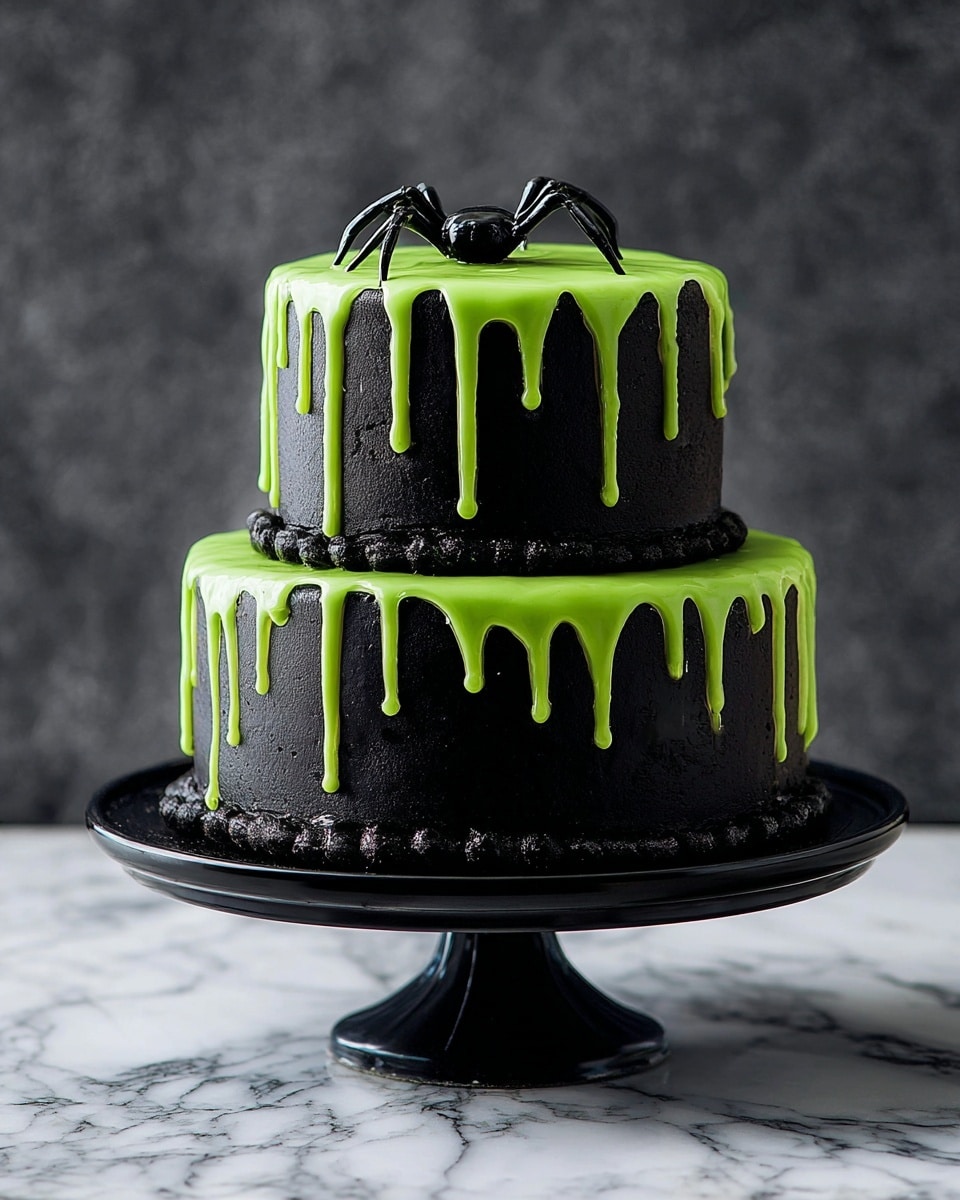
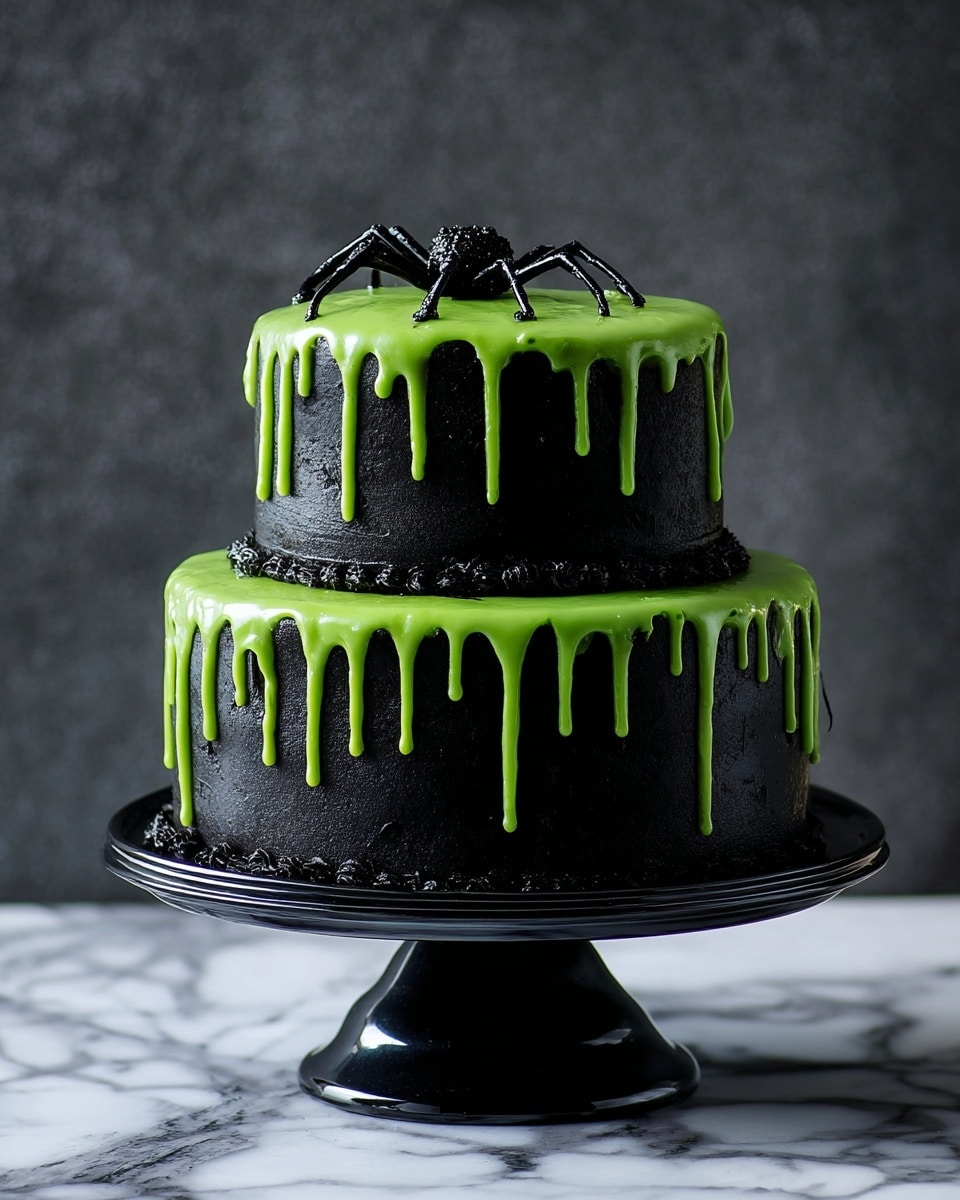
- Visually Stunning: The dramatic green drip on sleek black icing is sure to wow your guests and Instagram followers alike.
- Simple But Impressive: Uses store-bought sponges and icing to save you time without sacrificing charm.
- Perfect Balance of Flavors: The buttery cream offsets the rich chocolate and subtly sweet sponge for a well-rounded taste.
- Great for Any Occasion: Whether it’s Halloween, a birthday, or just a fun baking day, this cake hits the mark every time.

Ingredients You’ll Need
The ingredients for the Dreadful Drip Cake Recipe come together in a way that’s surprisingly accessible. With mostly pantry staples and ready-made components, it’s designed so you can enjoy the fun part of decorating without getting bogged down in complicated steps. Here are the essentials, and some tips along the way to pick the best options.
- Tesco Finest Victoria Sponges: These sponges are wonderfully light and moist; they form the perfect base for the layers without needing extra prep.
- Unsalted Butter: Using unsalted butter lets you control the saltiness of your buttercream exactly, which is key for balance.
- Icing Sugar: For that silky, smooth buttercream, icing sugar is non-negotiable—plus a little extra for dusting while working.
- Ready-to-roll Black Icing: This is your secret weapon for the dramatic black covering that makes the green drip pop.
- White Chocolate: Finely chopped for melting, white chocolate blends smoothly with cream to create that luscious drip icing.
- Double Cream: Heat gently to melt the chocolate and get a gorgeous glossy finish on your drip.
- Green Gel Food Colour: This packs a punch of vibrant color for your drip without watering down the icing.
Variations
I love making the Dreadful Drip Cake Recipe my own by tweaking colors and flavors depending on the occasion or my mood. Don’t be shy to make it yours—switching up little details is half the fun in baking!
- Color Variations: I’ve swapped the green food coloring with deep red or purple gel for a spooky Halloween vibe or a party-ready look.
- Flavor Twists: Adding a teaspoon of orange zest to the buttercream lifts the flavor—and it pairs beautifully with the black icing.
- Dietary Adjustments: Using vegan butter and dairy-free cream works well if you need a plant-based option without losing any magic.
- Size Options: I’ve halved the recipe for smaller gatherings—just make sure to adjust the icing roll sizes accordingly!
How to Make Dreadful Drip Cake Recipe
Step 1: Prep Your Sponges and Buttercream
Start by placing one Victoria sponge on a 22cm cake board (tip: you can cover the board with icing for a polished look, which I’ll explain below). Cut the other sponge to a 10cm diameter circle and set it aside. Now, soften your unsalted butter and gradually beat in the icing sugar until the mix is creamy and smooth. Spreading this buttercream on both sponges helps lock in moisture and gives your cake that irresistible rich texture. Taking your time to smooth it with a palette knife makes all the difference, so don’t rush this step!
Step 2: Cover Your Cakes with Black Icing
Here’s where the drama starts! Roll out about 120g of the black icing into a neat 17cm circle on nonstick baking paper. I like to brush just a tiny bit of cold water onto the back—that helps it stick perfectly when you place it on the large sponge. Carefully trim away any excess icing but keep those trimmings—you’ll need them! Next, measure your cake’s height and circumference and roll out a matching rectangle of icing to wrap around the side. Again, a little water acts as glue. Use a plastic smoother or just your hands to tidy every edge and avoid air pockets. Repeat this with the smaller cake for a 10cm circle top. This clean, matte black finish really makes the green drip stand out, and it’s easier than it looks once you get the hang of it.
Step 3: Make the Green Drip Icing
Finely chop your white chocolate and place it in a heatproof bowl. Warm the cream gently over medium heat until it just starts bubbling around the edges. Pour the hot cream over the white chocolate and stir until everything melts together into a smooth, glossy mix. Now comes my favorite part—adding green gel food color. Stir it in until you get a vibrant, bright green that looks like it could glow in the dark! Let the mixture cool for about 5 minutes, then set aside until it’s nearly room temperature. This helps the drip consistency be just right—not too runny, not too stiff.
Step 4: Create the Drip and Assemble
Pour or pipe the green icing over the edges of your large black-covered cake, allowing it to drip naturally down the sides. Don’t worry if some drips are longer or shorter—that’s part of the charm! Let the icing firm up slightly to avoid mixing with the top sponge. Once the drip is just set, place the smaller sponge on top. If the two cakes feel unstable, gently use a skewer to hold them together—just remember to remove it before serving! Watching the drip set while you build the cake is honestly so satisfying; it’s part science, part art.
Pro Tips for Making Dreadful Drip Cake Recipe
- Chill Before Icing: I discovered chilling the cakes for 20 minutes before covering with black icing helps it stick smoothly and avoids tearing.
- Don’t Over-Wet Icing: Using water sparingly is crucial—too much and the icing will get sticky and hard to smooth.
- Perfect Drip Texture: Let the chocolate cream mixture cool fully, or your drip will run off too fast and lose that beautiful effect.
- Work Quickly: Green drip sets fast once on the cake, so plan your pouring and cake assembly to avoid any mishaps!
How to Serve Dreadful Drip Cake Recipe
Garnishes
I usually keep garnishes simple to let the dramatic drip shine, but sometimes I add a few black edible glitter sprinkles or small green sugar crystals along the edges for some sparkle. Fresh mint leaves can also add a touch of natural green and a refreshing contrast, especially if you flavored the buttercream with citrus. Avoid overdoing it—this cake’s design is all about that bold contrast between rich black and glowing green.
Side Dishes
This cake pairs wonderfully with simple sides like a scoop of vanilla ice cream or a dollop of whipped cream to balance sweetness. A lightly brewed black tea or coffee complements the buttery richness perfectly and helps cut through the decadence if you’re sharing with friends.
Creative Ways to Present
For themed parties, I’ve placed this cake on a mirror platter with a few scatterings of dark berries and edible flowers for a gothic, moody vibe. If it’s Halloween time, try adding tiny fondant spiders or web designs for an extra “dreadful” factor. Layering the cake on a decorative cake stand lifts its presence and makes slicing feel like an event!
Make Ahead and Storage
Storing Leftovers
I always keep mine covered loosely with a large cake dome or wrap, storing it in the fridge because of the buttercream. This keeps the cake moist and the drip intact without getting sticky. Just remember to let it come to room temperature before slicing again—it makes the buttercream soft and lovely every time.
Freezing
I’ve frozen this cake before by wrapping individual slices tightly in plastic wrap and then foil. When you’re ready to eat, thaw overnight in the fridge. The texture remains surprisingly good, though the drip might lose a bit of its shine, so fresh is always best if you can manage.
Reheating
Since this is a buttercream and chocolate-based cake, I don’t recommend reheating in the microwave. Instead, bring slices to room temperature for 30 to 60 minutes before serving to get the best flavor and texture without melting the icing.
FAQs
-
Can I use homemade sponge cakes instead of store-bought?
Absolutely! Homemade Victoria sponges work superbly if you prefer baking from scratch. Just make sure your cakes are fully cooled and crumb-coated before decorating to get that smooth finish.
-
What if the drip icing is too runny?
If your drip icing runs too fast or pools at the bottom, it usually means it’s too warm or thin. Chill it slightly longer until it thickens to a slow flowing consistency before pouring—it should drip down slowly and beautifully.
-
How long can I store the Dreadful Drip Cake?
Refrigerated, the cake stays fresh for up to 3 days. Keep it covered to prevent it from drying out, and enjoy it sooner rather than later to experience peak freshness and flavor.
-
Can I use different colors for the drip?
Definitely! Feel free to customize the drip color with any gel food coloring you like—the recipe is flexible and that’s part of what makes it so much fun to make your own version.
Final Thoughts
This Dreadful Drip Cake Recipe holds a special place in my baking heart because it’s one of those rare treats that looks insanely impressive yet feels totally approachable to make. Each time I bring it to a gathering, friends ask for the secret—and the best part is, there isn’t one! Just a few simple ingredients, some patience, and a bit of creativity. If you’re someone who loves a baking project that delivers maximum wow with manageable effort, I wholeheartedly recommend giving this cake a whirl—you might just find your new favorite showstopper.
Print
Dreadful Drip Cake Recipe
- Prep Time: 40 mins
- Cook Time: 0 mins
- Total Time: 40 mins plus cooling time
- Yield: 16 servings
- Category: Baking
- Method: Baking
- Cuisine: British
Description
This Dreadful Drip Cake is a visually striking dessert featuring a large black-covered Victoria sponge topped with a smaller matching cake and a vibrant green white chocolate drip icing. Perfect for Halloween or themed parties, this cake combines rich buttercream and smooth ready-to-roll icing with a glossy, colored chocolate ganache drip for a spooky yet delicious centerpiece.
Ingredients
For the Cake
- 2 Tesco Finest Victoria sponges
- 150g unsalted butter
- 300g icing sugar, plus extra for dusting
- 2 x 250g packs ready-to-roll black icing
For the Drip Icing
- 300g white chocolate, finely chopped
- 150ml double cream
- 1 x 10g tube green gel food colour
Instructions
- Prepare the base sponge: Place one Victoria sponge cake on a 22cm cake board. Cover the board with icing as preferred for a neat presentation.
- Resize the second sponge: Cut the second sponge into a circle 10cm in diameter and set aside for later use as the top layer.
- Make the buttercream: In a bowl, gradually beat the unsalted butter with the icing sugar until a smooth, combined buttercream forms.
- Buttercream application: Spread the buttercream evenly over the top and sides of both sponges, keeping them separate. Use a palette knife to smooth the surfaces.
- Cover the large cake with black icing: Roll out a 17cm circle of black icing on nonstick baking paper (using about 120g of icing). Very lightly brush the icing with cold water, place it wet side down on the large cake, and trim the excess, reserving the trimmings.
- Cover the sides of the large cake: Measure the height and circumference of the cake. Roll out a rectangle of black icing to this size, lightly brush with water, and stick it around the cake. Smooth gently with a plastic cake smoother or your hands.
- Cover the smaller cake: Use remaining black icing to cover the smaller 10cm sponge with a 10cm circle for the top, applying it similarly with light water brushing to adhere.
- Prepare the drip icing: Place the finely chopped white chocolate in a heatproof bowl. Heat the double cream in a pan over medium heat until small bubbles appear around the edge, then pour over the chocolate. Stir until smooth and let cool for 5 minutes.
- Add color to the drip: Stir in the green gel food colour thoroughly until the mixture is smooth and vibrantly green. Allow the ganache to cool to just below room temperature to achieve the correct dripping consistency.
- Apply the drip icing: Pour or pipe the green icing carefully onto both cakes, allowing it to drip down the sides artistically.
- Assemble the cake: Let the drip set slightly, then place the smaller decorated sponge on top of the larger one. Secure with a skewer if necessary to stabilize the layers.
Notes
- Ensure the drip icing is not too hot when pouring to prevent melting the buttercream or icing.
- Brushing icing with water helps it stick smoothly without melting.
- Use a skewer carefully to prevent collapse but insert gently to avoid cracking icing.
- Chill the cake briefly if the buttercream feels too soft before applying the drip to maintain structure.
- The cake board can be covered with spare icing trimmings or decorative paper to enhance presentation.
Nutrition
- Serving Size: 1/16 of the cake
- Calories: 595 kcal
- Sugar: 71 g
- Sodium: 0.3 g
- Fat: 28 g
- Saturated Fat: 17 g
- Unsaturated Fat: 9 g
- Trans Fat: 0 g
- Carbohydrates: 83 g
- Fiber: 0.7 g
- Protein: 3.4 g
- Cholesterol: 60 mg


