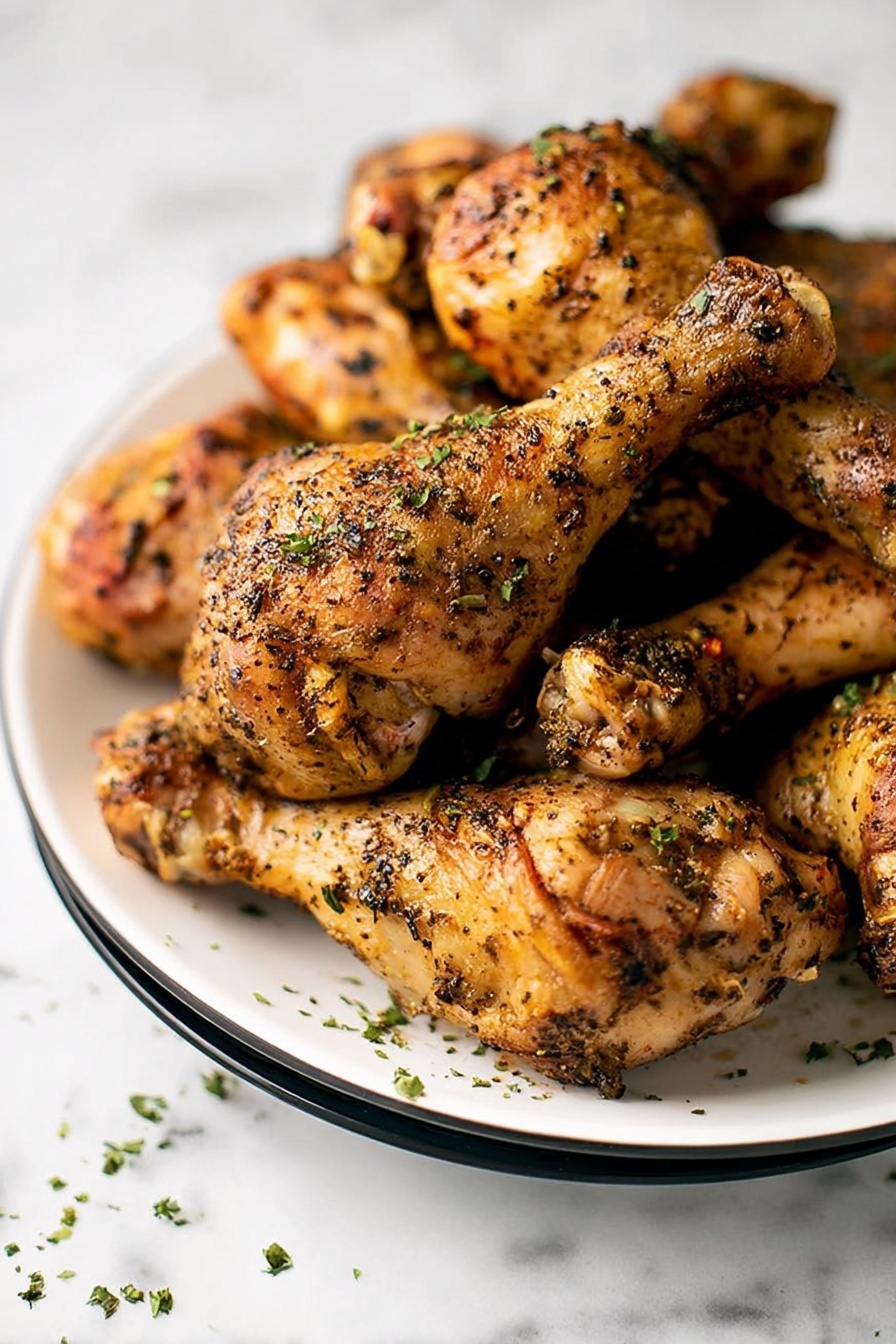
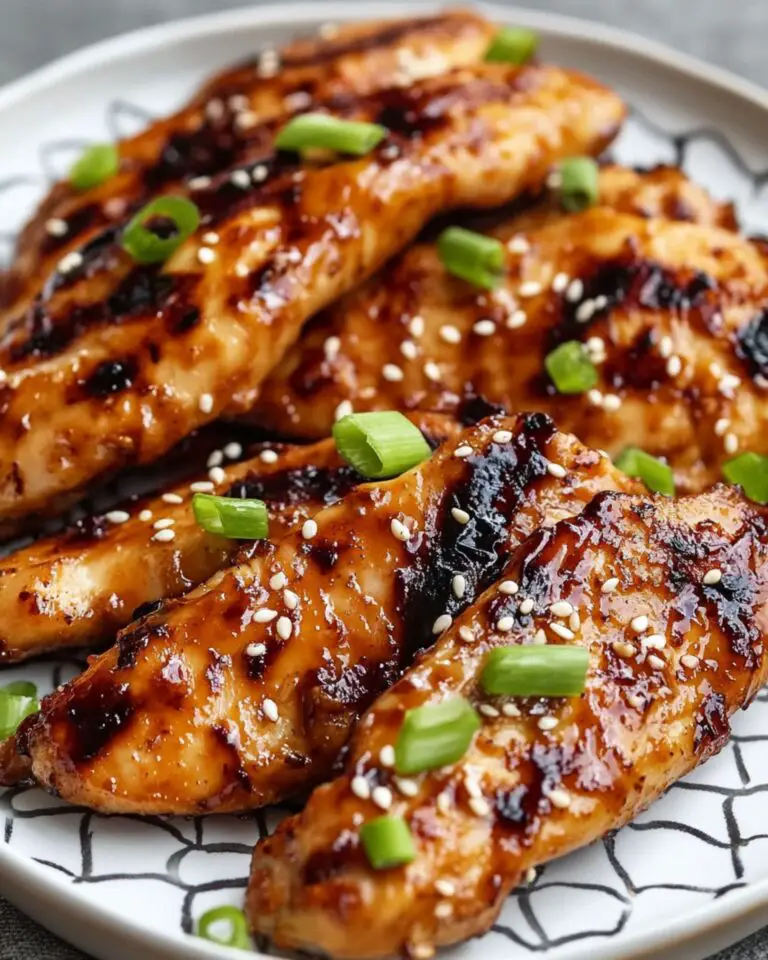
If you’re on the hunt for a foolproof way to get irresistibly crispy chicken without frying, you’ve just found it. This Crispy Baked Chicken Legs Recipe is my go-to for a juicy, flavor-packed dinner that feels indulgent without the extra oil. I absolutely love how the skin gets perfectly crisp in the oven, and I’m excited to share all my tips so you can get that same golden crunch every time.
Why You’ll Love This Recipe
- Crispy Skin Every Time: Thanks to baking powder and a dry rest, the skin crisps up beautifully without frying.
- Juicy and Tender Inside: The method locks moisture in so the meat stays succulent and never dry.
- Simple Ingredients: You likely already have everything in your pantry—no fancy spices required!
- Easy Prep and Cleanup: Baking on a wire rack keeps the skin crisp and means less mess in the kitchen.

Ingredients You’ll Need
These ingredients come together to create a perfect balance of crispy skin and juicy chicken. Using baking powder is my secret weapon; it really amplifies that crispiness without any added fat.
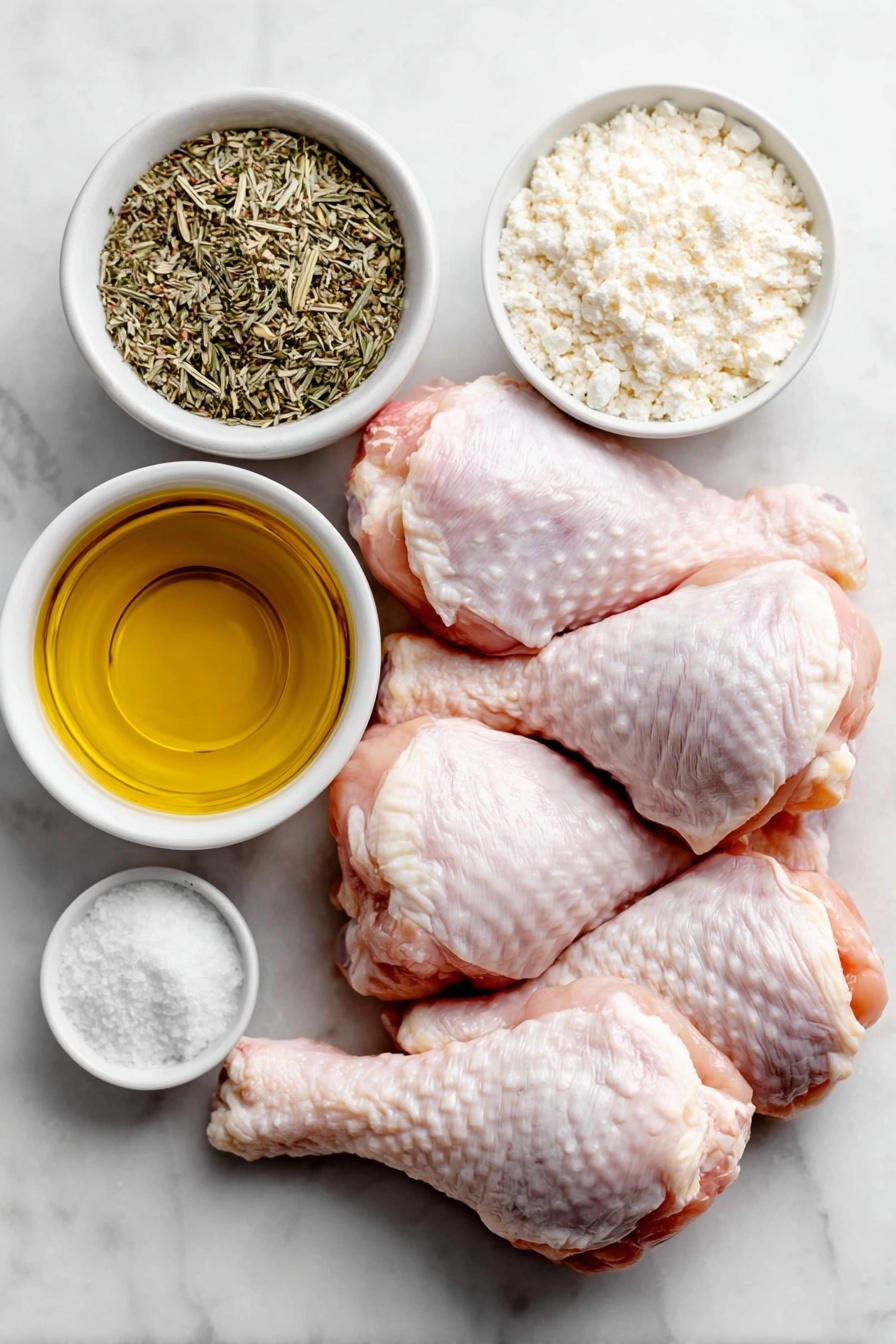
- Chicken drumsticks: I like to trim excess fat so the skin crisps without flare-ups or excess grease.
- Olive oil: Just enough to lightly coat and help the seasoning stick while keeping the skin from drying out.
- Poultry seasoning: This blend adds that warm, herbaceous flavor I love—feel free to swap with your favorite seasoning mix.
- Salt: Essential for flavor and to help draw out moisture from the skin for better crisp.
- Black pepper: Adds a subtle heat that pairs perfectly with the herbs.
- Baking powder: The unsung hero for crispy skin—makes all the difference in texture.
Variations
I love tweaking this recipe to keep things interesting—don’t hesitate to jazz it up with some personal flair. You’ll find small changes can transform the flavor while keeping that coveted crisp texture.
- Spicy Kick: Add a teaspoon of smoked paprika or cayenne pepper—I tried this for a family game night and it was a hit!
- Herb Blend: Swap poultry seasoning for Italian seasoning or a mix of fresh herbs like rosemary and thyme to freshen up the taste.
- Garlic Lovers: Toss in some garlic powder or fresh minced garlic before baking for an extra punch of flavor.
- Low Sodium: Reduce salt and boost flavor with a splash of lemon juice or a sprinkle of nutritional yeast for a savory twist.
How to Make Crispy Baked Chicken Legs Recipe
Step 1: Dry the Chicken for Maximum Crispiness
The magic starts by drying the skin, which may sound simple but is absolutely key. I like to set the chicken legs on a wire rack layered with paper towels, then cover and chill them in the fridge for a couple of hours or overnight if I plan ahead. This dries out the skin and means you’ll get that extra crunch when baking. If you’re in a hurry, just pat them very dry with paper towels—you’ll still get great results.
Step 2: Preheat Oven and Prep the Rack
Get your oven roaring at 400 degrees Fahrenheit. I always spray the wire rack with some non-stick spray so the chicken doesn’t stick and cooks evenly all around. This setup lets the hot air circulate beneath the drumsticks, helping the skin caramelize and crisp up perfectly—no sogginess here!
Step 3: Season and Coat the Chicken
In a big bowl, mix the olive oil together with poultry seasoning, salt, pepper, and baking powder. Here’s a tip: I like to use my hands to gently massage the seasoning into each chicken leg—that way, every nook and cranny gets coated evenly. You’ll notice the baking powder does a little magic right away, starting to dry and prep the skin.
Step 4: Arrange and Bake
Place the coated chicken legs spaced apart on your prepped wire rack. This is important so all sides crisp up without steaming. Pop them in the oven for 35-40 minutes. I always use a digital meat thermometer inserted into the thickest part—when it hits 165°F, you’re golden. The skin should be bubbly, deeply golden, and so inviting you’ll want to dive right in.
Step 5: Rest and Serve
Once out of the oven, let your crispy baked chicken legs rest for 5 minutes. This helps the juices redistribute so every bite is juicy and tender. Resist the urge to cut in immediately—I know, it’s tempting, but it really makes a difference.
Pro Tips for Making Crispy Baked Chicken Legs Recipe
- Patience with Drying: I learned that letting the chicken dry in the fridge overnight is the single biggest secret for crispiness.
- Use Baking Powder, Not Baking Soda: Baking powder is neutral and helps crisp without adding any weird taste.
- Space Chicken Properly: Crowding the pan traps moisture and results in soggy skin—give those legs room!
- Check Temperature Early: Ovens can vary, so start checking at 35 minutes to avoid drying out your chicken.
How to Serve Crispy Baked Chicken Legs Recipe
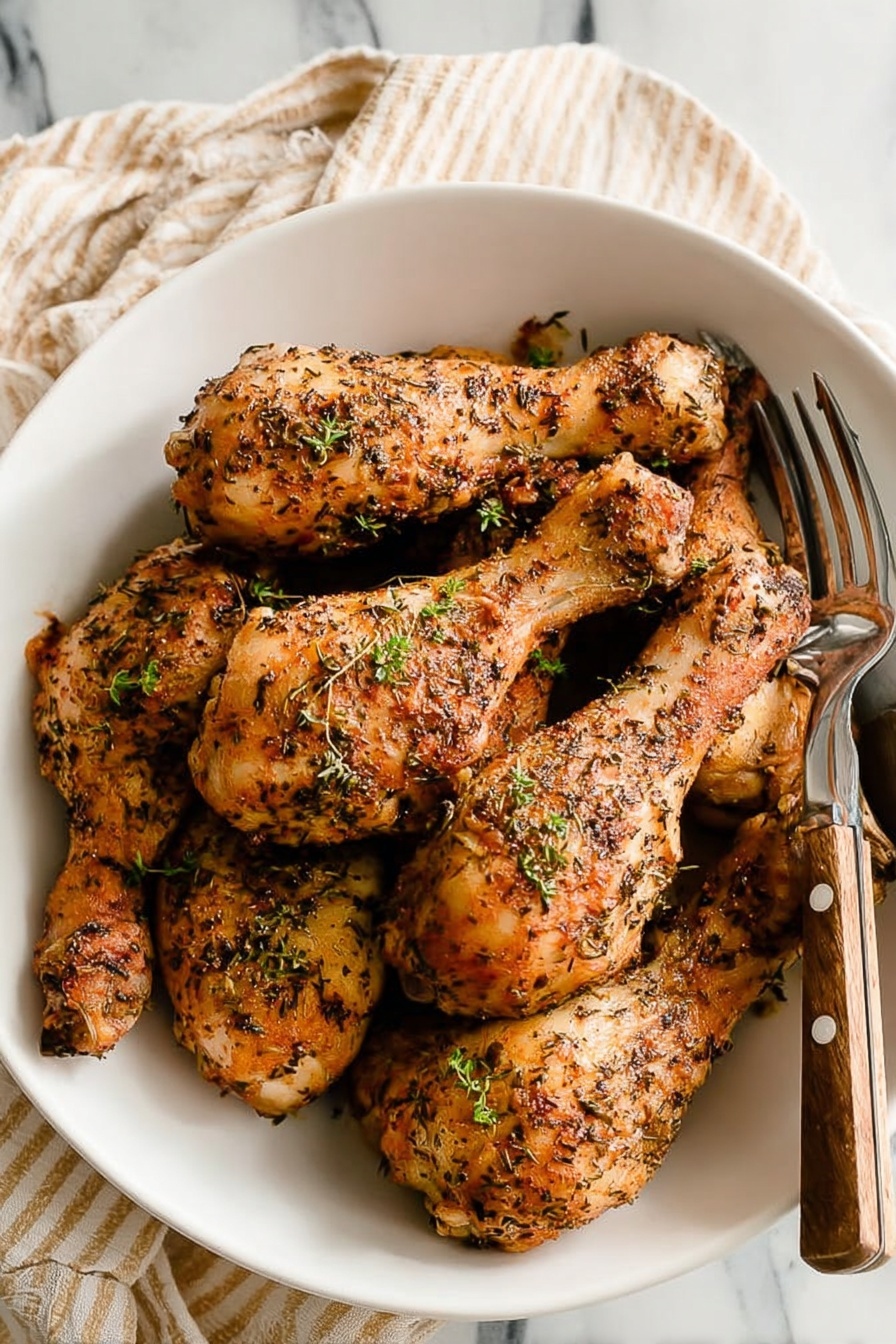
Garnishes
I’m a big fan of sprinkling chopped fresh parsley or cilantro over the finished chicken—it brightens and adds a lovely pop of color. Occasionally, I drizzle a little fresh lemon juice just before serving, which cuts through the richness and adds a zesty zing.
Side Dishes
These crispy chicken legs pair beautifully with roasted vegetables, garlic mashed potatoes, or a simple green salad for balance. For a casual dinner, I often serve them with corn on the cob or some buttery rice pilaf—comfort food at its best.
Creative Ways to Present
For a special occasion, I like to arrange the chicken legs on a large platter surrounded by lemon wedges, roasted cherry tomatoes, and fresh herbs. It not only looks stunning but lets guests customize their bites. Pairing it with colorful sides turns this simple dinner into a feast everyone will remember.
Make Ahead and Storage
Storing Leftovers
I store leftover chicken legs in an airtight container in the fridge, and they stay delicious for up to 3-4 days. The skin loses some crispness but the meat remains juicy. I usually cool them completely before refrigerating to avoid condensation making the skin soggy.
Freezing
Freezing is totally doable! I wrap each cooked leg tightly in foil or plastic wrap, then place them together in a freezer-safe bag. When I thaw them overnight in the fridge and reheat, they taste almost as good as freshly baked.
Reheating
To bring back crispiness when reheating, I pop the chicken legs on a wire rack in a 375°F oven for about 10-15 minutes. This method revives the crunchy skin better than microwaving, which tends to make it rubbery.
FAQs
-
Can I use this Crispy Baked Chicken Legs Recipe with other chicken parts?
Absolutely! Bone-in, skin-on chicken thighs or even wings can work well using this method. Adjust cooking times as needed—thighs might take a bit longer, while wings cook faster. The baking powder and drying approach still help get great crispiness.
-
Is baking powder necessary for crispy skin?
Yes! Baking powder raises the pH level of the chicken skin, breaking down proteins and promoting browning, which creates that satisfying crisp texture. Make sure to use baking powder, not baking soda, for the best results.
-
How do I know when the chicken legs are fully cooked?
The most reliable way is to use a digital meat thermometer—insert it into the thickest part without touching bone. When it reads 165°F, your chicken is safe to eat and perfectly juicy. Cooking times can vary based on oven and size.
-
Can I make this recipe gluten-free?
Definitely! All the main ingredients are naturally gluten-free. Just be sure to check your poultry seasoning or seasoning blends to confirm they don’t contain any hidden gluten.
Final Thoughts
This Crispy Baked Chicken Legs Recipe has truly won a place in my heart and kitchen. It’s exactly the kind of simple but elevated meal that feels special but doesn’t require hours of work or fancy ingredients. Whenever I serve this to friends or family, they can’t believe how crispy and flavorful the skin is, like it’s been fried but with none of the guilt. I hope you give it a try soon—you’ll love how easy and satisfying it is to have restaurant-quality crispy chicken right out of your oven!
Print
Crispy Baked Chicken Legs Recipe
- Prep Time: 15 minutes
- Cook Time: 35-40 minutes
- Total Time: 50-55 minutes
- Yield: 8 servings
- Category: Main Course
- Method: Baking
- Cuisine: American
Description
This Crispy Baked Chicken Legs recipe delivers perfectly seasoned, juicy chicken drumsticks with a delectably crisp skin. Using a combination of baking powder and poultry seasoning, these chicken legs bake in the oven to a golden perfection, ideal for a family-friendly dinner or meal prep.
Ingredients
Chicken
- 2 pounds chicken drumsticks, cleaned, with the excess fat removed
Seasoning Mix
- 2 tablespoon olive oil
- 2 tablespoon poultry seasoning, or seasoning of choice
- ½ teaspoon salt, plus more if desired
- ½ teaspoon black pepper, plus more if desired
- 2 teaspoon baking powder
Instructions
- Dry the Chicken: Place a cooling rack over a large baking sheet and layer it with paper towels. Arrange the chicken drumsticks on top of the wire rack and tent with more paper towels. Transfer this setup to the refrigerator for at least two hours or ideally overnight. If you’re short on time, pat the chicken legs as dry as possible with paper towels to remove moisture for crispier skin.
- Preheat Oven and Prepare Rack: Preheat your oven to 400 ℉ (204 ℃). Discard the paper towels from the cooling rack and spray the rack lightly with non-stick cooking spray to prevent sticking.
- Season the Chicken: In a large mixing bowl, combine olive oil, poultry seasoning, salt, black pepper, and baking powder thoroughly. Add the chicken legs to the bowl, and gently mix using your hands or tongs to coat each piece evenly with the seasoning mixture.
- Bake the Chicken: Arrange the seasoned chicken legs spaced apart on the prepared wire rack over the baking sheet. Bake them in the preheated oven for 35 to 40 minutes or until an instant-read thermometer inserted into the thickest part of the drumstick registers 165 ℉ (74 ℃), ensuring they are fully cooked and safe to eat.
- Rest and Serve: Remove the chicken legs from the oven and let them rest on the rack for 5 minutes. This allows the juices to redistribute and the skin to crisp up even more before serving.
Notes
- Store any leftovers in an airtight container in the refrigerator for up to 3-4 days.
- For extra crispy skin, ensure the chicken is thoroughly dried before seasoning.
- You can customize the seasoning by substituting poultry seasoning for your favorite spice blend.
- Using a wire rack allows air to circulate around the chicken for even crisping.
Nutrition
- Serving Size: 1 chicken drumstick (about 4 oz)
- Calories: 220
- Sugar: 0 g
- Sodium: 420 mg
- Fat: 14 g
- Saturated Fat: 3.5 g
- Unsaturated Fat: 9 g
- Trans Fat: 0 g
- Carbohydrates: 1 g
- Fiber: 0 g
- Protein: 22 g
- Cholesterol: 90 mg
