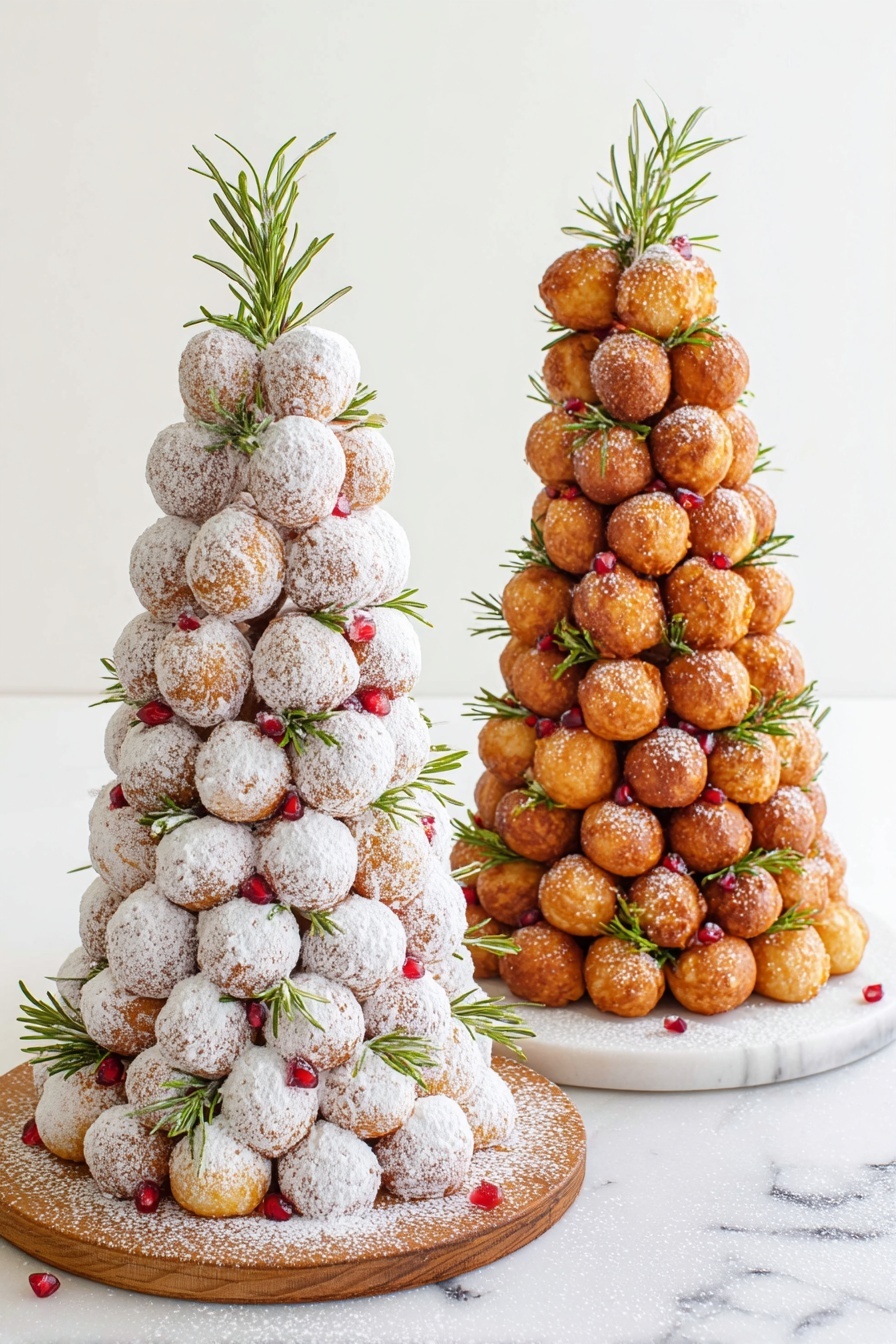
If you’re looking for a show-stopping, festive centerpiece that doubles as a sweet treat, you absolutely have to try this Christmas Donut Tree Recipe. It’s super fun to make, tastes delightful, and honestly, it lights up the whole room with that cozy holiday vibe. Trust me, once you see how easy it is to assemble and how magical it looks, you’ll want to make this every year!
Why You’ll Love This Recipe
- Effortlessly Festive: You can put this donut tree together quickly without baking or complicated steps.
- Beautiful and Edible: It looks like a holiday decoration but tastes delicious—double win!
- Customizable Details: Adding rosemary and pomegranate makes it uniquely Christmassy with fresh, zingy pops of flavor.
- Fun for All Ages: Kids love helping with assembly, and adults enjoy the festive vibe it brings.

Ingredients You’ll Need
The ingredient list here is refreshingly simple, but these little components come together to create something that feels so much bigger than the sum of its parts. Using fresh rosemary and bright pomegranate arils gives the tree a fresh, elegant touch that’s as pretty as it is tasty.
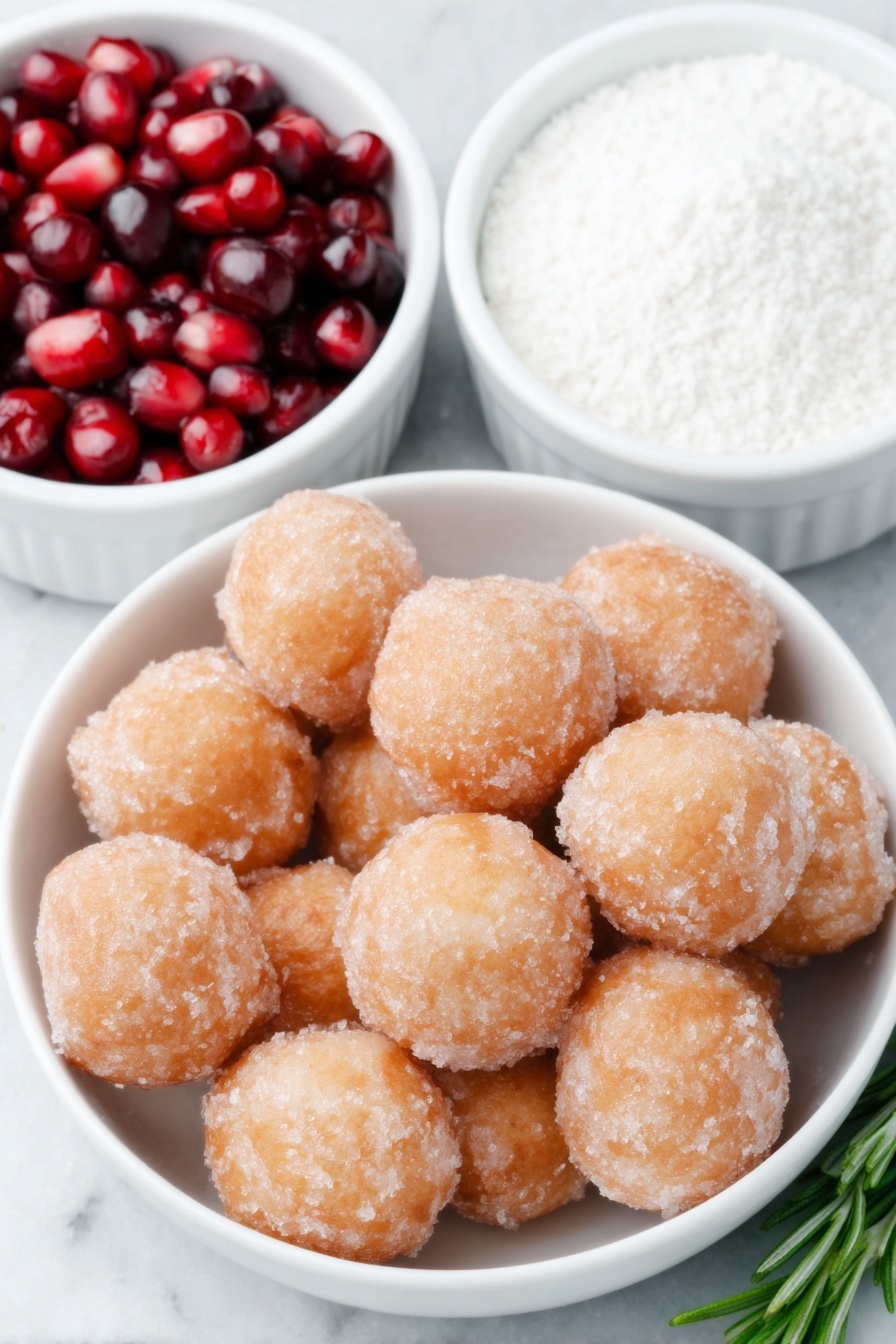
- Donut Holes: Grab classic glazed donut holes or your favorite variety to build your tree.
- Powdered Sugar: For dusting lightly over the finished tree – it adds that snowy Christmas look.
- Fresh Rosemary Sprigs: These little green sprigs resemble pine branches, perfect for filling gaps and adding an herbal aroma.
- Pomegranate Arils: These bright red seeds look like ornaments and add a tart burst of flavor.
- Toothpicks: Essential for skewering your donut holes onto the cone securely.
- 12 inch Styrofoam Cone: The base structure that gives your donut tree its iconic shape.
- Plastic Wrap: To cover the cone and keep it clean before applying the donuts.
Variations
I like to switch things up depending on what I have on hand or what flavor profile I want to highlight. The Christmas Donut Tree Recipe is super versatile, so feel free to customize it to your liking – after all, the holidays are all about making things your own!
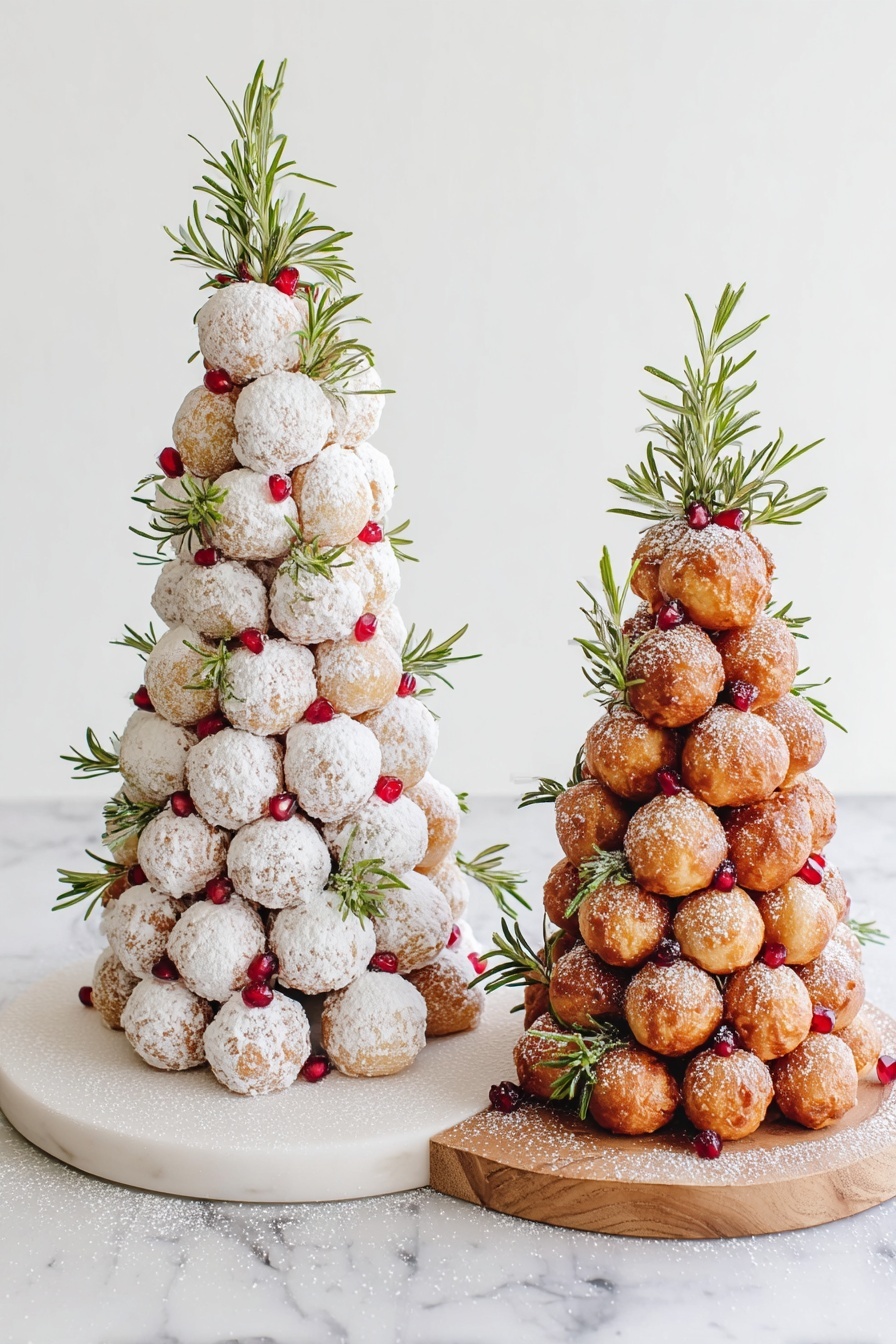
- Glazed vs. Powdered Donuts: I’ve tried swapping powdered sugar donut holes for classic glazed ones, and both work beautifully – just pick your favorite sweetness level.
- Herb Substitutes: Sometimes, I use thyme instead of rosemary for a slightly different aroma; just make sure you stick to fresh herbs for that piney look.
- Fruit Toppings: If pomegranate isn’t in season, try holly berries made from red candies or tiny cranberries for a similar festive pop.
- Tree Base Size: You can downsize the cone for a smaller donut tree, perfect for desk decorations or individual dessert displays.
How to Make Christmas Donut Tree Recipe
Step 1: Wrap Your Cone and Prep Base
First, wrap your 12-inch styrofoam cone tightly with two layers of plastic wrap. This keeps it clean and prevents any styrofoam from sticking to your donut holes. Place the cone upright on a sturdy surface so it’s easy to work with.
Step 2: Start Skewering Donut Holes
Take a toothpick and insert it about halfway into the bottom edge of the cone. Gently push one donut hole onto the toothpick, making sure it sits firmly. Continue to place toothpicks and donut holes around the base, spacing them evenly but allowing room so the tree shape stays neat and the holes don’t squish each other.
Step 3: Build the Tree Upward in Rows
Once the bottom ring is complete, start your next row above it. I like to tuck the donut holes in between the ones below, which means pushing the toothpicks in at a slight angle to fill gaps and give the tree a fuller appearance. Work your way up, row by row, until the entire cone is covered.
Step 4: Add Rosemary and Pomegranate Decorations
After your tree is fully covered with donuts, trim rosemary sprigs into small pieces and tuck them into any visible gaps. The greenery gives it a pine-like effect and adds a fresh herbal note. Dot pomegranate arils all over the tree like tiny red ornaments—they bring color and a juicy tartness that’s just perfect.
Step 5: Final Dusting
Finally, lightly dust the entire donut tree with powdered sugar as the “snow” to complete the festive look. Just use a small sieve and gently sprinkle—don’t go overboard!
Pro Tips for Making Christmas Donut Tree Recipe
- Use Fresh Donut Holes: I once tried this with stale donut holes, and it definitely showed—the fresh ones hold together better and look more appetizing.
- Angle Toothpicks for Stability: Slightly angling toothpicks inward as you go up helps keep the donuts secure and your tree sturdy.
- Pomegranate Timing: Add the pomegranate arils last, right before serving, so they stay juicy and don’t dry out.
- Gentle Dusting: Powdered sugar falls everywhere! I learned to dust lightly and over a tray to catch the excess, saving on cleanup.
How to Serve Christmas Donut Tree Recipe
Garnishes
I stick with fresh rosemary and lively pomegranate arils for garnishes—they not only look festive but bring that fresh aroma and a burst of flavor. Sometimes I add a few tiny candy canes at the base for a playful touch that kids adore.
Side Dishes
This donut tree stands beautifully alone as a dessert centerpiece, but if you want sides, I love pairing it with hot cocoa or mulled cider. A simple cup of spiced tea also complements the sweet and herbal flavors perfectly during cozy gatherings.
Creative Ways to Present
For extra flair, I’ve placed fairy lights around the base for a twinkling effect in dim light. Wrapping a big festive ribbon around the cone (below the donuts) adds a polished look too. If you’re making several mini donut trees, arrange them in different heights for a charming holiday display.
Make Ahead and Storage
Storing Leftovers
If by some miracle you have leftovers, keep the donut tree covered loosely with plastic wrap and store it at room temperature. Because donut holes can get soggy in the fridge, room temp works best for up to a day. I usually dismantle the tree and eat the donuts individually the next day.
Freezing
I don’t recommend freezing the assembled donut tree since the texture of the donuts changes. However, the donut holes themselves freeze well if stored in airtight bags, so you can prep ahead and thaw them before building your tree.
Reheating
Since the donut tree is all about fresh presentation, I usually enjoy the donuts at room temperature. If you want to warm individual donut holes, a few seconds in the microwave does the trick, but avoid reheating the whole tree.
FAQs
-
Can I make the Christmas Donut Tree Recipe with gluten-free donuts?
Absolutely! As long as you can find gluten-free donut holes sturdy enough to hold on toothpicks, the assembly process stays the same. Just handle the donut holes gently since some gluten-free varieties can be more delicate.
-
How far in advance can I assemble the donut tree?
I recommend assembling the tree no more than a few hours before your event to keep the donuts fresh and the rosemary green. If you need to prep ahead, wrap the cone and toothpicks first, then add donuts and decorations last minute.
-
What if I don’t have a styrofoam cone?
You can use a cone-shaped wire frame or even roll sturdy cardboard into a cone shape and cover it with plastic wrap. The key is having a stable base to skewer your donuts securely.
-
Can I use mini donuts instead of donut holes?
Mini donuts may work, but donut holes are ideal since their small size helps create that classic Christmas tree shape without gaps. Using larger donuts might make the tree bulky and harder to stabilize.
Final Thoughts
This Christmas Donut Tree Recipe has become one of my all-time favorite holiday projects because it’s simple, fun, and brings everyone together. Whether you’re surprising guests or just want something unique for your family’s celebration, this tree delivers that festive magic with ease. Give it a try—I promise you’ll love how it turns out and how much joy it adds to your holiday table!
Print
Christmas Donut Tree Recipe
- Prep Time: 20 minutes
- Cook Time: 0 minutes
- Total Time: 20 minutes
- Yield: 12 servings
- Category: Dessert, Snack, Holiday Treat
- Method: No-Cook
- Cuisine: American
Description
Create a festive and visually stunning Christmas Donut Tree using simple ingredients like donut holes, fresh rosemary sprigs, and pomegranate arils. This no-cook holiday centerpiece doubles as a delicious treat, perfect for gatherings and parties. Easy to assemble, it makes an impressive holiday display with sweet and fresh flavors.
Ingredients
Donuts
- 80-90 Donut Holes (powdered sugar or sour cream flavor)
Decorations
- Fresh Rosemary Sprigs (for filling gaps and decoration)
- 1/4 Cup Pomegranate Arils (for embellishment)
- 1/2 Cup Powdered Sugar (for dusting)
Assembly Supplies
- 90 Toothpicks
- 12 inch Styrofoam Cone
- Plastic Wrap (to wrap cone)
Instructions
- Prepare the Cone: Wrap the 12-inch styrofoam cone with two layers of plastic wrap to protect it from the donut holes and ease cleanup.
- Insert Toothpicks at the Base: Position the wrapped cone upright and push a toothpick halfway into the cone starting at the bottom. This will hold the donut holes in place.
- Add Donut Holes in Rows: Gently place a donut hole onto each toothpick, ensuring the donut holes line up evenly around the base of the cone to form a stable foundation.
- Continue Adding Toothpicks and Donuts: Insert the next toothpick near but not touching the previous donut hole to leave space for the next. Place donut holes on these toothpicks, continuing around in a complete circle to cover the bottom row.
- Build Subsequent Rows: For the new rows, tuck the donut holes in between the ones below to fill gaps and maintain a tree shape, continuing upwards until the entire cone is covered.
- Add Rosemary Sprigs: Trim small pieces of fresh rosemary and place them strategically into the cone where gaps exist or to add greenery for a festive look.
- Decorate with Pomegranate and Powdered Sugar: Scatter pomegranate arils throughout the tree for red berry accents and lightly dust the assembled donut tree with powdered sugar to mimic snow.
Notes
- Use fresh rosemary sprigs for best aroma and visual effect.
- Choose donut holes that are freshly made or store-bought but fresh for optimal taste.
- Be gentle when placing donut holes to avoid squishing.
- The tree serves approximately 12 people, depending on appetite.
- Can be prepared a few hours ahead but assemble close to serving time for freshness.
- To keep the powdered sugar from melting, dust just before serving.
Nutrition
- Serving Size: 1 slice (approx. 1 donut hole)
- Calories: 110
- Sugar: 12g
- Sodium: 90mg
- Fat: 5g
- Saturated Fat: 2.5g
- Unsaturated Fat: 1.5g
- Trans Fat: 0g
- Carbohydrates: 15g
- Fiber: 0.5g
- Protein: 1g
- Cholesterol: 10mg


