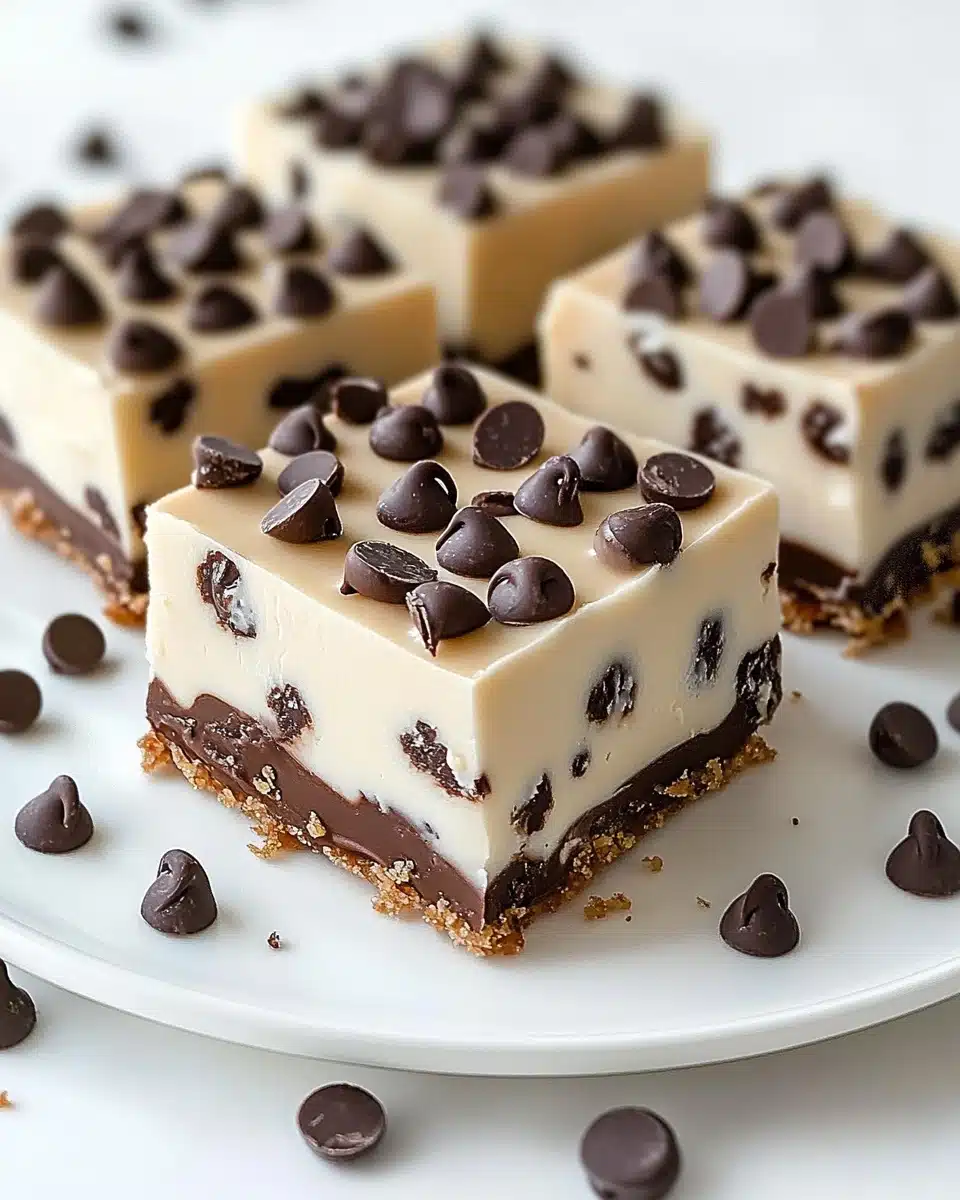
Imagine the decadent joy of cheesecake, the irresistible comfort of a chocolate chip cookie, and the ease of a handheld treat—all combined into one glorious dessert. That’s exactly what you get with these Chocolate Chip Cheesecake Bars: a rich, creamy filling nestled atop a buttery chocolate-studded cookie crust, all baked into perfectly sliceable bars. Honestly, I could swoon just thinking about them!
Why You’ll Love This Recipe
- All-in-One Crowd Pleaser: These bars deliver the flavors of classic cheesecake and chocolate chip cookies in every bite, making them a hit at any gathering.
- Handheld & Mess-Free: No slicing messy cheesecake wedges—just grab a bar and savor with zero fuss (napkin totally optional!).
- Easy, Straightforward Steps: With no water bath or springform pan required, anyone can bake these bars, no matter your skill level.
- Make-Ahead Magic: They taste even better after chilling overnight, making them ideal for prepping ahead for parties or weeknight treats.
Ingredients You’ll Need
You’ll be amazed at how just a handful of familiar ingredients transform into showstopping Chocolate Chip Cheesecake Bars. Each one plays an important part, from the vanilla wafers’ subtle crunch to those melty pockets of mini chocolate chips—nothing fancy, just pure dessert joy.
- Vanilla wafer cookies: These classic cookies create a buttery, slightly crisp crust that offers the perfect contrast to creamy cheesecake.
- Granulated sugar: Adds sweetness to both the crust and the cheesecake filling, balancing the tang for that classic cheesecake zing.
- Kosher salt: Just a touch sharpens and brightens every other flavor in the bars.
- Unsalted butter (melted): Binds the crust together for a rich, melt-in-your-mouth base.
- Mini chocolate chips: They’re sprinkled in both the crust and the filling, guaranteeing chocolate in every glorious bite without overpowering the creamy cheesecake.
- Cream cheese (softened): The heart of the cheesecake layer—make sure it’s at room temperature for the silkiest, lump-free texture.
- Large eggs: Bind the ingredients and create that classic, rich cheesecake structure.
- Vanilla extract: Adds a warm, sweet aroma that makes these bars extra inviting.
- Sour cream: Delivers irresistible tang and lushness to the filling.
Variations
One of my favorite things about Chocolate Chip Cheesecake Bars is how endlessly customizable they are. Whether you’re working with what’s in your pantry or adjusting for allergies and preferences, you can easily make them your own.
- Swap the cookies: Try chocolate graham crackers, Biscoff cookies, or even classic graham crackers for a fun twist on the crust’s flavor.
- Add a swirl: Drop dollops of salted caramel or raspberry jam on top of the cheesecake filling and swirl with a knife before baking for a bakery-worthy look.
- Mix in nuts: Stir in a handful of finely chopped toasted pecans or walnuts to the crust or filling for extra crunch and nutty richness.
- Make it gluten-free: Use gluten-free vanilla wafers or cookies and check that your chocolate chips are gluten-free, too—easy as that!
How to Make Chocolate Chip Cheesecake Bars
Step 1: Prepare Your Pan and Preheat the Oven
Start by heating your oven to 350°F. Grab an 8×8-inch baking dish and line it with parchment paper, leaving an overhang on two sides—this little trick makes lifting the bars out later a total breeze. Give the exposed edges a light greasing so nothing sticks.
Step 2: Make the Cookie Crust
In a food processor, pulse the vanilla wafers until they’re fine crumbs, like soft sand—about 1 cup’s worth. Add the sugar and salt, then pulse a few more times. Pour in the melted butter and pulse again until the mixture clumps together. Stir in the mini chocolate chips by hand for an even distribution of chocolate (and some pops of joy in each bite)!
Step 3: Press and Bake the Crust
Pour the crumb mixture into your prepared pan and use a small spatula—or the bottom of a measuring cup—to press it firmly and evenly across the bottom. Bake the crust for about 8–10 minutes, just until it’s fragrant and has taken on a pale golden hue. Let it cool slightly while you work on the filling.
Step 4: Mix the Cheesecake Filling
Beat the softened cream cheese with the sugar until velvety-smooth and fluffy (no lumps, please!). Add the eggs one at a time, mixing until fully blended. Scrape down the bowl, then mix in the vanilla extract and sour cream. Gently fold in the mini chocolate chips, saving a few to sprinkle over the top, if you’re feeling fancy.
Step 5: Assemble and Bake
Spoon the cheesecake batter over the warm crust and gently smooth the top. Sprinkle with any reserved chocolate chips, then bake for about 25 minutes—the center should be just set but still ever-so-slightly wobbly. The bars will continue to set as they cool.
Step 6: Cool, Chill, and Slice
Cool the bars completely on a wire rack, then cover and refrigerate for at least 4 hours (overnight is best). Use the parchment overhang to lift the chilled slab out of the pan and slice into squares. Prepare to be everyone’s new favorite dessert maker!
Pro Tips for Making Chocolate Chip Cheesecake Bars
- Ultra-Silky Filling: Make sure your cream cheese is completely softened before mixing—this prevents pesky lumps and ensures the creamiest texture.
- No Rushing the Chill: Don’t be tempted to slice before the bars are fully chilled—this rest time guarantees clean cuts and dreamily set cheesecake.
- Even Chocolate Distribution: Toss your mini chocolate chips with a teaspoon of flour before folding them into the filling for perfect, chocolatey bites in every bar.
- Lining the Pan: Be generous with your parchment paper overhang—removing the bars will be effortless (and oh so satisfying)!
How to Serve Chocolate Chip Cheesecake Bars
Garnishes
For a truly bakery-worthy finish, scatter a few extra mini chocolate chips or a drizzle of melted chocolate across the bars just before serving. You can even add a dusting of powdered sugar for a whimsical snowy touch, or top each square with a dollop of whipped cream for a special occasion.
Side Dishes
Keep things simple and let these bars shine as a solo act, or serve alongside a platter of fresh berries—the tartness balances the creamy richness. If you want to go all-in with comfort vibes, pair with a mug of strong coffee or iced cold brew for the ultimate afternoon treat.
Creative Ways to Present
Arrange the bars on a pretty cake stand for a party centerpiece, or wrap individual squares in parchment and bakery twine for the most adorable lunchbox or picnic surprise. For potlucks, stack them up on a platter with fresh mint leaves tucked between for a pop of color.
Make Ahead and Storage
Storing Leftovers
Chocolate Chip Cheesecake Bars keep beautifully—simply store them in an airtight container in the refrigerator for up to five days. The texture actually improves with a bit of chill, making the flavors meld even more.
Freezing
Want to save some for later (or just have a stash of happiness ready)? Freeze the bars, tightly wrapped and layered with parchment or wax paper, for up to two months. Thaw overnight in the fridge for the best texture—no one will guess they weren’t freshly baked.
Reheating
No need to reheat these—Chocolate Chip Cheesecake Bars are meant to be enjoyed chilled or at cool room temperature. If you like a warmer, gooier center, let a bar sit out on the counter for 20 minutes before enjoying.
FAQs
-
Can I double the recipe for a larger crowd?
Absolutely! Simply double all the ingredients and bake in a 9×13-inch pan. The baking time may need an extra 5–10 minutes; just make sure the center is just set before cooling.
-
Do I have to use mini chocolate chips, or can I use regular ones?
Mini chips distribute more evenly throughout each layer and make slicing tidier, but regular chocolate chips work just fine. If you’d like, give them a rough chop first for more even chocolate in every bite.
-
Why is my cheesecake filling lumpy?
Lumpy cheesecake usually happens when the cream cheese isn’t fully softened before mixing. Next time, let it come to room temp and beat until smooth before adding the eggs and other ingredients.
-
How do I get clean slices without the bars crumbling?
Be sure to chill the bars thoroughly, then use a long, sharp knife wiped clean between cuts. The parchment paper overhang also helps lift them out smoothly for easier cutting.
Final Thoughts
Whether you’re craving the richness of cheesecake, the comfort of chocolate chip cookies, or simply a dessert that’s incredibly easy to share, these Chocolate Chip Cheesecake Bars never disappoint. I hope you love them as much as my friends and family do—dig in and let these delightful bars become your new go-to sweet treat!
Print
Chocolate Chip Cheesecake Bars Recipe
- Prep Time: 30 mins
- Cook Time: 25 mins
- Total Time: 4 hrs 55 mins
- Category: Dessert
- Method: Baking
- Cuisine: American
- Diet: Vegetarian
Description
Indulge in these decadent Chocolate Chip Cheesecake Bars that combine a buttery cookie crust with a creamy cheesecake filling studded with mini chocolate chips. Perfect for any occasion!
Ingredients
For the cookie crust
- 30 standard-sized vanilla wafer cookies
- 2 tablespoons granulated sugar
- 1/4 teaspoon kosher salt
- 3 tablespoons (43g) unsalted butter, melted
- 2 tablespoons (10g) mini chocolate chips
For the cheesecake filling
- 16 ounces cream cheese, softened
- 3 large eggs
- 1/2 cup (3 1/2 ounces) granulated sugar
- 1 teaspoon vanilla extract
- 1/4 cup (2 ounces) sour cream
- 1/2 cup (3 ounces) mini chocolate chips
Instructions
- Preheat oven: Heat oven to 350°F. Grease and line an 8×8 baking dish with parchment paper, leaving an overhang of parchment on two sides.
- Make the crust: Pulse the vanilla wafers in a food processor until fine crumbs the size of sand form. Add sugar and salt, pulse 5 times. Pour in melted butter and pulse until clumpy. Stir in mini chocolate chips.
Nutrition
- Serving Size: 1 bar
- Calories: 290
- Sugar: 16g
- Sodium: 220mg
- Fat: 20g
- Saturated Fat: 11g
- Unsaturated Fat: 6g
- Trans Fat: 0g
- Carbohydrates: 24g
- Fiber: 1g
- Protein: 5g
- Cholesterol: 90mg


