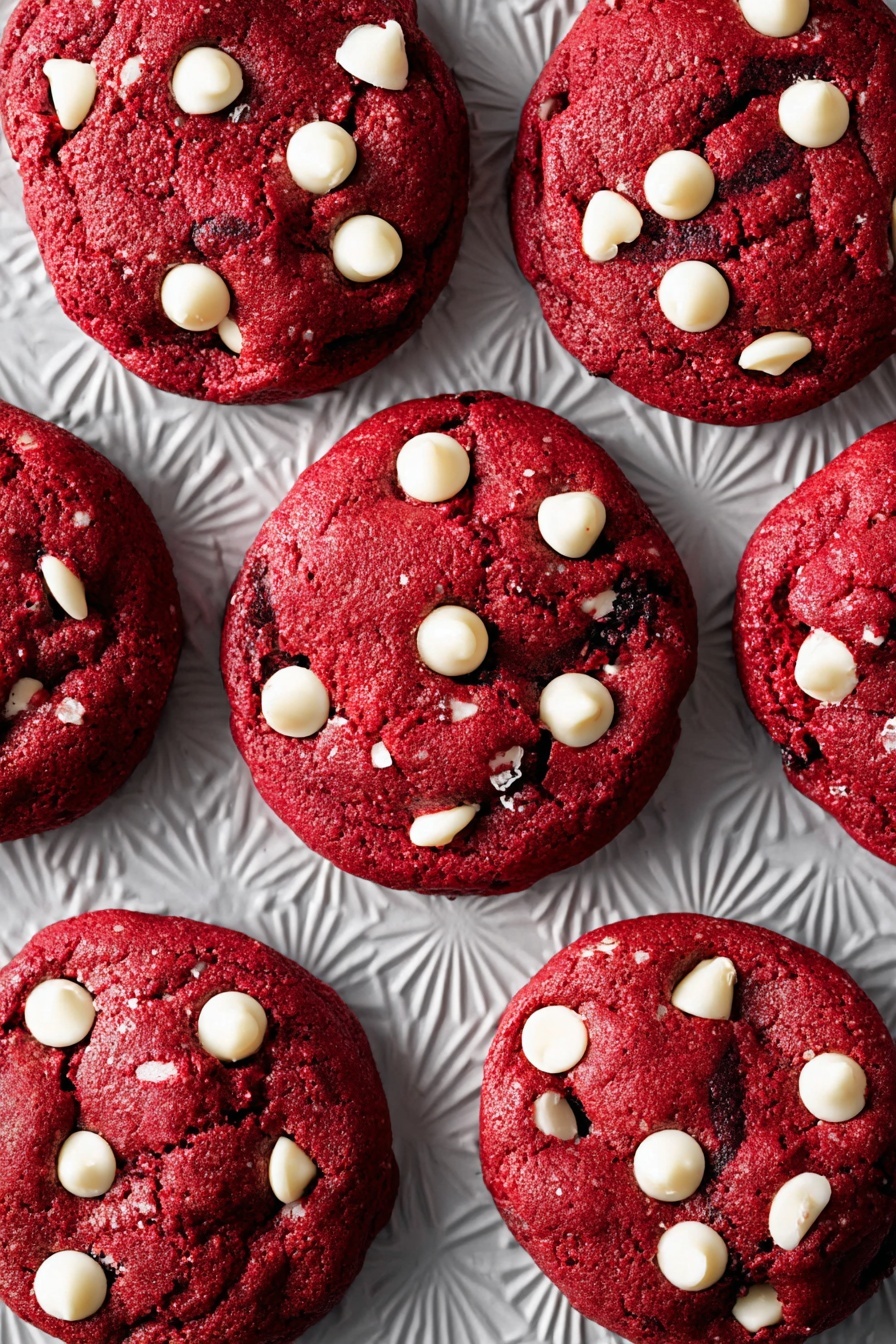
If you love a little surprise in your cookies, then you’re in for a treat with this Cheesecake-Stuffed Red Velvet Cookies Recipe. These aren’t your average cookies—they’re a luscious red velvet exterior wrapped around a creamy cheesecake center that melts in your mouth. When I first tried making these, I was hooked immediately, and I bet once you bake them, you’ll understand why they’re such a fan favorite!
Why You’ll Love This Recipe
- The Perfect Red Velvet Flavor: A deep cocoa taste balanced with a vibrant red hue that always impresses.
- Creamy Cheesecake Surprise: Each bite reveals a smooth cheesecake filling that’s irresistibly rich.
- Soft, Slightly Underbaked Texture: These cookies stay tender and moist, just how I like them—and you will too.
- Fun to Make and Share: Great for holidays, parties, or just an indulgent treat at home.

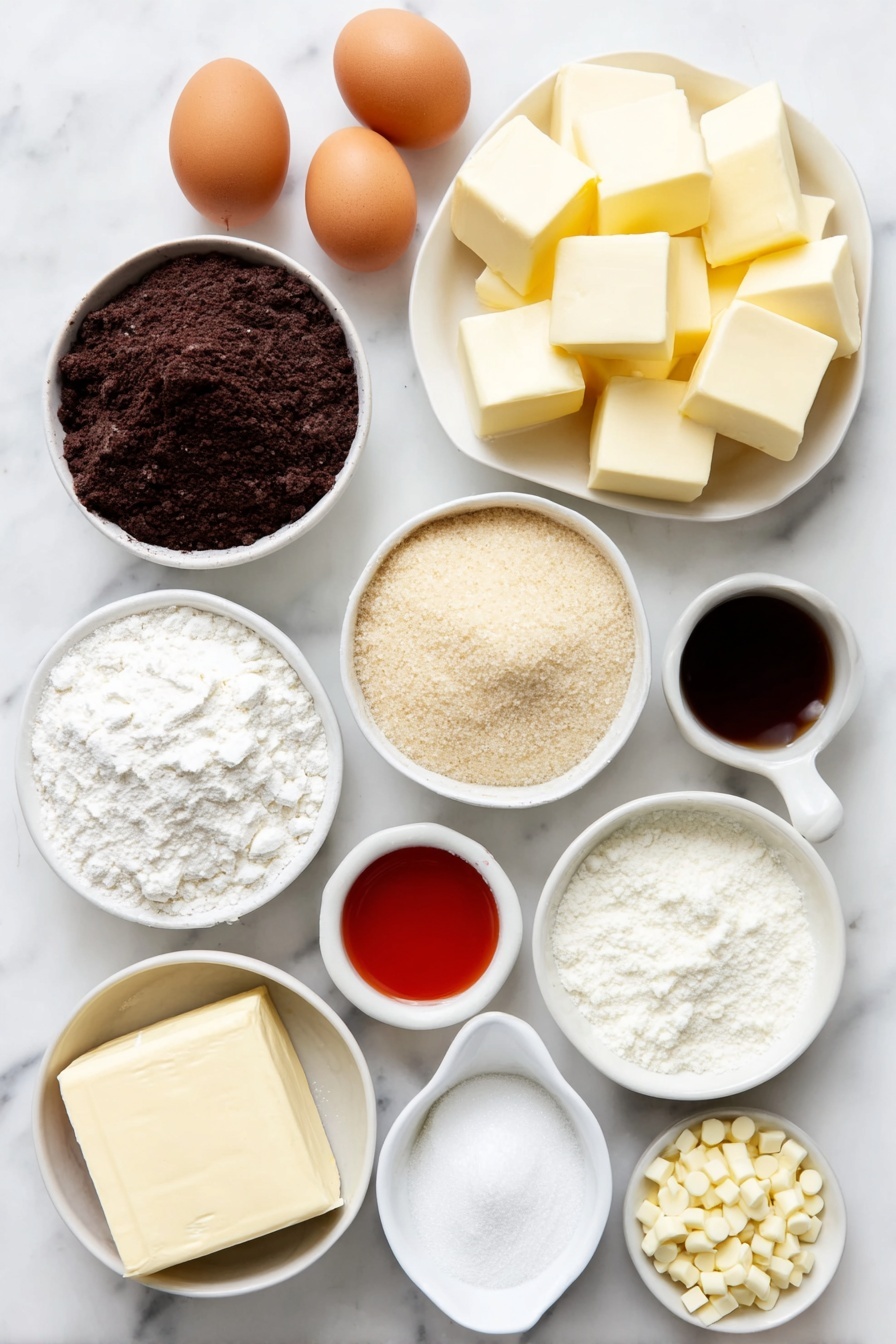
Ingredients You’ll Need
Getting your ingredients right is the first step to nailing this Cheesecake-Stuffed Red Velvet Cookies Recipe. The combination of cocoa, red food coloring, and cream cheese really makes these cookies stand out. Plus, using white chocolate chips adds a lovely sweet touch that compliments the tangy cream cheese perfectly.
- Butter: Use barely softened butter for the best texture—it helps create that perfect cookie dough consistency.
- Brown Sugar: Adds moisture and a hint of caramel flavor that complements the cocoa.
- Sugar: Balances sweetness and works with brown sugar for chewiness.
- Eggs: Key for holding everything together and adding richness.
- Vanilla Extract: Enhances the overall flavor depth; vanilla bean paste works beautifully too.
- Red Food Coloring or Gel: Use gel coloring for a more intense red without watering down the dough.
- Unsweetened Cocoa Powder: Essential for that authentic red velvet taste—it adds subtle chocolate notes.
- Flour: Provides structure; you can tweak the amount to get your desired cookie thickness.
- Baking Soda: Helps the cookies rise and keeps them soft.
- Cornstarch: Adds tenderness by softening the gluten structure in the flour.
- Salt: Balances sweetness and enhances flavors—remember to adjust if using salted butter.
- White Chocolate Chips: These little bursts of sweetness pair perfectly with red velvet and cheesecake.
- Cream Cheese: For the luscious cheesecake filling; make sure it’s barely softened for easy mixing.
- Powdered Sugar: Sweetens and smooths out the cheesecake filling.
Variations
This Cheesecake-Stuffed Red Velvet Cookies Recipe is pretty amazing as is, but sometimes I like to tweak it to match what I have on hand or to make it fit the occasion. Don’t be afraid to customize—baking should be fun and flexible!
- White Chocolate-Free Version: If white chocolate isn’t your thing, swap the chips for dark chocolate or even mini red velvet chunks—I’ve tried this, and it’s still delicious!
- Mini Cheesecake Centers: For a bite-size treat, freeze smaller cheesecake dollops and make teeny cookies around them. Perfect for parties.
- Nutty Twist: Add chopped pecans or walnuts into the dough for some crunch—I love this texture contrast in the fall.
- Dairy-Free Adaptation: Use vegan butter and dairy-free cream cheese alternatives. It takes a bit of experimenting but totally doable with these swaps.
How to Make Cheesecake-Stuffed Red Velvet Cookies Recipe
Step 1: Prep the Cheesecake Filling
Start by beating the cream cheese, powdered sugar, and vanilla extract until smooth and creamy. This is the heart of the cookie’s surprise! Next, scoop the mixture into 16 small portions onto a parchment-lined tray. Freeze these for about 45 minutes to an hour until they’re firm but not rock solid—this makes them easier to wrap in dough later without melting or leaking.
Step 2: Make the Red Velvet Cookie Dough
While the cheesecake is chilling, preheat your oven to 350°F and line your baking sheets with parchment paper. Cream the butter with both sugars until fluffy—this is where a stand mixer really shines. Beat in the eggs one at a time, then add vanilla and red food coloring for that signature eye-catching color.
In a separate bowl, whisk together the flour, cocoa powder, cornstarch, baking soda, and salt. Gradually fold the dry ingredients into the wet mixture until just combined—don’t overmix or you’ll risk tougher cookies. Stir in the white chocolate chips last for a sweet surprise throughout.
Step 3: Assemble Your Cookies
Divide the cookie dough into 16 balls. Flatten each one into a disc, then place a frozen cheesecake ball in the center. This is where patience pays off—the cheesecake needs to still be cold to prevent stickiness. Gently wrap the dough around the cheesecake, pinching seams to seal entirely so no filling escapes during baking. Roll into a smooth ball to seal the deal.
Place your filled dough balls with about 2 inches of space on the parchment-lined baking sheet. This spacing helps them bake evenly without sticking together.
Step 4: Bake and Shape
Bake for 10 to 13 minutes, watching that the edges are set but the center still looks soft—this is key because you want to slightly underbake for that delicate chewiness. As soon as they come out of the oven, gently press them into perfect circles with a spatula or the bottom of a glass. This little shaping hack makes a huge difference in presentation.
Let the cookies rest on the baking sheet for 5 minutes before moving them to a wire rack to finish cooling. If you want to get fancy, drizzle melted white chocolate or sprinkle festive accents on top once cooled; it elevates these cookies to party-level treats.
Pro Tips for Making Cheesecake-Stuffed Red Velvet Cookies Recipe
- Freeze the Filling Enough: Make sure the cheesecake balls are firm but not frozen solid—I found this is key so the dough doesn’t tear and leak while wrapping.
- Don’t Overmix Dry Ingredients: Fold gently; overmixing activates gluten and can make your cookies tough instead of tender.
- Use a Spatula for Perfect Cookies: Pressing the cookies immediately out of the oven helps them keep a classic, even shape instead of spreading unevenly.
- Seal the Seams Well: Take your time here to prevent the cheesecake from oozing out during baking—pinch and roll gently but firmly.
How to Serve Cheesecake-Stuffed Red Velvet Cookies Recipe
Garnishes
For me, a quick drizzle of melted white chocolate over cooled cookies is everything—it adds a glossy, gourmet touch that’s surprisingly simple. Sometimes, I sprinkle a bit of festive colored sugar or sprinkles on top before the chocolate sets to make them party-ready. These little touches always impress guests without any extra fuss.
Side Dishes
I usually serve these with a tall glass of cold milk or even a hot cup of coffee or tea. The rich cookie and cheesecake center are perfect matches for beverages that cut through the sweetness. For a brunch twist, they pair wonderfully with fresh fruit or a light yogurt parfait to balance the indulgence.
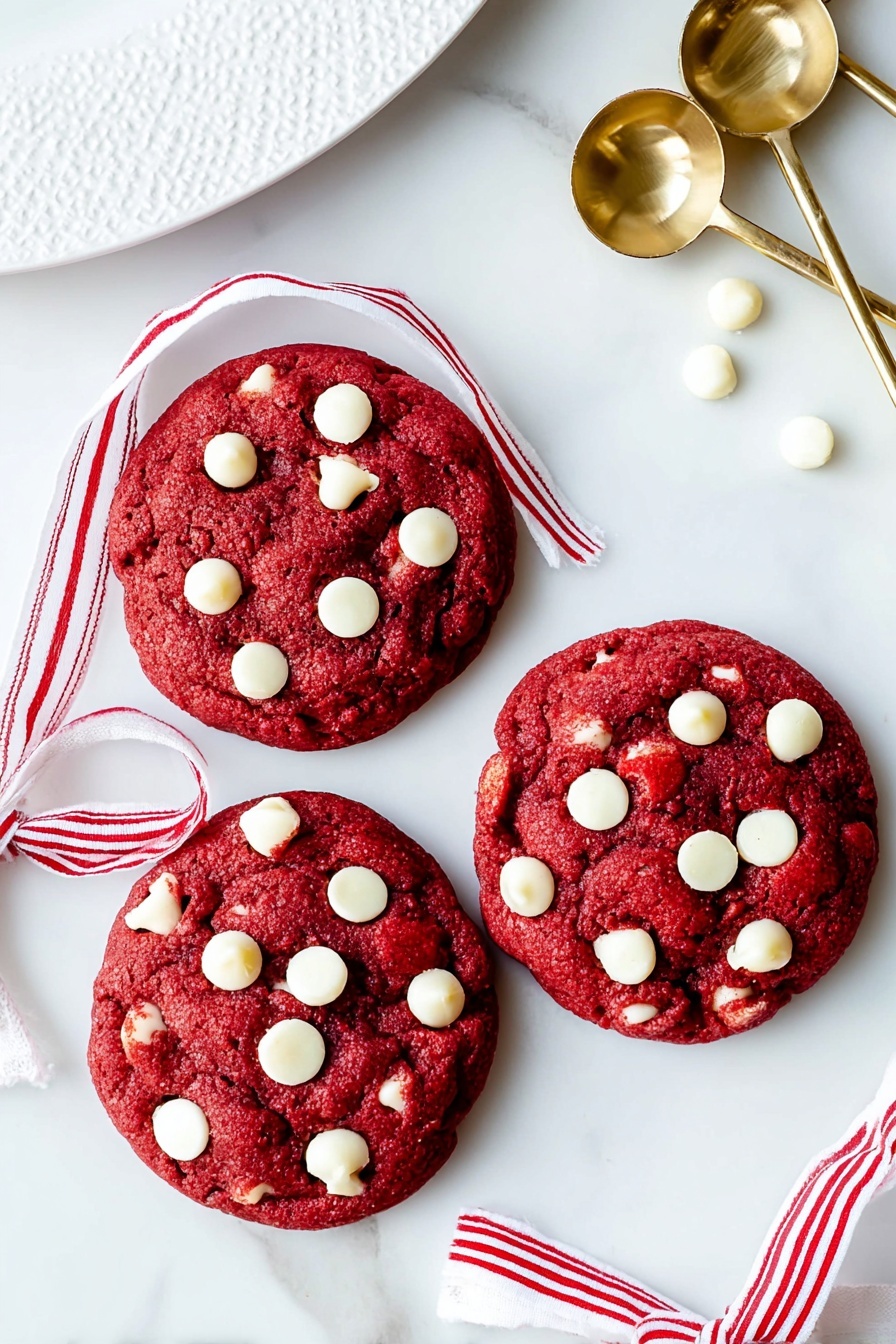
Creative Ways to Present
Once, I arranged these cookies on a beautiful tiered dessert stand for a holiday party, alternating with red velvet cupcakes and cream cheese frosting for a stunning red-and-white themed spread. You can also wrap them individually in parchment paper tied with ribbon, making great homemade gifts for friends and family.
Make Ahead and Storage
Storing Leftovers
I keep leftover cheesecake-stuffed cookies in an airtight container at room temperature for up to 3 days, which keeps them soft and flavorful. If you want longer storage, refrigeration works too but can slightly dry them out, so I recommend warming them a bit before serving.
Freezing
These cookies actually freeze quite well! After baking and cooling completely, I wrap them individually in plastic wrap, then pop them in a freezer-safe bag. When I’m ready for a treat, I thaw them at room temperature for about an hour, and they taste almost fresh-baked.
Reheating
I reheat leftover cookies gently in a microwave for about 15 seconds or in a low oven (300°F) for 5 minutes. This softens the cookie and slightly warms the cheesecake center, reviving that fresh-from-the-oven sensation that’s pure comfort.
FAQs
-
Can I use regular red food coloring or should I choose gel?
You can use either regular liquid or gel food coloring, but gel is my preference because it gives a more vibrant red without altering the dough consistency. Liquid coloring can sometimes make the dough a little looser.
-
What if my cheesecake filling leaks during baking?
Leaking usually means the cheesecake portions weren’t frozen enough or the dough wasn’t sealed tightly. Make sure your filling is firm, and when wrapping, pinch the dough seams well and check for any thin spots where filling might seep out.
-
Can I make these cookies ahead of time?
Absolutely! You can prepare the dough and cheesecake filling in advance, freeze the assembled cookie balls, and bake them straight from frozen—just add a couple extra minutes to the bake time.
-
How do I prevent the cookies from spreading too much?
Using the right flour amount and chilling the cheesecake filling helps. Also, don’t flatten the dough too thin before wrapping; thicker dough will better hold its shape. Baking at 350°F works well for controlled spreading.
Final Thoughts
This Cheesecake-Stuffed Red Velvet Cookies Recipe has become one of my absolute go-tos when I want to impress without a ton of fuss. The creamy surprise inside paired with the soft, cocoa-kissed cookie is a flavor and texture combo that absolutely delights every time. If you try it once, I promise you’ll keep coming back to this recipe for birthdays, holidays, or whenever you need a sweet pick-me-up. Honestly, baking these is like sharing a little love in cookie form, and I can’t wait for you to enjoy them as much as my family does!
Print
Cheesecake-Stuffed Red Velvet Cookies Recipe
- Prep Time: 25 minutes
- Cook Time: 10 minutes
- Total Time: 35 minutes
- Yield: 16 cookies
- Category: Dessert
- Method: Baking
- Cuisine: American
- Diet: Vegetarian
Description
Delight in these decadent Cheesecake Stuffed Red Velvet Cookies, featuring soft and rich red velvet cookie dough generously filled with a creamy cheesecake center. Perfectly baked to achieve a tender texture with a slight underbaked center, these cookies combine the luscious flavors of cocoa, cream cheese, and white chocolate chips into an irresistible treat.
Ingredients
Red Velvet Cookies:
- 1 cup Butter (barely softened)
- 1 cup Brown Sugar
- 1/2 cup Sugar
- 2 large Eggs
- 2 teaspoons Vanilla Extract
- 2 teaspoons Red Food Coloring or Gel
- 1/3 cup Unsweetened Cocoa Powder
- 3 cups Flour
- 1 teaspoon Baking Soda
- 1/2 teaspoon Cornstarch
- 1 teaspoon Salt (use 1/2 teaspoon if using salted butter)
- 1 3/4 to 2 cups White Chocolate Chips
Cheesecake Filling:
- 1 (8-ounce) package Cream Cheese (barely softened)
- 1 cup Powdered Sugar
- 1 teaspoon Vanilla Extract or Vanilla Bean Paste
Instructions
- Prepare Cheesecake Filling: In a medium bowl, beat the cream cheese, powdered sugar, and vanilla extract until smooth and creamy. Scoop the mixture into 16 small portions on a parchment-lined baking sheet. Freeze for 45 minutes to 1 hour, or until firm to the touch.
- Make Red Velvet Cookie Dough: Preheat the oven to 350°F (175°C) and line baking sheets with parchment paper. In a large bowl, cream the butter, brown sugar, and granulated sugar together until light and fluffy. Beat in the eggs, one at a time, followed by the vanilla extract and red food coloring.
- Combine Dry Ingredients: In a separate bowl, whisk together the flour, cocoa powder, cornstarch, baking soda, and salt. Gradually fold the dry ingredients into the wet mixture until just combined. Gently fold in the white chocolate chips.
- Assemble Cookies: Divide the cookie dough into 16 equal balls and flatten each into a disc using your hands. Place one frozen cheesecake portion in the center of each disc, ensuring the cheesecake is cold to prevent stickiness. Carefully wrap the dough around the cheesecake, pinching seams and rolling gently into a smooth ball to fully encase the filling and avoid leaks.
- Bake the Cookies: Place the assembled cookie balls on the prepared baking sheets, spacing them about 2 inches apart. Bake for 10-13 minutes until the edges are set but centers still look soft — it’s important to underbake slightly so they remain tender after cooling.
- Shape and Cool: Remove cookies from the oven and immediately press down gently with a round spatula, the rim of a glass, or a spoon to shape them into perfect circles. Allow the cookies to cool on the baking sheet for 5 minutes before transferring to a wire rack to cool completely.
- Optional Decoration: For a gourmet touch, drizzle melted white chocolate over the cooled cookies or sprinkle with festive sprinkles. To melt white chocolate, place chips in a microwave-safe bowl with 1 teaspoon oil and microwave at 50% power in 30-second intervals, stirring until smooth.
Notes
- For thinner cookies, flatten dough balls more or reduce flour to 2 3/4 cups. For thicker cookies, roll dough into larger balls and use the full 3 cups of flour.
- You may add only 1 cup of white chocolate chips into the dough and reserve the other cup for drizzling after baking.
- Ensure the cheesecake filling is sufficiently frozen before wrapping in cookie dough to prevent leaks during baking.
- Use parchment-lined baking sheets to prevent sticking and make cleanup easier.
- Underbaking is key to achieving a soft, creamy center; cookies will continue to firm up as they cool.
Nutrition
- Serving Size: 1 cookie
- Calories: 280
- Sugar: 20g
- Sodium: 180mg
- Fat: 15g
- Saturated Fat: 8g
- Unsaturated Fat: 6g
- Trans Fat: 0.2g
- Carbohydrates: 32g
- Fiber: 1.5g
- Protein: 3g
- Cholesterol: 45mg


