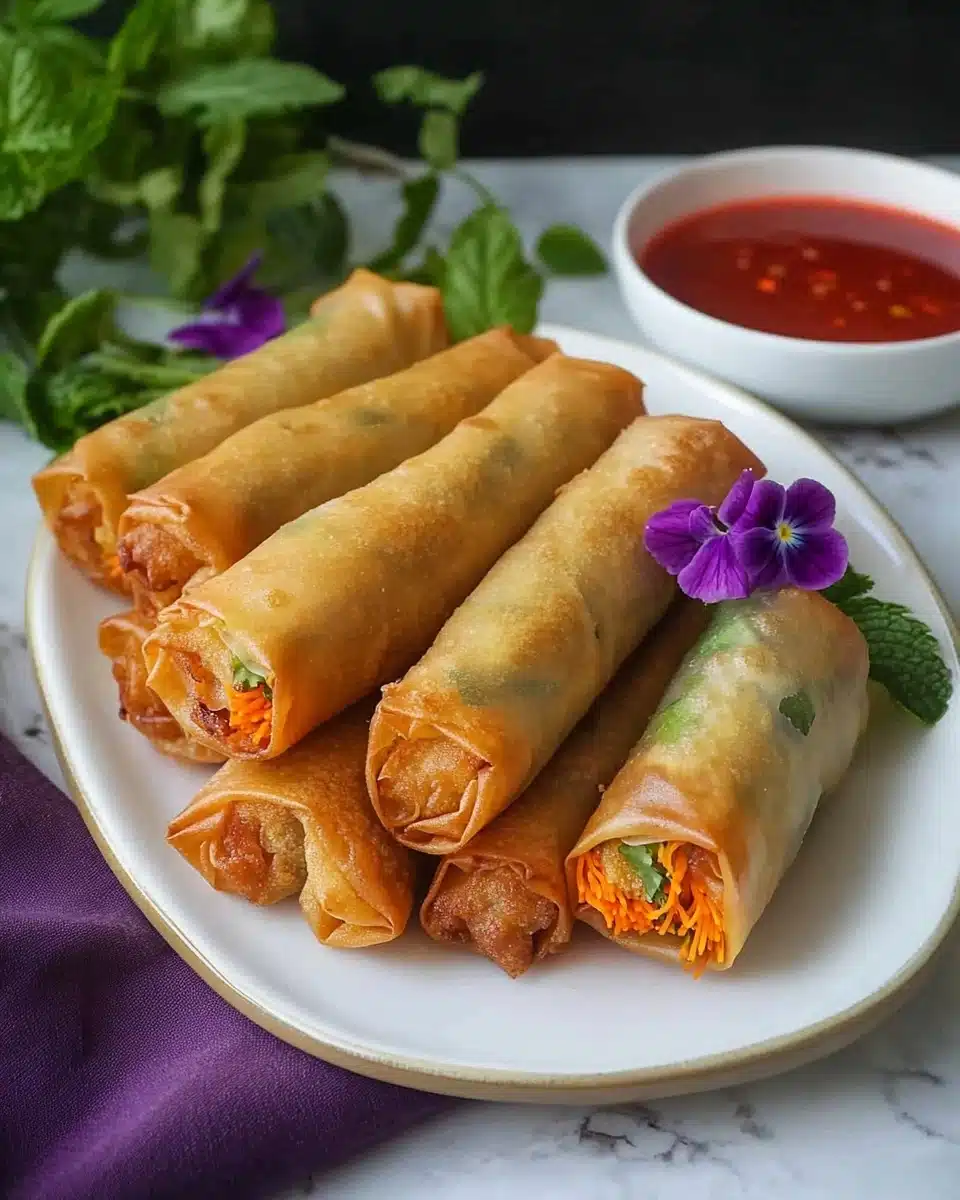
If you’re craving something irresistibly crunchy, savory, and packed with classic Thai flavor, these Best Crispy Spring Rolls – Thai Style will absolutely steal the show. Each bite boasts the perfect blend of tender pork, vibrant veggies, springy glass noodles, and aromatic spices—all wrapped up and fried to golden perfection. Trust me, once you make these homemade, you’ll never look at takeout the same way again!
Why You’ll Love This Recipe
- Ultra-Crispy Perfection: Frying at the right temperature gives these spring rolls that shatteringly crisp shell every time.
- A Colorful, Flavorful Filling: Pork, shiitake mushrooms, cabbage, and carrots create a tasty, textural medley you’ll crave bite after bite.
- Easy to Customize: You can effortlessly swap out ingredients to suit your tastes, making them vegetarian, spicier, or even gluten-free!
- Fun to Make and Share: These Best Crispy Spring Rolls – Thai Style make a perfect party appetizer, family snack, or light meal with friends.

Ingredients You’ll Need
Every ingredient in these spring rolls serves a delicious purpose—from the glass noodles that lend bounce to the juicy pork and aromatic veggies. The beauty lies in the simplicity; good wrappers, fresh vegetables, and just the right seasoning make every roll shine.
- Glass noodles: These delicate noodles soak up flavor and give the filling that signature Thai spring roll texture.
- Ground pork: For a heartier bite, but feel free to leave it out or swap with ground chicken, tofu, or mushrooms.
- Soy sauce: Brings savory depth and classic Asian umami to the filling.
- Ground black and white pepper: Essential for adding warm, peppery notes that balance the sweetness of veggies.
- Minced garlic: The aromatic backbone—don’t skimp!
- Dried shiitake mushrooms: Once soaked and chopped, they add meatiness and a deep, woodsy flavor.
- Green cabbage: Shredded for a subtle crunch and a pretty burst of color in every roll.
- Carrots: Their mild sweetness and bright hue are classic for Thai spring rolls.
- Cilantro stems: Use the stems for robust, herby flavor in the filling.
- Salt and sugar: Seasonings that balance salty, savory, and sweet notes in authentic Thai style.
- Spring roll wrappers: Choose 8-inch wrappers for uniform, easy-to-fill rolls (thawed if frozen).
- Egg: Lightly beaten—this is your secret for perfectly sealed, non-leaky rolls.
- Oil for frying: Use a neutral oil (like canola or vegetable) to fry up ultra-crispy spring rolls.
Variations
One of the best things about making Best Crispy Spring Rolls – Thai Style at home is how easy it is to mix things up! Whether you’re catering to dietary needs, cleaning out the fridge, or simply itching for an extra punch of heat, these rolls love a creative twist.
- Vegetarian Delight: Omit the pork entirely and double up on mushrooms or add crumbled tofu for a plant-based version everyone will love.
- Spicy Kick: Add a finely chopped Thai chili or a dash of chili flakes to the filling for bold, authentic heat.
- Gluten-Free Option: Use gluten-free soy sauce (tamari) and be sure your wrappers are rice paper instead of wheat-based.
- Sweet & Savory Fusion: Try adding a tablespoon of chopped pineapple for a fresh, fruity pop!
How to Make Best Crispy Spring Rolls – Thai Style
Step 1: Soak and Prep the Noodles
Start by soaking your glass noodles in room temperature water for about 7 to 10 minutes—just until softened but still a tad chewy. Drain them well, then snip into easy-to-eat, 2-inch lengths. This makes mixing, wrapping, and biting into your finished rolls so much better!
Step 2: Sauté the Flavors
In a medium-hot wok or sauté pan, drizzle a bit of oil and add the minced garlic, black pepper, and white pepper. Let the aroma bloom for a few moments—this is the start of your irresistible filling. Add in the seasoned ground pork and stir until it’s broken up and nearly cooked through.
Step 3: Build the Filling
Next, crank the heat up a notch, then toss in your chopped shiitake mushrooms, prepped noodles, cabbage, carrots, chopped cilantro stems, sugar, salt, and remaining soy sauce. Stir everything together until the noodles are fully cooked and your kitchen smells incredible! If things stick, add a splash of water to keep it all happy and moist.
Step 4: Cool and Assemble
Scoot the filling into a bowl and let it cool to room temperature—a crucial step so your wrappers don’t get soggy. While it cools, gently separate your spring roll wrappers (they peel apart much easier at room temp), and set up a wrapping station, including your beaten egg for sealing the edges.
Step 5: Roll and Seal
Grab a wrapper, add a hearty scoop (about a heaping ¼ cup) of filling, and roll it up tight, tucking in the sides as you go. Brush a bit of beaten egg along the edge to seal it all up—this keeps the filling locked inside while frying. Don’t worry if your rolls aren’t perfect; each one has its own charm.
Step 6: Fry to Golden Bliss
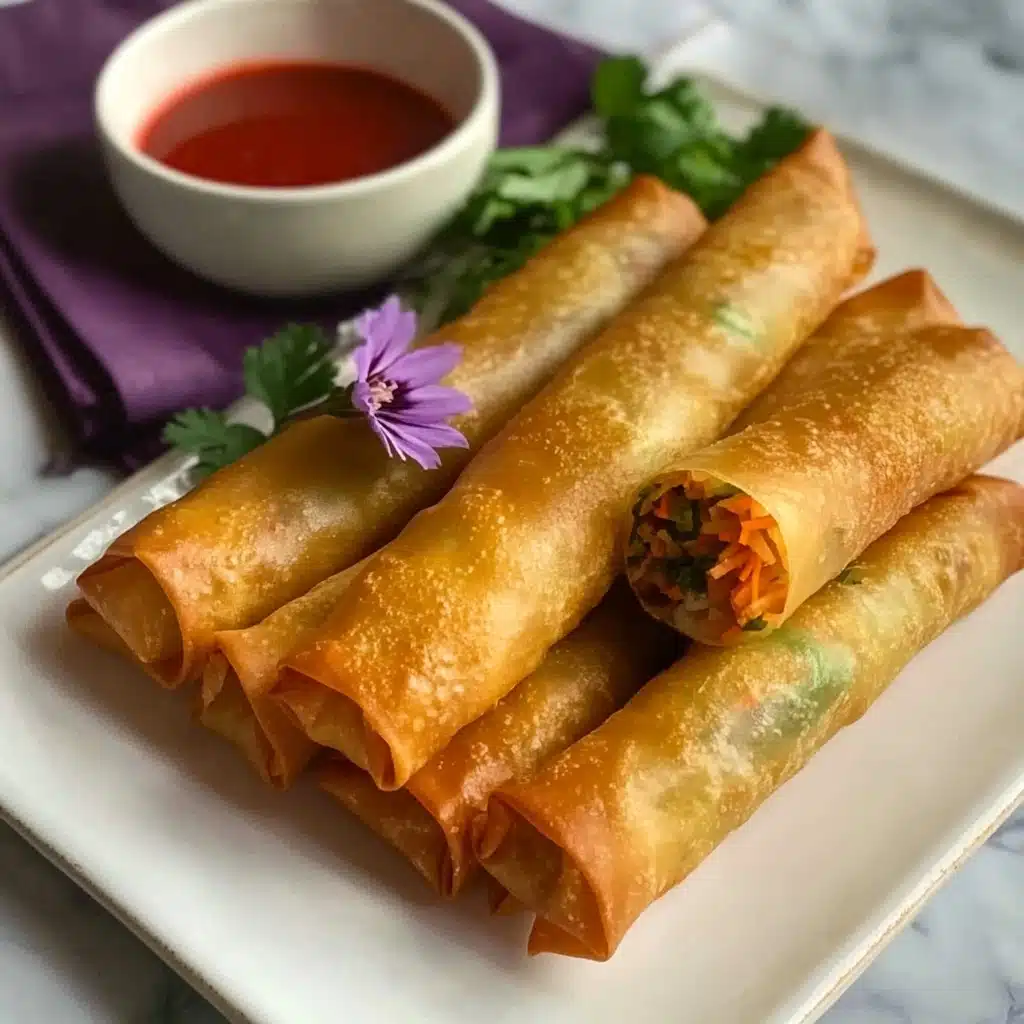
Heat 2 inches of neutral oil in a heavy pot to 350°F (375°F if you’re frying straight from frozen). Carefully add a few rolls at a time and fry, turning occasionally, until crisp and deeply golden—about 5 minutes. Let them drain on a paper towel, and be ready to resist eating them all before serving!
Pro Tips for Making Best Crispy Spring Rolls – Thai Style
- Wrappers at Room Temp: Spring roll wrappers separate so much easier (and don’t tear) if they’re fully thawed and at room temperature before you begin rolling.
- Cool Your Filling: Always let the cooked filling cool to prevent soggy wrappers, which ensures that perfect crisp crunch.
- Egg Seal Guarantee: Don’t skip brushing the edge with a bit of beaten egg for a leak-proof roll and bakery-quality results.
- Watch Your Oil Temperature: Fry in batches and use a thermometer—too low and your rolls absorb oil, too high and the outsides burn before the inside’s hot.
How to Serve Best Crispy Spring Rolls – Thai Style
Garnishes
To finish your Best Crispy Spring Rolls – Thai Style, I love scattering a shower of freshly chopped cilantro and sliced green onions over the platter. If you want to add authentic vibrance, a few slices of Thai red chili and delicate carrot ribbons make everything look bright and extra inviting.
Side Dishes
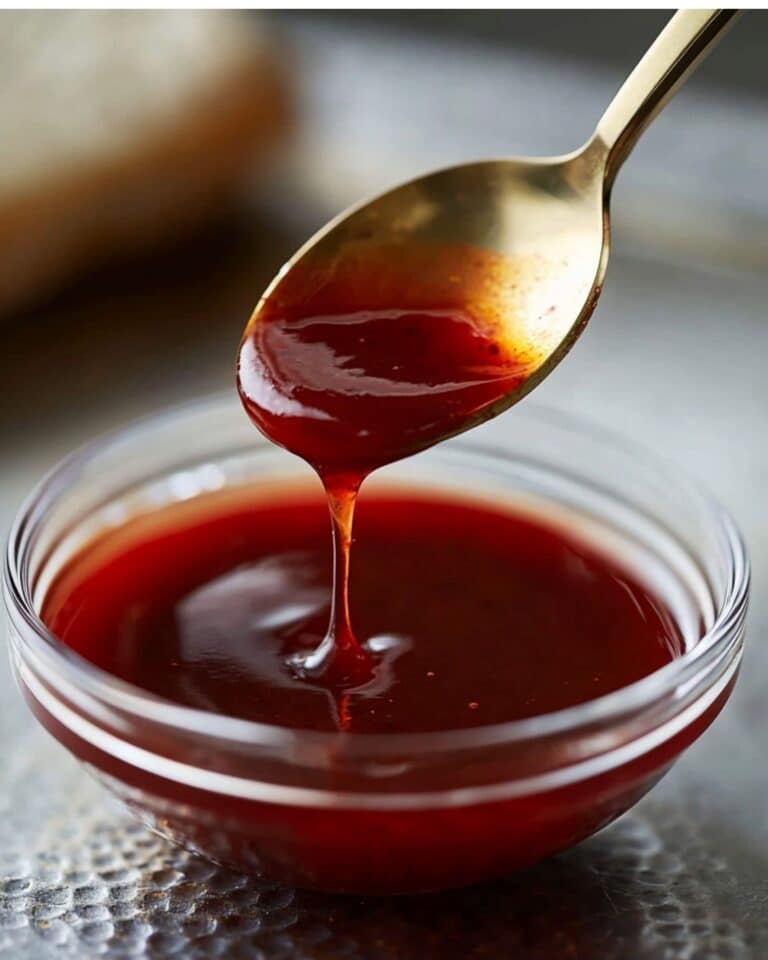
Pair these crispy beauties with a tangy Thai papaya salad, a bowl of jasmine rice, or even a refreshing cucumber salad. And of course, don’t forget a generous bowl of Thai sweet chili sauce, peanut sauce, or plum sauce for dipping—each adds its own personal flair to the spread!
Creative Ways to Present
Serve spring rolls upright in a glass or lined up on a colorful platter for a party starter that truly wows. You can also slice them diagonally and turn them into bite-sized “spring roll pops”—perfect for dipping and sharing at gatherings, picnics, or family movie nights.
Make Ahead and Storage
Storing Leftovers
If you find yourself with leftover Best Crispy Spring Rolls – Thai Style, let them cool to room temperature, then store in an airtight container. They’ll keep fabulously crisp in the refrigerator for 2-3 days—although, honestly, they rarely last that long at my house!
Freezing
One of my favorite tricks is freezing un-fried, rolled spring rolls on a tray until solid, then transferring to a zipper bag for up to 3 months. They go straight from freezer to fryer—just add 1-2 minutes to the cooking time for piping hot, crispy results.
Reheating
Give leftovers a second life by reheating in a 375°F oven or air fryer for 8-10 minutes, or until re-crisped and heated through. Microwaving works in a pinch but can soften the shell, so opt for dry heat if you want to restore that signature crunch.
FAQs
-
Can I make Best Crispy Spring Rolls – Thai Style vegetarian?
Absolutely! Simply omit the pork and increase the mushrooms or add crumbled firm tofu for a satisfying, plant-based filling. Adjust the seasoning to taste, and you’ll have a vegetarian version everyone will love.
-
What’s the secret to keeping spring rolls super crispy?
Let the filling cool completely before wrapping, seal the edges tightly with egg, and make sure the oil is hot enough (around 350°F) when frying. This combination locks in the crispness and gives you that classic shatter with every bite!
-
Can I prep Best Crispy Spring Rolls – Thai Style ahead of time?
Definitely! You can assemble and freeze them before frying, or keep wrapped, uncooked rolls covered in the refrigerator for up to a day before frying. This makes them perfect for parties and busy days.
-
What dipping sauces pair well with these Thai spring rolls?
Thai sweet chili sauce is a classic favorite, but you can also serve with spicy peanut sauce, plum sauce, or a homemade garlic-lime dip for a refreshing kick. Each adds its own delicious dimension to the Best Crispy Spring Rolls – Thai Style!
Final Thoughts
There’s something utterly joyful about sharing a platter of homemade Best Crispy Spring Rolls – Thai Style with the people you love. They’re comforting, surprisingly simple, and bursting with authentic Thai flavor in every bite. Whether you enjoy them piping hot with a sweet chili dip, or sneak a few straight from the tray, I hope this recipe becomes a family favorite you come back to time and again!
Print
Best Crispy Spring Rolls – Thai Style Recipe
- Prep Time: 30 mins
- Cook Time: 45 mins
- Total Time: 1 hour 15 minutes
- Yield: Makes 12-14 pieces
- Category: Frying
- Method: Stovetop
- Cuisine: Thai
Description
Learn how to make the best crispy spring rolls Thai-style with a delicious filling of glass noodles, ground pork, shiitake mushrooms, cabbage, and carrots, all wrapped up in a crispy spring roll wrapper.
Ingredients
For the Filling:
- 40 g (1.4 oz) glass noodles, dry
- 120 g (4.2 oz) ground pork (optional, see note)
- 3 teaspoon (15 ml) soy sauce, divided
- 1/4 teaspoon ground black pepper
- 1/2 teaspoon ground white pepper
- 4 cloves garlic, minced
- 3 medium size dried shiitake mushrooms, soaked in hot water until soft (at least 30 mins), then finely chopped
- 1 1/2 cup finely shredded green cabbage (about 2-inch juliennes)
- 1 cup grated carrots
- 6 cilantro stems, finely chopped
- 1/2 – 1 teaspoon salt
- 1 tablespoon sugar
- 2-3 tablespoon water, as needed
For Wrapping:
- 12-14 pieces of 8-inch spring roll wrappers, thawed
- 1 egg, beaten, for sealing the wrapper
- Oil for frying
Instructions
- Soak glass noodles: Soak glass noodles in room temperature water for 7-10 minutes. Drain, then cut into 2-inch pieces.
- Prepare pork: Mix the ground pork with 1 teaspoon of soy sauce, set aside.
- Cook filling: In a wok, sauté garlic and peppers, then add pork, mushrooms, noodles, cabbage, carrots, cilantro, sugar, salt, and soy sauce. Cook until well combined.
- Cool filling: Transfer the filling to a bowl and let it cool. Separate spring roll wrappers and beat the egg for sealing.
- Wrap spring rolls: Place a portion of filling on each wrapper, fold, and seal with the beaten egg.
- Fry: Heat oil, then fry the spring rolls until golden brown and crispy. Drain on paper towels.
- Serve: Allow the spring rolls to cool slightly before serving with Thai sweet chili sauce.
Notes
- Spring roll wrappers can be a bit tricky to separate; it’s helpful to do this step before wrapping.
- Adjust the seasoning of the filling to suit your taste preferences.
Nutrition
- Serving Size: 1 spring roll
- Calories: 150
- Sugar: 2g
- Sodium: 250mg
- Fat: 8g
- Saturated Fat: 2g
- Unsaturated Fat: 6g
- Trans Fat: 0g
- Carbohydrates: 15g
- Fiber: 1g
- Protein: 5g
- Cholesterol: 25mg


