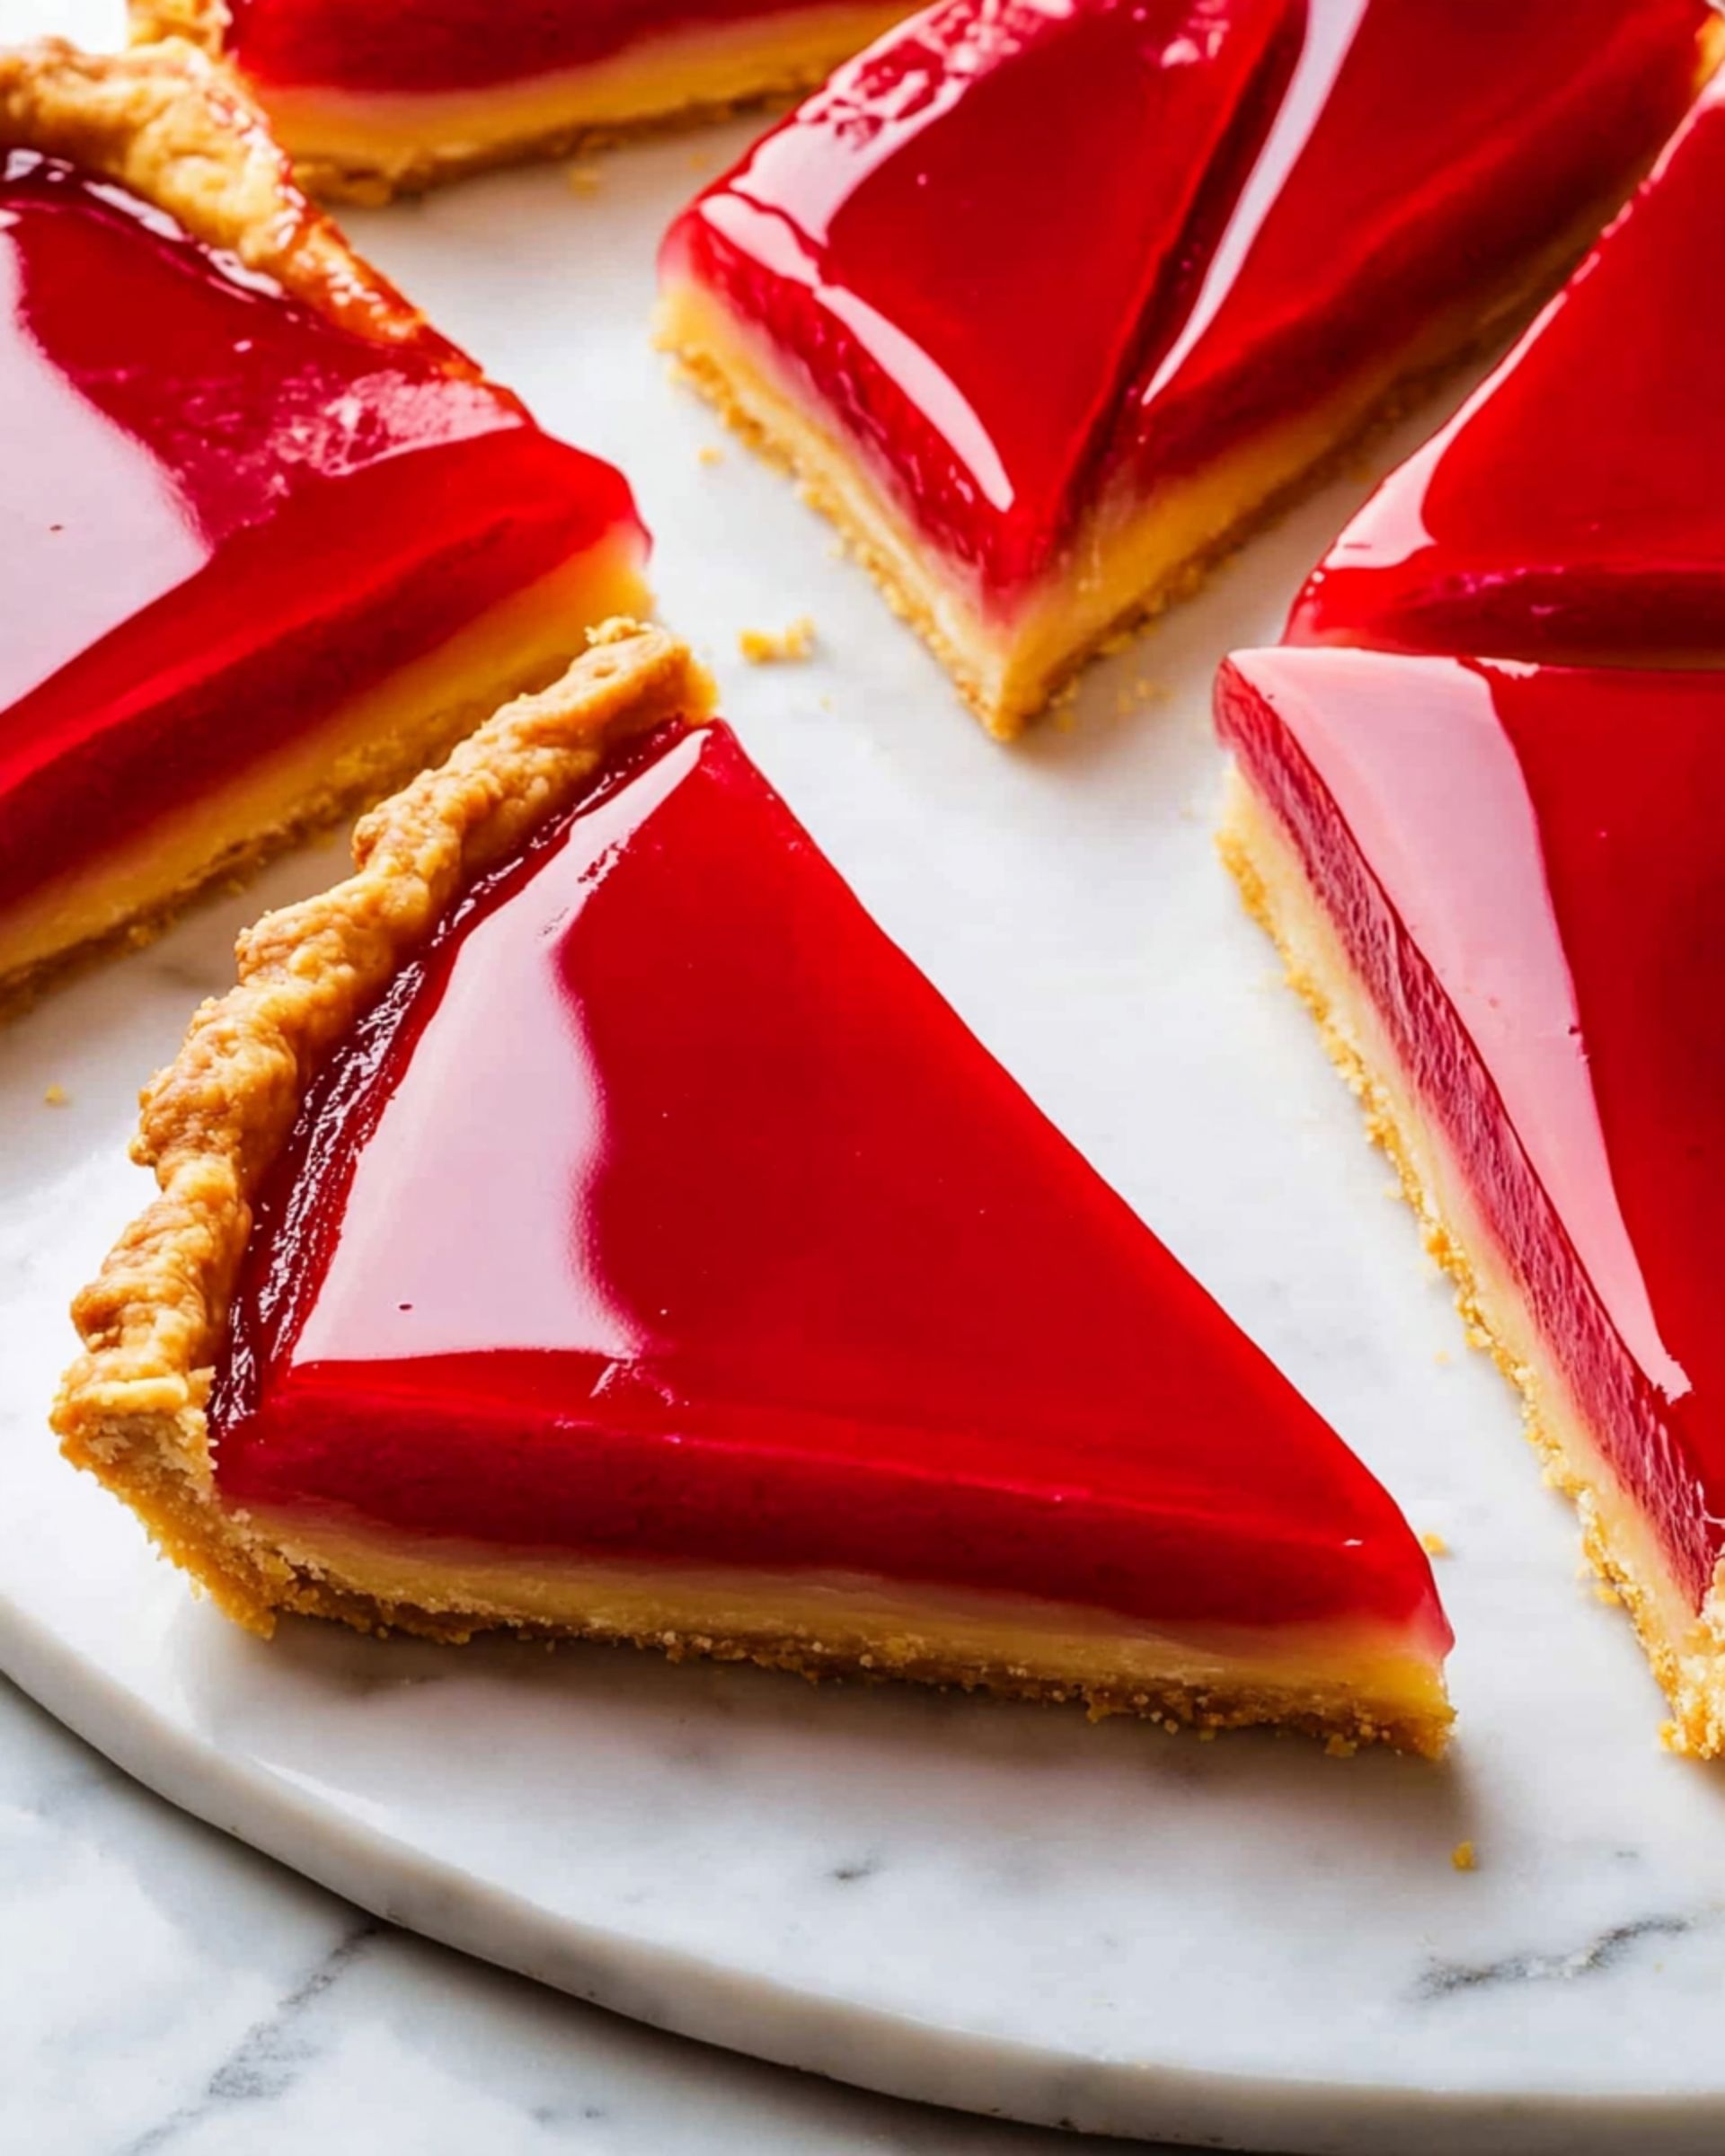
This Raspberry Lemon Tart is a show-stopping dessert that combines the bright, zesty punch of lemon with the sweet-tart flavor of fresh raspberries. Nestled in a buttery, delicate crust, these two layers create a perfect harmony of flavors that’s both refreshing and indulgent. While it might look like something from a fancy bakery window, you’ll be amazed at how manageable it is to create in your own kitchen!
Why You’ll Love This Recipe
- Perfect Balance of Flavors: The zingy lemon layer and sweet raspberry topping create a flavor combination that’s absolutely irresistible.
- Make-Ahead Friendly: Most of the work can be done in advance, making this ideal for entertaining or special occasions.
- Stunning Presentation: With its vibrant red top layer and golden crust, this tart looks as impressive as it tastes—your friends will think you spent all day in the kitchen!
- Versatile Dessert: Works beautifully year-round, but especially shines during spring and summer when fresh berries are at their peak.

Ingredients You’ll Need
- All-purpose flour: Forms the foundation of our buttery crust, providing structure while remaining tender.
- Confectioners’ sugar: Sweetens the crust without the graininess of regular sugar, giving it that melt-in-your-mouth quality.
- Butter: The secret to a flaky, rich crust. Make sure it’s well-chilled for the best texture.
- Egg yolk: Adds richness and helps bind the crust together.
- Vanilla extract: Enhances the sweetness of the crust with its aromatic flavor.
- Lemons: Both the zest and juice are used, providing that essential bright citrus kick. Fresh is absolutely non-negotiable here!
- Eggs: Create the custard-like texture in the lemon layer. The combination of whole eggs and yolks gives the perfect consistency.
- Honey: A natural sweetener that adds depth and complexity compared to regular sugar.
- Raspberries: The star of the top layer, providing gorgeous color and sweet-tart flavor.
- Cornstarch: Thickens the raspberry layer to the perfect consistency.
- Heavy cream: Adds richness and creates a silky-smooth texture in the lemon filling.
Note: You’ll find the complete list of ingredients, along with their exact measurements, in the printable recipe card at the bottom of this post.
Variations
Fruit Swaps
Not a raspberry fan? Try strawberries, blackberries, or a mixed berry blend instead. Each will bring its own unique flavor profile to complement the lemon layer.
Gluten-Free Version
Substitute the all-purpose flour with your favorite gluten-free flour blend. Just make sure it contains xanthan gum for proper structure.
Citrus Twist
Switch up the lemon for lime or blood orange for a completely different flavor experience.
Add Some Crunch
Sprinkle toasted sliced almonds or crushed pistachios around the edge of the tart for added texture and visual appeal.
How to Make Raspberry Lemon Tart
Step 1: Prepare the Tart Crust
Whisk together the egg yolk, cream, and vanilla in a small bowl. In your food processor, combine flour, confectioners’ sugar, and salt with a few pulses. Add the chilled butter cubes and pulse until the mixture resembles coarse cornmeal. With the processor running, add the egg mixture until the dough comes together.
Form the dough into a disk, wrap in plastic, and refrigerate for at least an hour to let the dough rest and firm up.
Step 2: Roll Out and Chill the Dough
Roll the dough into an 11-inch circle on a lightly floured surface. Carefully transfer to your tart pan, gently pressing into the corners and sides. Trim excess dough by rolling your pin over the top. Freeze the crust for about 30 minutes to prevent shrinking during baking.
Step 3: Blind Bake the Crust
Heat your oven to 375°F. Line the frozen crust with foil and fill with pie weights. Bake until golden brown and set, about 30 minutes, rotating halfway through. Remove the weights and foil and let the crust cool completely.
Step 4: Make the Lemon Filling
Reduce oven temperature to 350°F. Set aside 1 tablespoon of lemon juice for later use. Whisk together the remaining lemon juice, zest, eggs, yolks, honey, and salt in a saucepan. Cook over medium-low heat, stirring constantly, until the mixture thickens and reaches 165°F. Remove from heat, whisk in the butter until melted, then strain through a fine-mesh sieve. Stir in the cream.
Step 5: Bake the Lemon Layer
Pour the warm lemon curd into the cooled tart shell. Bake until the filling is shiny and opaque with a slight jiggle in the center, 10-12 minutes. Cool slightly on a wire rack.
Step 6: Prepare the Raspberry Layer
Process the fresh raspberries until smooth, then strain through a fine-mesh sieve to remove seeds. Add honey and salt to the puree. Mix cornstarch with the reserved lemon juice and water, then whisk into the raspberry mixture. Cook over medium-low heat until thickened and registers 170°F.
Step 7: Assemble and Chill
Allow the raspberry mixture to cool slightly to about 130°F, whisking occasionally. Pour it over the lemon layer and spread evenly. Refrigerate for at least 2 hours until the raspberry layer is set and shiny.
Pro Tips for Making the Recipe
- Cold Ingredients: Keep your butter and dough as cold as possible when making the crust—this ensures that perfect flaky texture.
- Don’t Skip the Straining: Straining both the lemon curd and raspberry puree might seem fussy, but it’s essential for that silky-smooth texture that makes this tart special.
- Temperature Matters: Follow the temperature guidelines closely for both fillings—this ensures proper setting and texture.
- Patience with Cooling: Allow proper cooling and setting time between layers and before serving. Rushing this step can result in layers that blend together or a filling that’s too loose.
- Even Zesting: When zesting the lemons, be careful to only remove the yellow part, avoiding the bitter white pith underneath.
How to Serve

This Raspberry Lemon Tart is a stunning standalone dessert that needs little embellishment, but here are some serving suggestions to take it to the next level:
Perfect Pairings
Serve slices with a dollop of softly whipped cream or a small scoop of vanilla ice cream to balance the tartness.
Garnish Ideas
Top with a few fresh raspberries, a sprig of mint, or a light dusting of powdered sugar just before serving for an extra-special presentation.
Drink Companions
Pair with champagne or prosecco for celebrations, or a cup of Earl Grey tea for afternoon indulgence.
Make Ahead and Storage
Storing Leftovers
Cover the tart loosely with plastic wrap and refrigerate for up to 3 days. The crust may soften slightly but will still be delicious.
Freezing
The baked tart shell can be frozen for up to a month. The completed tart doesn’t freeze well, as the texture of the fillings changes upon thawing.
Make Ahead Tips
Prepare the tart crust up to 4 days in advance and keep it refrigerated. The lemon filling can be made a day ahead and gently rewarmed before pouring into the crust.
FAQs
-
Why did my tart crust shrink during baking?
Shrinking happens when the gluten in the dough contracts during baking. Make sure to really chill the dough before baking, and don’t stretch it when placing it in the pan. Using pie weights during blind baking also helps prevent shrinkage.
-
Can I use frozen raspberries instead of fresh?
Yes, you can use frozen raspberries for the topping! Thaw them completely first and drain any excess liquid before pureeing. You might need to cook the puree slightly longer to reach the right consistency.
-
How do I know when my lemon filling is done baking?
The filling should be set around the edges but still have a slight jiggle in the center—similar to how cheesecake looks when properly baked. It will continue to set as it cools, so be careful not to overbake.
-
Can I make this tart without a food processor?
Absolutely! For the crust, you can cut the butter into the flour mixture using a pastry cutter or two knives. For the raspberry puree, use a blender or simply mash the berries very well and then strain them.
Final Thoughts
This Raspberry Lemon Tart brings together the perfect balance of sweet, tart, and buttery flavors in one elegant dessert. While it does require some time and attention to detail, the result is truly worth it—a bakery-quality treat made right in your own kitchen. The vibrant colors and fresh flavors make it perfect for special occasions, but don’t wait for one to enjoy this delightful creation!
Print
Raspberry Lemon Tart Recipe
- Prep Time: 30 minutes
- Cook Time: 1 hour
- Total Time: 5 hours
- Yield: 8 servings
- Category: Desserts
- Method: Baking
- Cuisine: American, French
- Diet: Vegetarian
Description
This Raspberry Lemon Tart features a buttery and crisp tart crust filled with a silky lemon curd and topped with a vibrant, homemade raspberry layer. The combination of sweet, tangy lemon and fresh raspberry makes this tart a show-stopping dessert ideal for spring and summer gatherings. With a delicate crust, smooth filling, and bold flavors, it’s perfect for impressing guests or treating yourself to a delightful treat.
Ingredients
Tart Crust
- 1 large egg yolk
- 1 tablespoon heavy cream
- 1/2 teaspoon pure vanilla extract
- 1 1/4 cups (158g) all-purpose flour
- 1/2 cup (66g) confectioners’ sugar
- 1/4 teaspoon kosher salt
- 8 tablespoons unsalted butter, cut into cubes and chilled
Fillings
- 1/4 cup lemon zest (from about 4 lemons)
- 1/2 cup lemon juice (from about 4 lemons)
- 1 large egg
- 5 large egg yolks
- 2/3 cup honey, divided
- Kosher salt (pinch + 1/8 teaspoon)
- 4 tablespoons unsalted butter, cut into 4 pieces and chilled
- 2 tablespoons heavy cream
- 10 ounces fresh raspberries (~2 cups)
- 3 tablespoons cornstarch
- 2 tablespoons water
Instructions
- Prepare the Egg Mixture: Whisk together1 egg yolk, 1 tablespoon heavy cream, and 1/2 teaspoon vanilla extract in a small bowl. Set aside.
- Make the Tart Dough: In a food processor, pulse together 1 1/4 cups flour, 1/2 cup confectioners’ sugar, and 1/4 teaspoon salt until combined (about 5 seconds). Scatter 8 tablespoons chilled butter over the top and pulse until the mixture looks like coarse cornmeal (about 15 pulses). With the processor running, add in the egg yolk mixture and process until the dough just comes together (about 12 seconds).
- Shape and Chill the Dough: Turn the dough out and form into a 6-inch disk. Wrap tightly in plastic and refrigerate for at least 1 hour and up to 4 days.
- Roll Out the Dough: Let the chilled dough sit at room temperature for about 10 minutes to soften. Roll into an 11-inch circle on a lightly floured counter. Loosely roll the dough around the rolling pin and unroll it into a 9-inch tart pan with a removable bottom. Gently press the dough into the corners and flutes, then trim excess dough with a rolling pin. Wrap and freeze the dough-lined pan for 30 minutes until firm.
- Bake the Tart Shell: Preheat the oven to 375°F (190°C) and place the rack in the middle position. Set the prepared tart shell on a baking sheet, line with a double layer of foil, and fill with pie weights. Bake for 30 minutes until the crust is golden, rotating the pan halfway. Remove the foil and weights; let the crust cool completely.
- Make the Lemon Filling: Reduce oven temperature to 350°F (175°C). Reserve 1 tablespoon lemon juice. In a medium saucepan, whisk remaining lemon juice, 1/4 cup lemon zest, 1 whole egg, 5 yolks, 1/3 cup honey, and a pinch of salt until smooth. Cook over medium-low heat, stirring constantly, until thickened and the mixture reaches 165°F (about 5 minutes). Remove from heat; whisk in 4 tablespoons chilled butter until melted. Strain the lemon curd into a bowl and gently stir in 2 tablespoons heavy cream.
- Bake Lemon Layer: Pour the warm lemon filling into the cooled crust. Bake on a sheet pan for 10–12 minutes, rotating halfway, until the filling is shiny, opaque, and still slightly jiggly in the center. Cool on a wire rack.
- Make the Raspberry Layer: In a food processor, process 10 ounces fresh raspberries until smooth (about 2 minutes). Strain the purée into a medium saucepan, pressing to extract all juice and discarding solids. Whisk in remaining 1/3 cup honey and 1/8 teaspoon salt. In a separate bowl, whisk together 3 tablespoons cornstarch, reserved 1 tablespoon lemon juice, and 2 tablespoons water. Whisk this mixture into the raspberry purée. Cook over medium-low heat, stirring constantly, until thickened and reaching 170°F (about 5 minutes). Cool to 130°F, whisking occasionally.
- Finish and Set Tart: Pour the slightly cooled raspberry mixture evenly over the cooled lemon filling and spread into an even layer. Refrigerate for about 2 hours, or until the raspberry layer is set and shiny.
- Serve: Remove the outer ring of the tart pan, slide a thin spatula underneath the tart to transfer to a serving platter, slice into wedges, and enjoy.
Notes
- Chilling time for dough and finished tart is essential for best texture.
- Use fresh, high-quality raspberries and lemons for the brightest flavor.
- Tart can be made up to 1 day in advance; store covered in refrigerator.
- If you don’t have pie weights, use dried beans or rice as a substitute.
- Strain the curds and purées for an extra-smooth filling and topping.
Nutrition
- Serving Size: 1 slice (1/8 of tart)
- Calories: 320
- Sugar: 25g
- Sodium: 120mg
- Fat: 17g
- Saturated Fat: 10g
- Unsaturated Fat: 6g
- Trans Fat: 0g
- Carbohydrates: 41g
- Fiber: 2g
- Protein: 4g
- Cholesterol: 130mg


