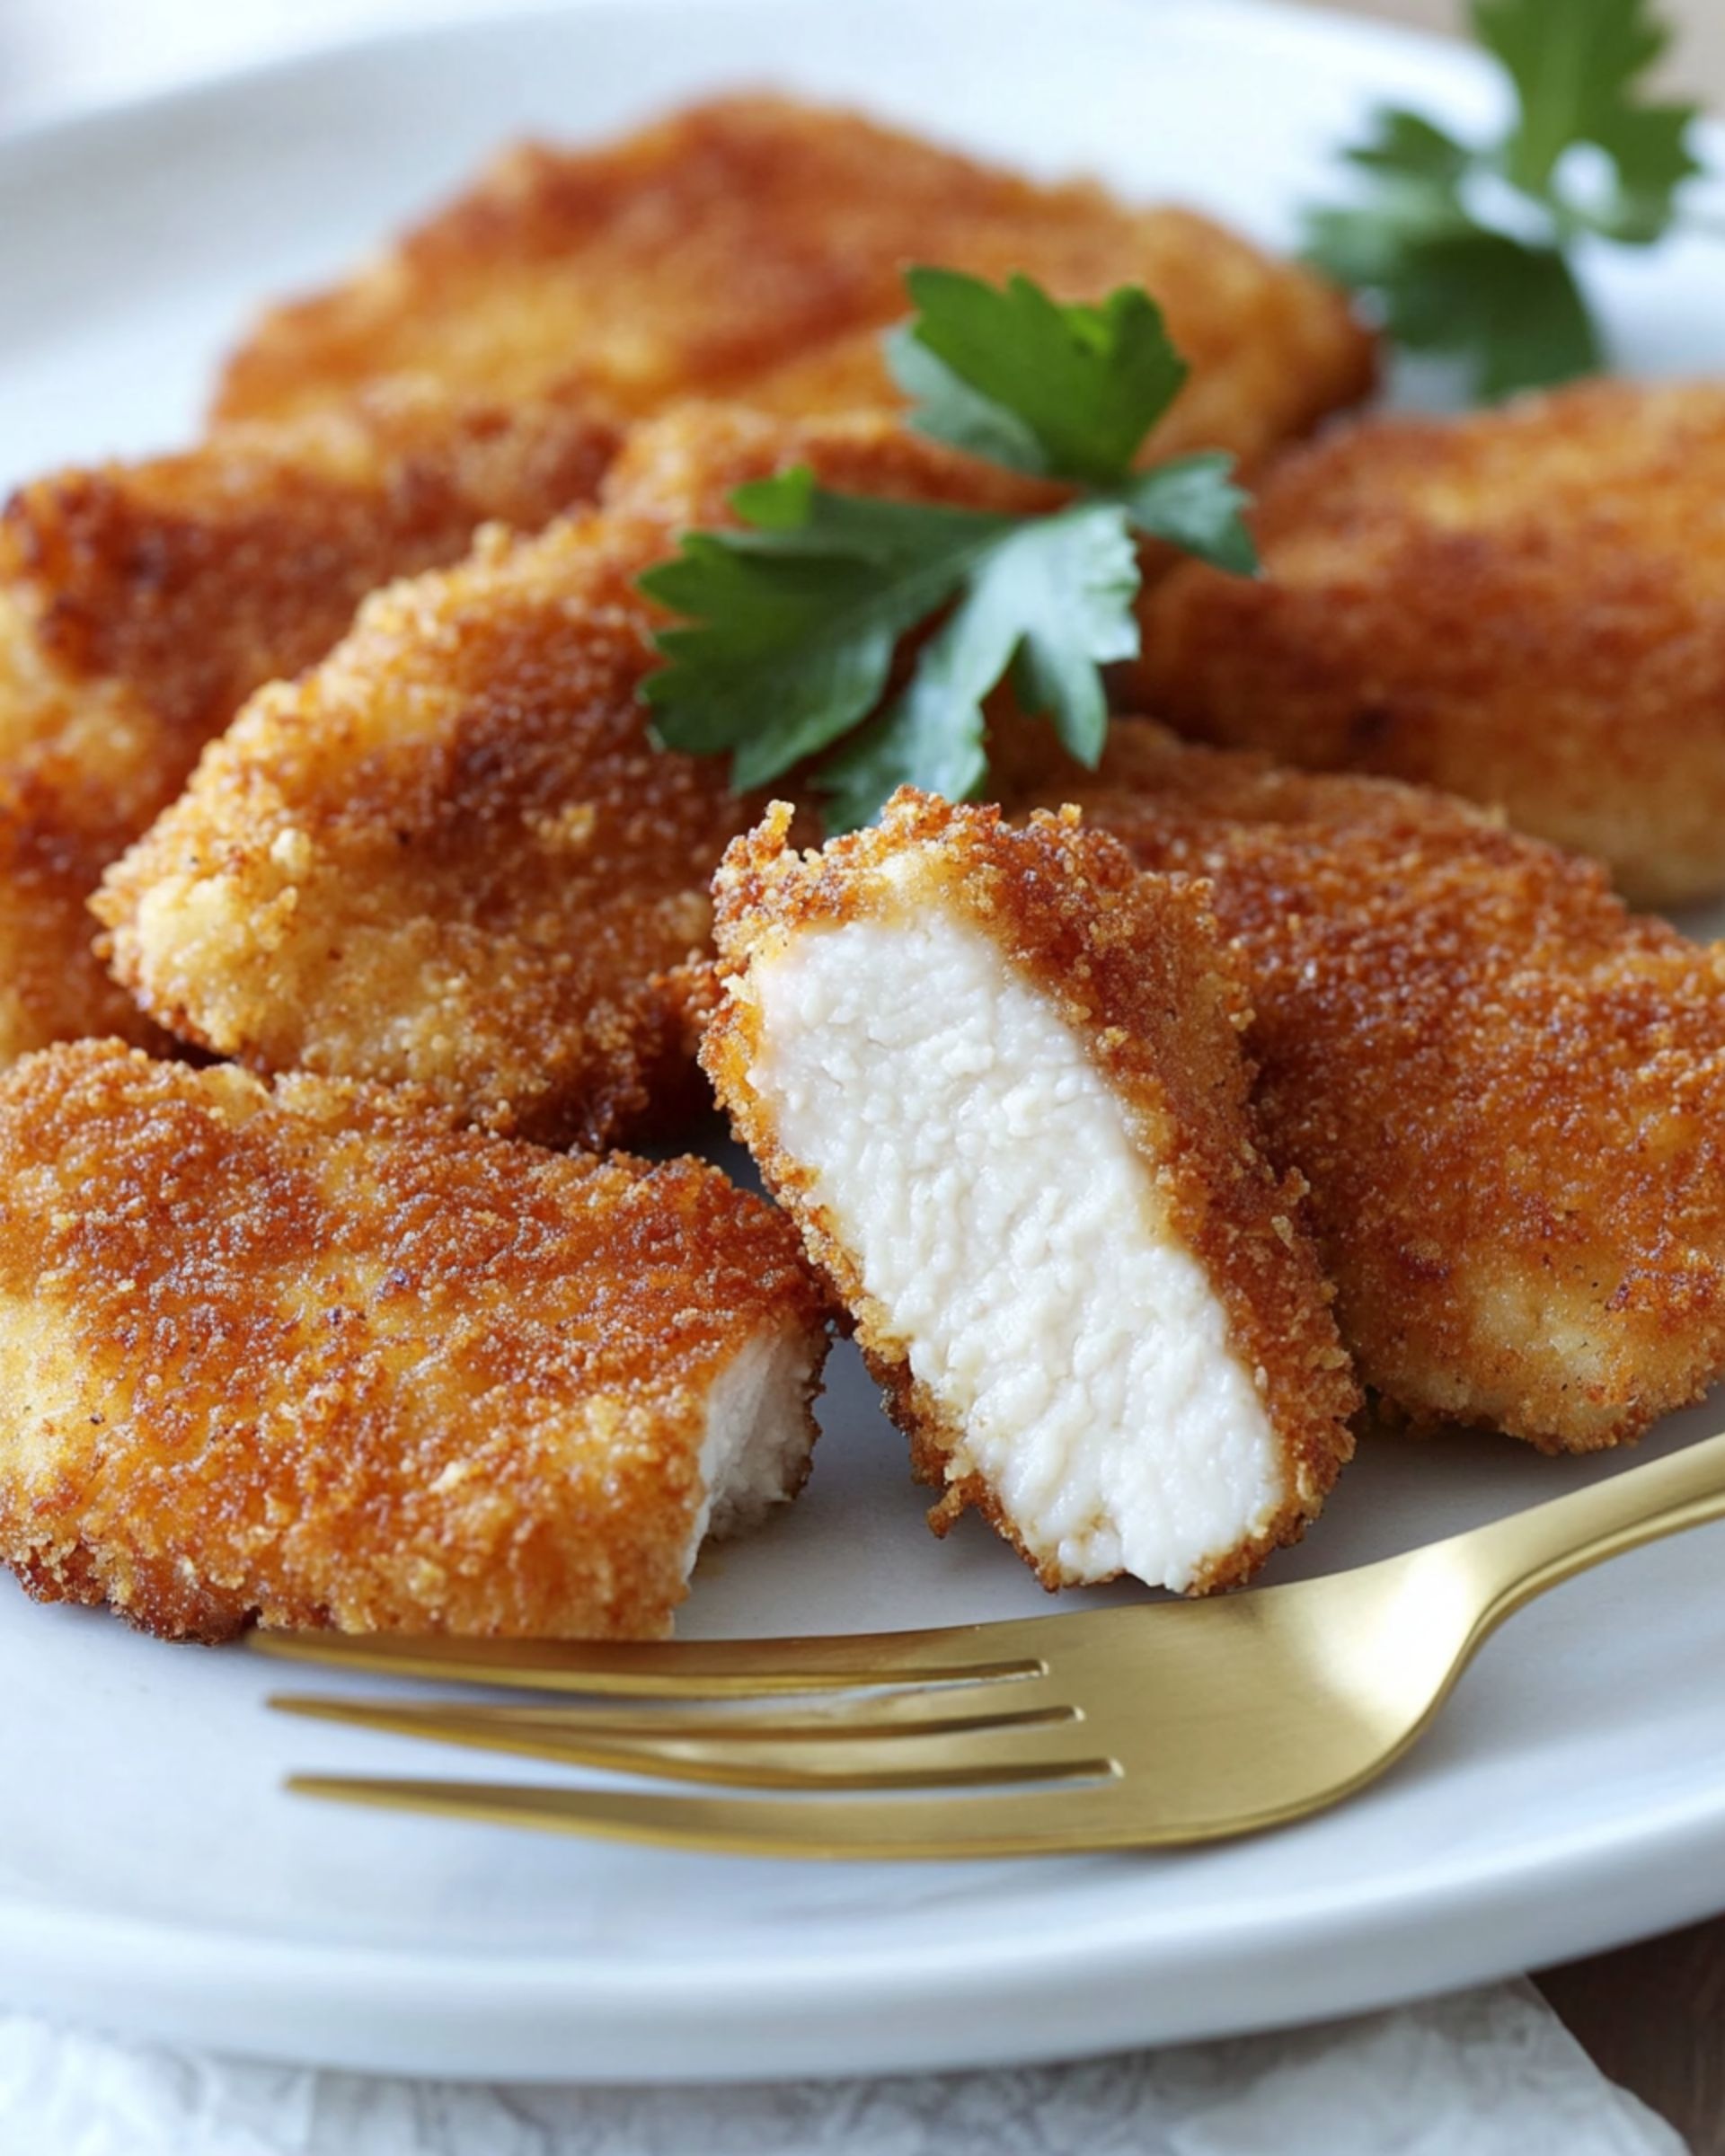
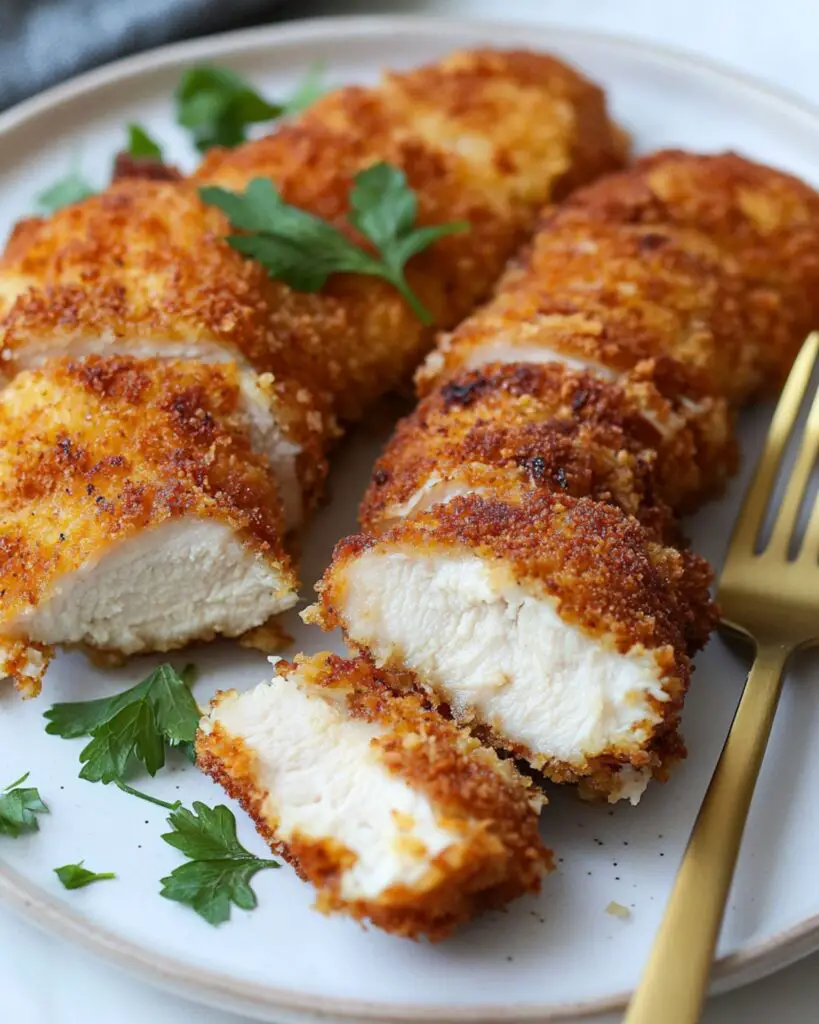
This Crispy Chicken Cutlets recipe delivers the perfect combination of juicy chicken and crunchy coating that’s absolutely irresistible. With a golden-brown exterior that audibly crunches when you cut into it and tender, moist meat inside, these cutlets are restaurant-quality but made right in your own kitchen. Ready in just 30 minutes, they’re the ultimate weeknight dinner solution that the whole family will love!
Why You’ll Love This Recipe
- Foolproof Crispiness: The three-step coating process ensures perfect crunchiness every time, creating that satisfying crackle when you bite into each cutlet.
- Quick Preparation: From prep to table in just 30 minutes, making it perfect for busy weeknights when you need something delicious without spending hours in the kitchen.
- Versatile Base: These cutlets work beautifully as the star of your meal, in sandwiches, on top of salads, or as the base for chicken parmesan – one recipe with endless possibilities!
- Family Favorite: Both adults and kids love these chicken cutlets – they’re the kind of crowd-pleaser that disappears quickly and has everyone asking for seconds.

Ingredients You’ll Need
- Thin-sliced chicken breasts: The foundation of our recipe, providing lean protein that cooks quickly and evenly. Thin slices ensure the perfect meat-to-coating ratio.
- All-purpose flour: Creates the first layer of our coating system, helping the egg wash adhere to the chicken while locking in moisture.
- Seasoned salt: Infuses the first layer with flavor, ensuring the chicken is seasoned from the inside out.
- Eggs: Acts as the essential “glue” that helps the breadcrumbs stick to the flour-coated chicken.
- Water: Thins the egg mixture slightly for better adherence and coverage.
- Hot sauce: Adds a subtle kick without making the dish spicy – you won’t specifically taste it, but you’ll notice the flavor depth it provides.
- Panko breadcrumbs: The secret to superior crunchiness! These Japanese-style breadcrumbs create an extraordinary crispy exterior that regular breadcrumbs simply can’t match.
- Garlic powder: Contributes a savory note that enhances the overall flavor profile without overpowering.
- Kosher salt: The larger grains provide better seasoning control than table salt.
- Black pepper: Adds a mild heat and complexity to the breadcrumb coating.
- Parmesan cheese: Brings a nutty, salty dimension to the coating while helping it brown beautifully.
- Light oil: The cooking medium that creates that perfect golden exterior – light olive oil, canola oil, or vegetable oil all work well due to their neutral flavors and higher smoke points.
Note: You’ll find the complete list of ingredients, along with their exact measurements, in the printable recipe card at the bottom of this post.
Variations
Different Flavor Profiles
- Italian Style: Add 1 tablespoon of Italian seasoning to the breadcrumb mixture and serve with marinara for dipping.
- Lemon Pepper: Mix 2 teaspoons of lemon zest and extra black pepper into the breadcrumb mixture for a bright, zesty kick.
- Spicy Version: Double the hot sauce in the egg wash and add ½ teaspoon of cayenne to the breadcrumb mixture.
Coating Alternatives
- Gluten-Free Option: Substitute the all-purpose flour with rice flour and use gluten-free panko breadcrumbs.
- Keto-Friendly: Replace panko with crushed pork rinds mixed with Parmesan for a low-carb alternative.
- Extra Crunchy: Use crushed cornflakes instead of panko for an even crunchier texture.
How to Make Crispy Chicken Cutlets
Step 1: Prepare the Chicken
Trim any excess fat from the chicken breasts and pat them completely dry with paper towels. This crucial step ensures the coating adheres properly and prevents steaming instead of crisping.
Step 2: Set Up Your Breading Station
Create an efficient assembly line with three shallow bowls. In the first, whisk together the flour and seasoned salt. In the second, beat the eggs with water and hot sauce until well combined. In the third bowl, thoroughly mix the panko breadcrumbs, garlic powder, kosher salt, black pepper, and Parmesan cheese.
Step 3: Coat the Chicken
Take each chicken breast and dredge it thoroughly in the flour mixture, coating all sides. Shake off any excess, then dip into the egg mixture, allowing extra egg to drip off. Finally, press firmly into the panko mixture, ensuring an even, thick coating all around. Place the breaded cutlets on a plate or platter as you continue with the remaining pieces.
Step 4: Fry to Perfection
Heat your oil in a 10-inch skillet over medium heat until it reaches 350°F. To test if it’s ready, dip the handle end of a wooden spoon into the oil – if bubbles form immediately around it, you’re good to go! Carefully add two cutlets at a time, frying for 2-3 minutes per side until they develop a beautiful golden-brown color. Adjust the heat if needed to prevent burning.
Step 5: Drain and Serve
Transfer the finished cutlets to a paper towel-lined plate to absorb excess oil. Let them rest for a minute before serving warm for maximum crispiness and juiciness.
Pro Tips for Making the Recipe
- Temperature Control: Keep your oil between 325-350°F for the perfect fry – too hot and they’ll burn before cooking through, too cool and they’ll absorb too much oil.
- Don’t Crowd the Pan: Frying just two cutlets at a time ensures proper oil temperature and gives you room to flip them easily.
- Press Firmly: When coating with breadcrumbs, press the mixture onto the chicken to create a thick, even layer that won’t fall off during cooking.
- Rest Before Serving: Let cutlets rest for 1-2 minutes after frying to allow the juices to redistribute within the meat for maximum tenderness.
- Work in Advance: You can bread the cutlets up to 4 hours ahead and refrigerate them (uncovered) until ready to fry, making dinner prep even quicker.
How to Serve
Main Course Pairings
Serve these crispy cutlets with a side of garlic mashed potatoes and roasted vegetables for a complete, satisfying meal. A lemon wedge on the side adds brightness that cuts through the richness.
Sandwich Supreme
Place a cutlet on a toasted brioche bun with lettuce, tomato, and a spread of herb mayo for an incredible chicken sandwich that puts fast food to shame.
Elegant Presentation
For a dinner party, slice the cutlets into strips and arrange them over a bed of arugula dressed with lemon vinaigrette, then top with shaved Parmesan and a drizzle of high-quality olive oil.
Make Ahead and Storage
Storing Leftovers
Place cooled cutlets in an airtight container with paper towels between layers to absorb moisture and prevent sogginess. Refrigerate for up to 3 days.
Freezing
These cutlets freeze beautifully! Place them in a single layer on a baking sheet and freeze until solid, then transfer to a freezer bag with parchment paper between layers. They’ll keep for up to 3 months.
Reheating
For the crispiest results, reheat in an air fryer at 400°F for just 4 minutes, or in a 400°F oven for 6 minutes. Avoid microwaving, which will make the coating soggy.
FAQs
-
Can I use chicken thighs instead of breasts for this recipe?
Absolutely! Boneless, skinless chicken thighs work wonderfully in this recipe and often result in even juicier cutlets. Just be sure to pound them to an even thickness of about ¼ inch for consistent cooking. You may need to increase the cooking time by 1-2 minutes per side since thighs have a slightly higher fat content.
-
My coating keeps falling off during frying. What am I doing wrong?
This typically happens for three reasons: the chicken is too wet before beginning the coating process, the oil isn’t hot enough, or you’re flipping the cutlets too often. Make sure to thoroughly pat the chicken dry before starting, verify your oil temperature with a thermometer if possible, and resist the urge to check and flip the cutlets more than once per side.
-
Is there a way to make these cutlets healthier?
You can certainly make these cutlets more health-conscious by baking or air-frying them instead of pan-frying. For baking, place the breaded cutlets on a wire rack over a baking sheet and spray with cooking oil, then bake at 425°F for about 15 minutes. For air-frying, cook at 380°F for approximately 10 minutes, flipping halfway through. Both methods use significantly less oil.
-
Can I prepare these cutlets ahead of time for a party?
These cutlets are perfect for entertaining! You can bread the chicken up to 4 hours ahead and refrigerate uncovered (this actually helps the coating set better). You can also fully cook them up to 2 hours before serving and keep them warm in a 200°F oven on a wire rack over a baking sheet. For the crispiest results at a party, consider frying them just before guests arrive.
Final Thoughts
These Crispy Chicken Cutlets might just become your new weeknight hero – simple enough for Monday dinner but special enough for when friends drop by. The combination of juicy chicken and that irresistible crunchy coating creates comfort food magic that never fails to satisfy. Give them a try tonight and watch how quickly they disappear from the table!
Print
Crispy Chicken Cutlets Recipe
- Prep Time: 10 minutes
- Cook Time: 20 minutes
- Total Time: 30 minutes
- Yield: 4-6 servings
- Category: Main Course
- Method: Frying
- Cuisine: American
Description
Crispy Chicken Cutlets are the perfect choice for a delicious, golden-fried dinner option that pairs well with various sides. These tender cutlets are seasoned and coated with Parmesan-infused panko breadcrumbs, delivering an irresistibly satisfying crunch. Quick to make, they’re ideal for busy weeknights or when you’re in the mood for something comforting yet classic.
Ingredients
For the Chicken:
- 2 pounds thin-sliced chicken breasts
- 1 cup all-purpose flour
- 1 tablespoon seasoned salt
- 2 eggs
- 1 tablespoon water
- 1 teaspoon hot sauce
For the Coating:
- 2 cups panko breadcrumbs
- 1 teaspoon garlic powder
- 1 teaspoon kosher salt
- 1/2 teaspoon black pepper
- 1/4 cup Parmesan cheese
For Frying:
- 1 cup light oil (light olive oil, canola oil, or vegetable oil)
Instructions
- Prepare the Chicken:
Trim any excess fat from the chicken breasts and pat them dry. Set the chicken aside on a plate or flat surface. - Prep Your Work Station:
Prepare three shallow bowls. In the first bowl, whisk together the flour and the seasoned salt. In the second bowl, whisk the eggs, water, and hot sauce until well combined. In the third bowl, mix the panko breadcrumbs, garlic powder, kosher salt, black pepper, and Parmesan cheese. - Coat the Chicken:
Dip each chicken breast into the flour mixture first, ensuring it is lightly coated. Then dip it into the egg mixture, allowing any excess egg to drip off. Finally, coat the chicken in the panko mixture, pressing lightly to ensure the breadcrumbs stick. Place the coated chicken on a plate and repeat the process for all pieces. - Fry the Chicken:
Heat the oil in a 10-inch skillet over medium heat until it reaches 350°F. To check if the oil is ready, dip the back of a wooden spoon into the oil—if bubbles form immediately, it’s time to fry. - Place 1–2 chicken cutlets in the hot oil and fry for 2–3 minutes on each side, until golden and crispy. If the oil gets too hot and the chicken browns too quickly, reduce the heat to medium-low. Avoid overcrowding the pan to maintain even frying.
- Drain and Serve:
Once cooked, transfer the chicken to a plate lined with paper towels to absorb excess oil. Repeat the process for all the chicken cutlets. Serve warm with your favorite dipping sauce or as a side to salads or pasta
Notes
- Storage: Store airtight in the refrigerator for up to 3 days.
- Reheating Instructions:
- Air Fryer: Heat for 4 minutes at 400°F.
- Oven: Heat for 6 minutes at 400°F.
- Ensure your oil temperature remains consistent to achieve evenly cooked chicken that isn’t overly greasy.
- For a healthier alternative, the chicken can also be baked in the oven at 400°F for 20–25 minutes, flipping halfway.
Nutrition
- Serving Size: 1 serving
- Calories: 350 kcal
- Sugar: 2g
- Sodium: 450 mg
- Fat: 18g
- Saturated Fat: 4g
- Unsaturated Fat: 14g
- Trans Fat: 0g
- Carbohydrates: 18
- Fiber: 1g
- Protein: 28
- Cholesterol: 80mg

