
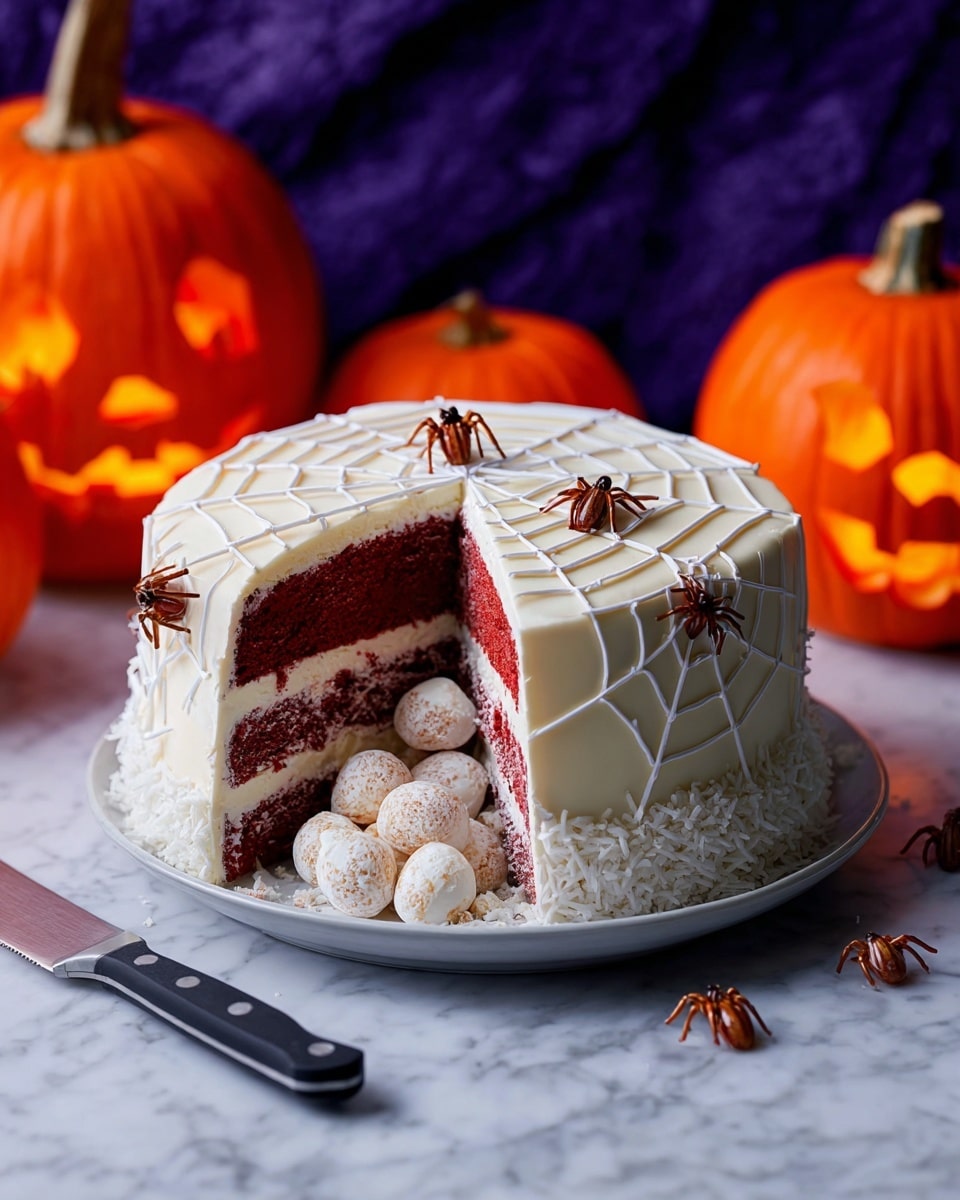
If you’re looking for a show-stopping dessert that’s as fun to make as it is to eat, you’ve just hit the jackpot with this Spider’s Nest Cake Recipe. I absolutely love how this cake reveals a spooky surprise in the center—hidden “spider eggs” that delight both kids and adults alike. When I first made it for a Halloween party, my family went crazy for the dramatic build and the rich cinnamon buttercream icing. Trust me, you’ll want to keep this recipe on hand for any festive occasion or when you want to impress with a dessert that’s a little outside the ordinary.
Why You’ll Love This Recipe
- A Stunning Surprise Inside: Cut into this cake to find a hidden nest filled with coconut-coated “spider eggs” bursting with flavor.
- Rich and Fluffy Texture: The batter is perfectly balanced with cocoa and red food coloring for an eye-catching yet delicious cake.
- Warm Cinnamon Buttercream: The spiced frosting complements the cake with subtle heat and sweetness, making it unforgettable.
- Fun to Assemble: Creating the hole layers and decorating with marshmallow webs makes this cake a fantastic project to enjoy with family or friends.

Ingredients You’ll Need
Every ingredient in this Spider’s Nest Cake Recipe has a purpose—from giving the cake that vibrant color to ensuring the texture is just right. I recommend using good quality buttermilk and real vanilla extract for the best flavor boost. If you can, get your hands on cocoa powder that’s fresh; it really makes a difference in richness.
- Butter: Use softened butter to help with smooth creaming and a tender crumb.
- Caster sugar: For a finer grain than regular sugar, which blends better into the batter.
- Eggs: Beaten well for airy and structured layers.
- Vanilla extract: Adds depth and warmth to the cake flavor.
- Red food-colouring gel: Provides that signature “spider nest” red velvet look without thinning the batter.
- Plain flour: The cake’s backbone, sifted to avoid lumps.
- Cocoa powder: For a subtle chocolate undertone.
- Buttermilk: Keeps the cake moist and tangy—key for balance.
- Bicarbonate of soda and cider vinegar: These fizz friends react to give lift and tenderness.
- Slightly salted butter (for icing): A bit of salt in the buttercream amps up the sweetness without overpowering.
- Icing sugar: Sifted for a smooth, lump-free buttercream.
- Milk: Thins the frosting to the perfect spreading consistency.
- Ground cinnamon: A lovely warming spice that pairs beautifully with the buttercream.
- Stem ginger: Finely chopped for a zingy surprise inside the “spider eggs.”
- White chocolate: For coating the “eggs” to hold the coconut.
- Desiccated coconut: Adds texture and the look of tiny eggs.
- Chocolate-coated raisins and flaked almonds: Used to make the spooky flying “flies.”
- Ready-to-roll fondant icing: For a smooth covering that’s perfect for decorating.
- White mini-marshmallows: Melted into a sticky, fun web to drape the cake.
Variations
I love that this Spider’s Nest Cake Recipe can be tweaked to fit your taste or occasion. Whether you want it gluten-free, add a little berry flavor, or make it extra spooky for Halloween, there’s a way to customize it effortlessly.
- Gluten-Free Version: I once swapped plain flour with a gluten-free blend and it turned out just as moist and delicious—just add a little xanthan gum to help the structure.
- Berry Boost: Mixing some fresh raspberries into the buttercream or inside the “spider eggs” adds a tart contrast that I find irresistible.
- Chocolate Lovers: Have fun sprinkling mini chocolate chips into the batter for hidden bursts of chocolate goodness.
- Less Sweet Option: Reducing caster sugar slightly works well if you want to tone down the sweetness without losing flavor.
How to Make Spider’s Nest Cake Recipe
Step 1: Cream Butter and Sugar Until Fluffy
This is where your cake’s texture begins. I use an electric whisk to beat the softened butter and caster sugar for about 5 minutes, or until the mixture turns pale and fluffy. It might look like you’re just mixing, but this step traps tiny air bubbles that help create a light cake. Make sure your butter is properly softened—not melted!—to get this perfect texture.
Step 2: Add Eggs and Vanilla, Then Food Coloring
Gradually add the beaten eggs, one spoonful at a time, beating well after each addition to prevent the mixture from splitting. Then stir in the vanilla extract and red food coloring gel; the gel works so well here because it won’t thin your batter. You’ll start seeing the red velvet color leaping out—this is always the moment my kids get excited to help.
Step 3: Sift and Fold in Dry Ingredients
Sift together the plain flour, cocoa powder, and salt to keep clumps out. Add these in thirds, alternating with thirds of buttermilk to keep the batter smooth. Use a spatula for gentle folding rather than vigorous stirring—you want to keep as much air as possible for a tender crumb.
Step 4: Add Bicarbonate Soda and Vinegar
Mix the bicarbonate of soda and cider vinegar in a small bowl to activate the fizz. Then quickly stir this into the batter—it helps the cake rise beautifully while keeping it moist. Divide the batter evenly between the three prepared tins and bake for 28 to 30 minutes at 180°C (160°C fan). Remember to check with a skewer; when it comes out clean, you’re golden.
Step 5: Cool and Layer Your Cake
Once out of the oven, let the cakes cool for 10 minutes in their tins before turning out onto wire racks. When completely cool, cut each round in half horizontally—this is the key to creating all those layers and the spot for the secret spider’s nest. Using a biscuit cutter, remove circles from the centers of four layers, saving those scraps to make the spider eggs later.
Step 6: Prepare Buttercream Icing
Beat softened slightly salted butter on medium speed until creamy, then gradually add sifted icing sugar. Don’t rush this—beating for a good 8 minutes gives you that fluffy and smooth buttercream we all dream about. Stir in milk, cinnamon, and vanilla extract for that wonderfully spiced finish.
Step 7: Make the Hidden Spider’s Eggs
Mix the cake crumbs with a few spoonfuls of buttercream and finely chopped stem ginger—this little zing is what really makes the “eggs” special. Roll into small balls, dip in melted white chocolate, then coat in desiccated coconut. Chill them until set. This part always feels like a mini craft project, and I find it’s a great activity if you have kids eager to help.
Step 8: Assemble Layers and Fill the Nest
Start with one full cake layer as the base, spreading a generous layer of buttercream on top. Alternate with your layers that have holes, placing more buttercream between layers to secure them. Finally, fill the center cavity with your “spider eggs.” Pile them in tight—they’ll look so enticing when you cut into the cake later. Cover with the last solid cake layer, then coat the entire cake with a crumb coat of buttercream and chill.
Step 9: Decorate With Fondant, Marshmallow, and Flies
Roll out your fondant icing to cover the cake with a smooth, professional finish. Then, melt mini marshmallows and drag the sticky strands with your fingers over the top, creating a messy cobweb effect. I love how fun and tactile this step is! Finally, add your chocolate raisin “flies” with almond wings right onto the web. If you want to up the creep factor, top with a plastic spider for that ultimate spooky vibe.
Pro Tips for Making Spider’s Nest Cake Recipe
- Perfect Crumb for Spider Eggs: When saving the cake crumbs, aim for fine crumbs to help bind nicely with the buttercream and ginger.
- Don’t Overmix Batter: Folding in flour gently is key – overmixing makes the cake dense, and you want that soft loftiness.
- Use Gel Food Coloring: It packs more color with less liquid, keeping your batter consistent while delivering vivid red layers.
- Marshmallow Web Mastery: Let the melted marshmallows cool slightly before stretching; too hot and they’re too sticky, too cool and they harden.
How to Serve Spider’s Nest Cake Recipe
Garnishes
I usually stick with the marshmallow cobweb and chocolate almond flies because they add such fun detail and texture. Sometimes, I dust the edges lightly with extra icing sugar for a spooky “dew” effect. If you’re feeling extra fancy, a few edible glitter sprinkles can give it an otherworldly shimmer.
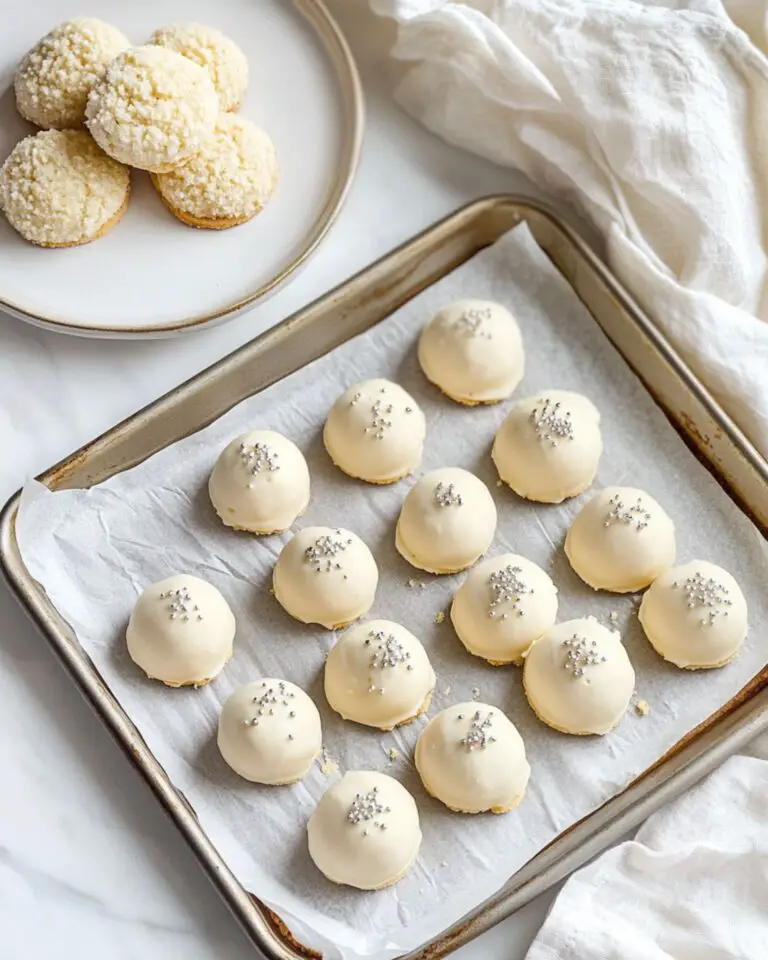
Side Dishes
I like pairing this cake with a simple cup of spiced chai or black coffee to balance the sweetness. For a party, a dollop of lightly whipped cream or vanilla ice cream on the side adds a creamy contrast that’s a total crowd-pleaser.
Creative Ways to Present
Once, I served this cake on a black slate board, surrounded by candy spiders and decorative leaves for a haunted forest theme. For kids’ parties, placing small plastic spiders crawling up the cake makes for exciting surprise moments. You can even use a glass dome cover that lifts on a faux spider web for some theatrical “unveiling” fun.
Make Ahead and Storage
Storing Leftovers
Wrap any leftover cake tightly in cling film and store it in the fridge for up to 4 days. I usually keep it on a cake stand covered with a dome or in an airtight container to preserve freshness. The buttercream actually perks back up once the cake returns to room temperature.
Freezing
I’ve frozen this cake in parts before—layers wrapped individually in cling film, and the spider eggs frozen separately on parchment. When thawed overnight in the fridge, they maintain texture surprisingly well. Just assemble and decorate fresh after thawing for the best results.
Reheating
Since this is a buttercream and fondant-covered cake, I don’t recommend reheating in a microwave. Instead, bring slices to room temperature for at least 30 minutes before serving to soften the buttercream and let the flavors shine through.
FAQs
-
Can I make the Spider’s Nest Cake Recipe dairy-free?
Absolutely! Use dairy-free butter and substitute buttermilk with a mix of plant milk and a splash of lemon juice or vinegar to mimic the tang. For the buttercream, plant-based margarines that whip well will work, though the flavor may be slightly different.
-
How do I avoid the fondant cracking?
Ensure your cake crumb coat is smooth and chilled before applying fondant. Knead your fondant well to make it pliable, and avoid rolling it too thin. Also, work quickly but gently when draping the fondant over the cake to prevent cracks.
-
What’s the best way to store the spider eggs?
Store the coated “spider eggs” in an airtight container in the fridge until you’re ready to use them. They can last for several days chilled, and I’ve even frozen them for quick firming before assembly.
-
Can I make this cake without the red food coloring?
Of course! The cake will still taste fantastic without the red color, though you won’t get the classic red velvet effect. You might consider increasing the cocoa slightly or adding a hint of beet juice for natural tint.
Final Thoughts
In all honesty, this Spider’s Nest Cake Recipe is one of those desserts that never fails to wow anyone who sees it—and even better when they taste it. I always find the process fun and rewarding, especially when you get to that moment of cutting the first slice and revealing the hidden nest of “spider eggs.” Try it out, and I promise it’ll become a favorite event cake in your repertoire. Plus, it’s such a satisfying bake to share, with plenty of layers of flavor and texture to enjoy. Happy baking!
Print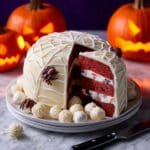
Spider’s Nest Cake Recipe
- Prep Time: 2 hours
- Cook Time: 45 minutes
- Total Time: 4 hours (including chilling and setting)
- Yield: 24 servings
- Category: Dessert
- Method: Baking
- Cuisine: Western/English
Description
This Spider’s Nest Cake is a show-stopping layered chocolate cake with a creepy twist. Featuring soft, moist red-tinted chocolate sponge layers, a spiced cinnamon buttercream, and a hidden cavity filled with coconut-coated white chocolate ‘spider eggs,’ it’s a perfect centerpiece for Halloween or spooky-themed celebrations. The cake is finished with a smooth fondant covering and a cobweb effect made from melted marshmallows, adorned with almond-winged chocolate raisin ‘flies’ and a plastic spider, creating a fun and spooky dessert experience.
Ingredients
For the cake
- 180g (6oz) butter, softened, plus extra for greasing
- 400g (13oz) caster sugar
- 3 eggs, beaten
- 2 tsp vanilla extract
- 3 x 10g tubes red food-colouring gel
- 500g (1lb) plain flour
- 50g cocoa powder
- 1 x 284ml carton buttermilk
- 1½ tsp bicarbonate of soda
- 1 tbsp cider vinegar
For the buttercream icing
- 300g slightly salted butter, softened
- 225g icing sugar, sifted, plus extra for dusting
- 1½ tbsp milk
- 2 tsp ground cinnamon
- ½ tbsp vanilla extract
For the hidden spider’s eggs
- 3 balls stem ginger, finely chopped
- 175g (6oz) white chocolate, melted
- 50g (2oz) desiccated coconut
For the flies
- 8 chocolate-coated raisins
- 16 flaked almonds
To decorate
- 1 x 1kg block ready-to-roll fondant icing
- 170g (6oz) white mini-marshmallows (for the cobwebs)
Instructions
- Prepare the cake tins and preheat oven: Preheat your oven to gas mark 4, 180°C (fan 160°C). Grease and line three 20cm (8-inch) sandwich tins with baking parchment for easy removal.
- Make the cake batter: Using an electric whisk, beat the softened butter and caster sugar in a large mixing bowl until the mixture is light and fluffy. Gradually add the beaten eggs one at a time, beating well after each addition. Stir in the vanilla extract and red food colouring gel until evenly combined.
- Sift and mix dry ingredients: Sift together the plain flour, cocoa powder, and 1 teaspoon of salt into a separate bowl. Add a third of this flour mixture to the wet ingredients, followed by a third of the buttermilk. Repeat this process two more times until all the flour and buttermilk are fully incorporated.
- Add bicarbonate of soda and vinegar: In a small bowl, mix the bicarbonate of soda with the cider vinegar, then beat this into the cake batter until well combined.
- Bake the cakes: Divide the batter evenly between the prepared tins and bake in the preheated oven for 28-30 minutes, or until a skewer inserted in the center comes out clean. Let the cakes cool in their tins for 10 minutes before turning them out onto a wire rack to cool completely.
- Create cake layers with holes: Once completely cooled, slice each cake horizontally into two even layers, creating a total of six layers. Using an 8cm (3 ½ inch) biscuit cutter, cut a round hole out of the center of four of these layers. Carefully remove the cut-out rounds and crumble them into a bowl; these crumbs will be used for the spider’s eggs.
- Make the buttercream icing: Beat the softened butter in a bowl for 5-8 minutes until soft and fluffy. Gradually add half the sifted icing sugar on low speed, beating for 3-5 minutes, then add the remaining icing sugar. Stir in the milk, ground cinnamon, and vanilla extract until fully combined. Cover and chill the buttercream.
- Prepare the hidden spider’s eggs: Mix the reserved cake crumbs with 3 heaped tablespoons of the buttercream icing and the finely chopped stem ginger until combined. Shape the mixture into small balls around 1.5cm (3/4 inch) wide using clean hands. Place the balls on a tray, cover with clingfilm, and chill for 1 hour (or freeze for 15 minutes).
- Coat the spider eggs: Melt the white chocolate in a heatproof bowl set over simmering water. Dip each cake ball into the melted chocolate, letting the excess drip off, then roll them in the desiccated coconut. Arrange on a tray lined with nonstick baking paper and chill until the coating has set, about 30 minutes.
- Make the flies: Using a sharp knife, carefully slice a small slit on either side of each chocolate-coated raisin and insert flaked almonds to resemble wings. Set aside.
- Assemble the cake: Place one whole cake layer (without a hole) on a cake stand or board. Spread an even layer of buttercream over it. Top with a cake layer that has a hole in the center, then spread more buttercream on this layer. Repeat with the remaining three layers that contain holes, stacking them to form a central cavity. Fill this hollow with as many spider eggs as fit, then top with the final whole cake layer. Spread the remaining buttercream evenly over the top and sides of the cake to create a crumb coat. Chill for at least 30 minutes.
- Decorate with fondant icing: Dust a clean surface with icing sugar and roll out the ready-to-roll fondant icing to a size large enough to cover the entire cake, top and sides. Carefully lift with a rolling pin and drape over the cake. Smooth the fondant gently over the cake and trim any excess icing at the base.
- Create the cobweb effect: Place the white mini-marshmallows in a microwave-safe bowl and heat in 30-second intervals until melted. Stir until cool enough to handle. Use your fingers to pull and stretch the melted marshmallow into thin, web-like strands. Drape these strands artistically all over the cake to mimic a spider web.
- Finish decorating: Attach the almond-winged chocolate raisin flies onto the marshmallow webs by gently pressing them in place. Add a plastic spider atop the cake for the final spooky touch.
Notes
- Ensure the cakes are completely cool before slicing and assembling to prevent the buttercream from melting.
- Use an electric mixer for beating the butter and sugar to achieve a light and fluffy texture for the cake and buttercream.
- When cutting holes in the cake layers, handle gently to prevent breaking the sponge.
- The spider egg balls can be made ahead of time and frozen if needed, just increase chilling time accordingly.
- Be cautious when melting chocolate and marshmallows over heat to avoid burning.
- This cake is best served after chilling for several hours or overnight to allow flavors to meld and buttercream to set.
- For a more dramatic effect, use red food coloring generously to achieve a vivid red color in the sponge.
Nutrition
- Serving Size: 1 slice (1/24 of cake)
- Calories: 568 kcal
- Sugar: 69 g
- Sodium: 0.4 g
- Fat: 23 g
- Saturated Fat: 13 g
- Unsaturated Fat: 7 g
- Trans Fat: 0 g
- Carbohydrates: 88.2 g
- Fiber: 2.4 g
- Protein: 5 g
- Cholesterol: 70 mg


