
This Easy Apple Slice Recipe is one of those comforting, no-fuss treats that I always keep in my back pocket for when I want something warm and satisfying without the hassle. It’s sweet, a little crumbly, and packed with tender apple slices that give each bite a little juicy surprise. Honestly, the first time I made this, it became an instant family favorite—my kids couldn’t stop sneaking pieces right out of the tin!
What’s great about this recipe is how quick it comes together with pantry staples and canned apple slices, so you don’t have to worry about peeling or chopping fresh apples. It works perfectly for an afternoon snack, a potluck dessert, or even a cozy weekend breakfast with coffee. Once you try this Easy Apple Slice Recipe, I’m pretty sure it’ll turn into one of your go-to recipes for an easy homemade treat.
Why You’ll Love This Recipe
- Super Simple Ingredients: You’ll find everything you need in your pantry or fridge, making it perfect for last-minute cravings.
- Minimal Prep Time: This recipe takes just about 10 minutes to mix and prep before it goes in the oven.
- Comforting and Delicious: The tender apple pieces combined with a lightly spiced batter create that warm, homey flavor everyone loves.
- Great For All Skill Levels: Whether you’re a baking newbie or a seasoned pro, you’ll have great results.

Ingredients You’ll Need
These simple ingredients come together to create a deliciously moist and sweet apple slice. Using canned apple slices saves time and ensures you get that perfect soft apple texture every time.
- Canned apple slices: Drained well to avoid sogginess but still juicy for moisture.
- Self-raising flour: Provides a light texture without needing extra leavening agents.
- Sugar: Sweetens the slice and helps the topping caramelize beautifully.
- Butter: Melted for easy mixing and richness.
- Egg: Binds the ingredients together for a perfect slice texture.
- Cinnamon and allspice (optional): These warming spices add a cozy autumnal flavor if you want to jazz it up.
Variations
I love tweaking this Easy Apple Slice Recipe depending on the season or what I have on hand. You can make it more decadent or keep it simple, so feel free to experiment and find your personal favorite.
- Spiced Up: I often add a teaspoon of cinnamon and allspice—my family goes crazy for the fall vibes this brings.
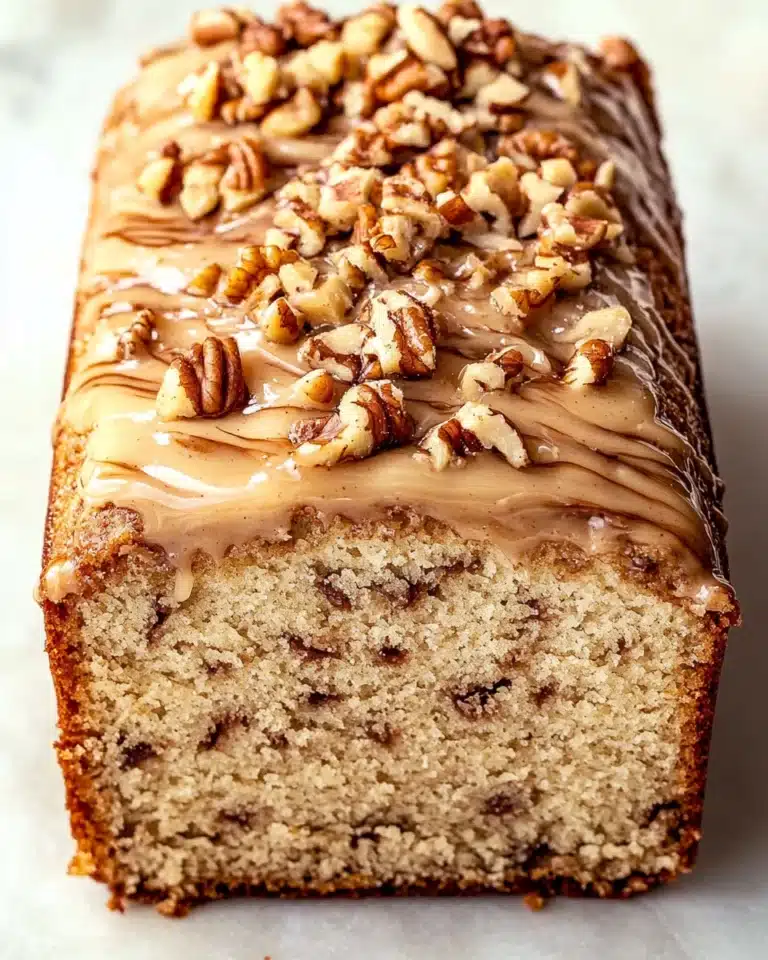
- Nutty Addition: Chopped walnuts or pecans sprinkled on top before baking add a lovely crunch.
- Gluten Free: Swap self-raising flour for a gluten-free blend with baking powder; just make sure it’s a 1:1 substitute for the best texture.
- Fruit Swap: If apples aren’t your favorite, try canned peaches or pears for a different twist.
How to Make Easy Apple Slice Recipe
Step 1: Preheat and Prep Your Pan
Start by preheating your oven to 180°C (fan bake). I like to line a baking tray with parchment paper—it makes cleanup so much easier and helps the apple slice lift out effortlessly when baked. A good tip I learned is to use a tray about 20x30cm, which gives you nice thick slices.
Step 2: Mix the Dry Ingredients and Apples
In a large bowl, combine your drained apple slices, self-raising flour, sugar, and any optional spices like cinnamon or allspice. I usually give the apples a gentle pat with paper towels to remove excess liquid—this keeps the batter from getting too wet. Stir everything until the apples are evenly coated and mixed through with the flour and sugar.
Step 3: Add Wet Ingredients and Combine
Add the melted butter and the egg to your apple mixture. I break the egg into a small bowl first to check for freshness—always a good habit! Stir thoroughly but gently until everything is well combined into a sticky batter. The batter will look thick and chunky, which is exactly what you want.
Step 4: Bake to Golden Perfection
Spread the mixture evenly into your lined tray and smooth the top with a spatula. Sprinkle 2 tablespoons of sugar over the surface—that little crunch of sugary topping is one of my favorite parts. Bake for 35 to 45 minutes or until the top is golden and a skewer inserted into the center comes out clean. Keep an eye on it after 30 minutes; ovens vary, so adjust timing if needed.
Step 5: Cool and Slice
Once out of the oven, let the apple slice cool completely in the baking tin before cutting it into large pieces. If you try to cut it while still warm, it’ll crumble and break apart more easily. Trust me—I learned this the hard way!
Pro Tips for Making Easy Apple Slice Recipe
- Drain Your Apples Thoroughly: Excess liquid from the canned apples can make the batter soggy—pat them dry before mixing.
- Use Room Temperature Ingredients: Especially the egg and butter, to help everything combine smoothly without clumping.
- Even Thickness Matters: Spread the batter evenly in the tray to ensure uniform baking and avoid wet spots.
- Cooling Completely Before Cutting: Helps the apple slice set and prevents crumbling—patience pays off!
How to Serve Easy Apple Slice Recipe

Garnishes
I like to dust my apple slices with a light sprinkle of powdered sugar or a touch more cinnamon right before serving. Sometimes, I add a dollop of whipped cream or vanilla yogurt on the side for an extra indulgence—makes it feel like a café dessert at home!
Side Dishes
This easy apple slice is great on its own or paired with a cup of tea or coffee. For a brunch spread, I serve it alongside scrambled eggs or a fresh fruit salad for balance.
Creative Ways to Present
For special occasions, I’ve tried cutting the apple slice into bite-sized squares and arranging them on a platter with small decorative picks. It makes a great finger food for parties. Adding a drizzle of caramel sauce or melted chocolate turns this humble slice into something fancy effortlessly.
Make Ahead and Storage
Storing Leftovers
I store leftover apple slice pieces in an airtight container at room temperature in a cool, dark place. It stays fresh for about 3 to 4 days. If your kitchen is warm, the fridge works too, but it might dry out slightly—just warm it a little before serving to bring back softness.
Freezing
Freezing works well if you want to prepare a big batch. I wrap individual portions tightly in plastic wrap and place them in a freezer bag. When ready, thaw in the fridge overnight and gently warm in the oven or microwave. The texture remains surprisingly good given the simple ingredients.
Reheating
I find reheating in a low oven (about 150°C) for 10 minutes keeps the apple slice tender and crisp on top. The microwave works too for convenience but can make the topping a bit softer. A few seconds on a hot grill can re-crisp the surface nicely if you want that fresh-baked feel.
FAQs
-
Can I use fresh apples instead of canned for this Easy Apple Slice Recipe?
Absolutely! Just peel and slice your fresh apples thinly, then toss them in a little lemon juice to prevent browning before adding to the mix. Keep in mind, fresh apples might release more moisture, so you might want to reduce other liquid ingredients slightly or bake a bit longer to get the right texture.
-
What if I don’t have self-raising flour—can I use plain flour instead?
You can! Just add 2 teaspoons of baking powder per cup of plain flour to mimic the rising effect. This will help your apple slice stay light and fluffy rather than dense.
-
Is this recipe suitable for a vegan diet?
Not as written, since it uses butter and an egg. However, you can swap the butter for a plant-based alternative and use a flax egg (1 tbsp ground flaxseed mixed with 3 tbsp water) to make it vegan-friendly. The texture might be a little different, but still delicious!
-
How do I ensure my apple slice is moist and not dry?
Draining the canned apples well but not over-drying them helps maintain moisture. Also, don’t overbake—check with a skewer close to the minimum time suggested. Using melted butter adds richness that keeps it moist too.
Final Thoughts
This Easy Apple Slice Recipe holds a special place in my kitchen because it’s that perfect blend of simple and satisfying—no complicated steps, just good honest flavors and that lovely apple warmth we all crave sometimes. I hope you give it a try and find yourself coming back to it again and again, whether for a quick snack or a cozy dessert. It’s the kind of recipe that feels like a warm hug on a plate, and I’m excited for you to experience that too.
Print
Easy Apple Slice Recipe
- Prep Time: 10 minutes
- Cook Time: 40 minutes
- Total Time: 50 minutes
- Yield: 16 pieces
- Category: Dessert
- Method: Baking
- Cuisine: Australian
Description
This easy apple slice is a deliciously simple baked treat featuring canned apple slices combined with a lightly spiced batter. With a moist, tender crumb topped with a crunchy sugar crust, it’s perfect for a snack or dessert and can be enjoyed fresh or stored for later.
Ingredients
Main Ingredients
- 1 can of apple slices, drained (385g)
- 2 cups self-raising flour
- 1 cup sugar
- 125g butter, melted
- 1 egg
Topping
- 2 tablespoons sugar
Optional Spices
- 1 teaspoon cinnamon
- 1 teaspoon allspice
Instructions
- Preheat Oven: Preheat your oven to 180°C using the fan bake setting to ensure even heat circulation for baking the apple slice.
- Mix Dry Ingredients and Apples: In a large mixing bowl, combine the drained apple slices, self-raising flour, sugar, and optional cinnamon and allspice if desired. Mix well to evenly distribute the spices and fruit.
- Add Wet Ingredients: Pour in the melted butter followed by the egg, then stir all ingredients together until you achieve a well-combined, uniform batter.
- Prepare Baking Tray: Line a baking tray with baking paper, then spread the apple batter evenly across the tray to ensure consistent baking.
- Apply Topping: Sprinkle the 2 tablespoons of sugar evenly on top of the batter to create a sweet, crunchy crust once baked.
- Bake: Place the tray in the oven and bake for 35 to 45 minutes, or until the top is golden brown and a skewer inserted in the center comes out clean.
- Cool and Slice: Allow the apple slice to cool fully in the tin before cutting into 16 large pieces for serving.
- Store: Keep any leftovers in an airtight container in a cool, dark place to maintain freshness.
Notes
- You can adjust the optional spices according to your preference or omit them entirely for a straightforward apple flavor.
- Using self-raising flour eliminates the need for additional leavening agents.
- If you prefer, fresh apple slices can be used but might affect moisture content and baking time slightly.
- Make sure to drain canned apple slices well to prevent the batter from becoming too wet.
- Allowing the slice to cool completely before slicing helps maintain clean cuts and better texture.
- Store the apple slice at room temperature in an airtight container for up to 3 days or refrigerate for longer freshness.
Nutrition
- Serving Size: 1 piece (approximately)
- Calories: 180 kcal
- Sugar: 15 g
- Sodium: 80 mg
- Fat: 7 g
- Saturated Fat: 4 g
- Unsaturated Fat: 3 g
- Trans Fat: 0 g
- Carbohydrates: 27 g
- Fiber: 1.5 g
- Protein: 2 g
- Cholesterol: 35 mg


