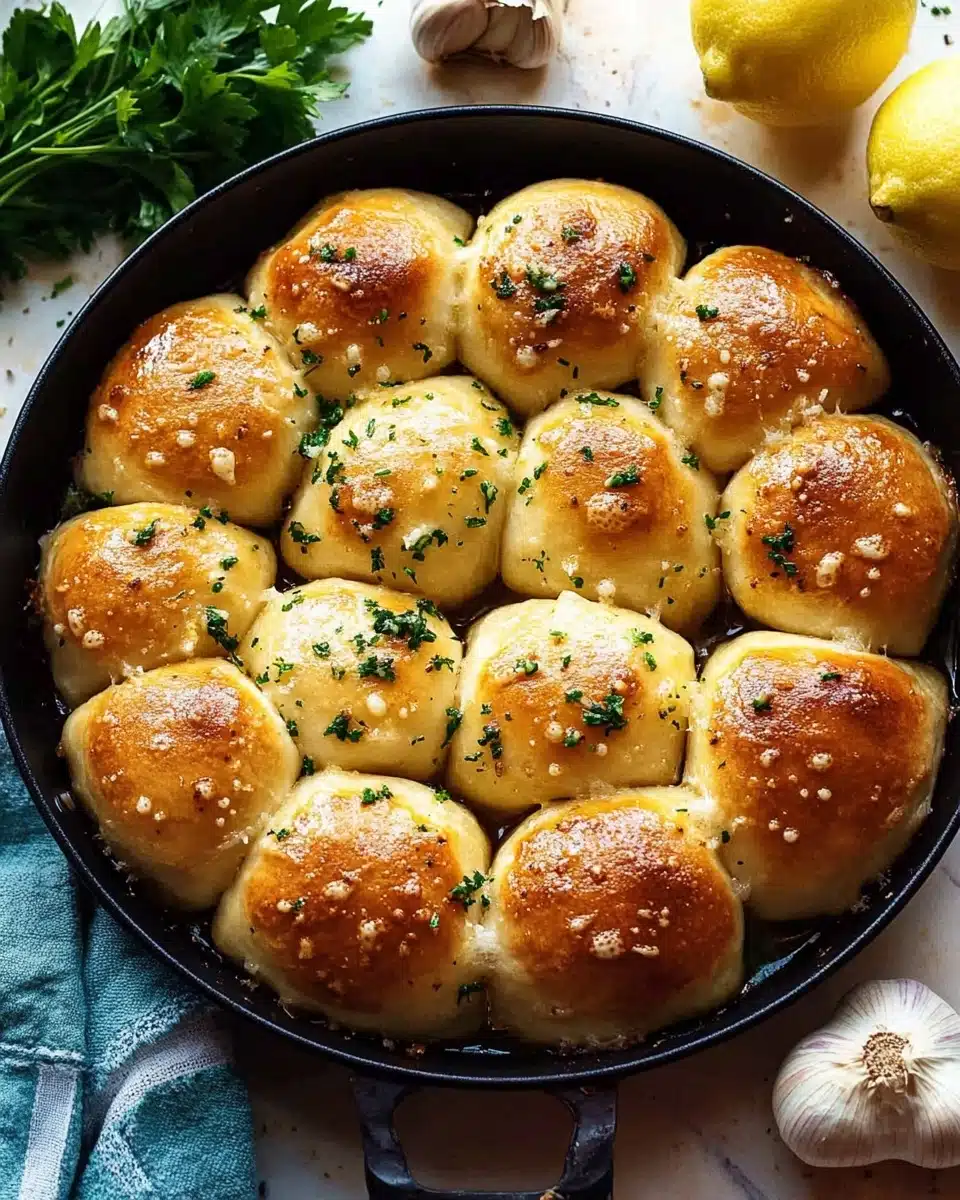
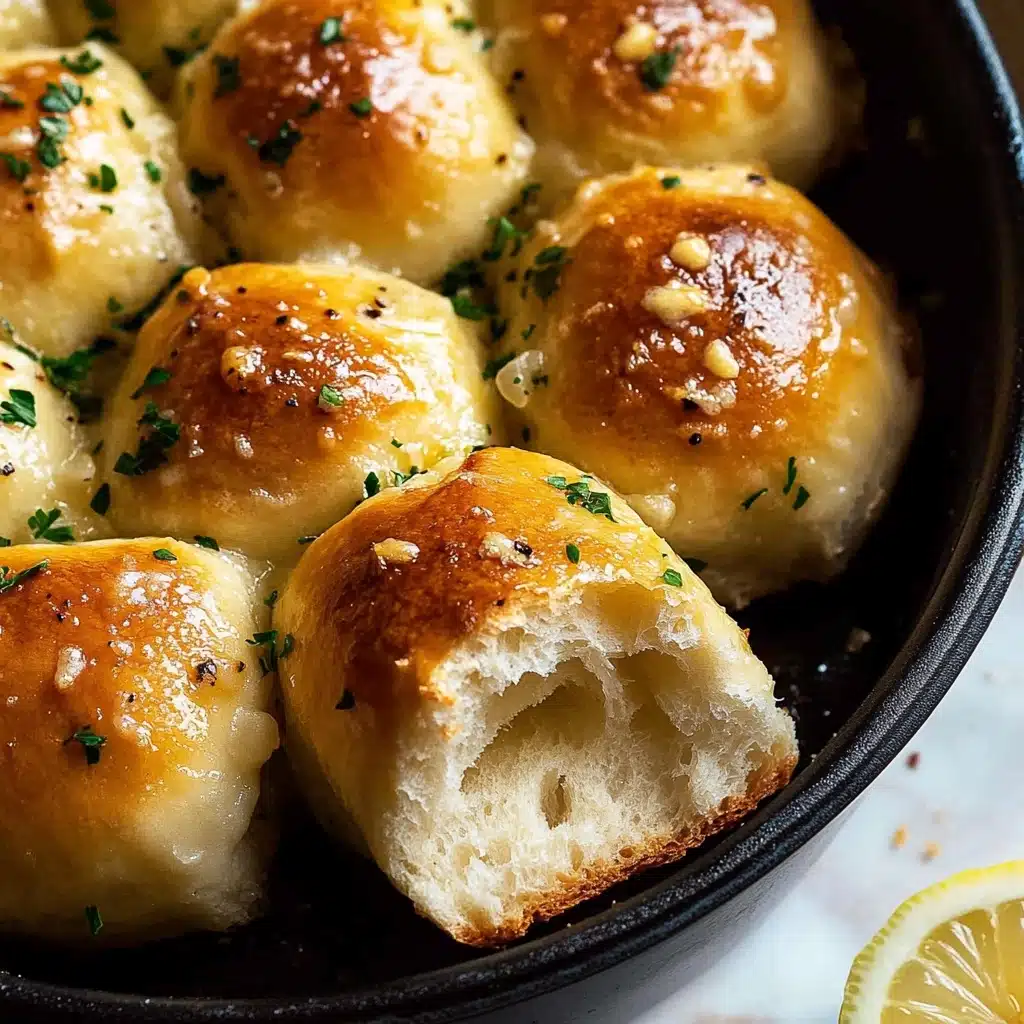
If you’re craving the heavenly flavor of cheesy garlic bread with a golden crust but want something truly special, you’ll fall head over heels for this Air Fryer Garlic Pizza Bread Made from Scratch. Imagine pillowy-soft dough brushed with buttery garlic goodness, all crisped to perfection right in your air fryer. This is more than a side—it’s a show-stopping treat that’s easier than you’d ever imagine.
Why You’ll Love This Recipe
- Fresh-from-Scratch Dough: Nothing beats the satisfying chew and flavor of homemade bread, and this recipe lets you customize every bite.
- Air Fryer Magic: Skip the oven and enjoy perfectly puffed, golden pizza bread in a fraction of the time—no babysitting required!
- Bold, Buttery Garlic Flavor: Each ball of dough is bathed in a dreamy mix of real butter, minced garlic, fresh parsley, lemon zest, and parmesan—your kitchen will smell irresistible.
- Crowd-Pleasing & Customizable: This bread is perfect as a side, starter, or snack, and you can tweak the toppings to suit any gathering or taste.
Ingredients You’ll Need
One of the best things about making Air Fryer Garlic Pizza Bread Made from Scratch is just how simple and honest these ingredients are. Each one plays its part in flavor, color, and texture, creating a pull-apart bread that’s so much greater than the sum of its parts!
- Pizza dough: Use your favorite homemade or store-bought pizza dough—this forms the fluffy, tender base that holds all the garlicky goodness.
- Unsalted butter: You want real, creamy butter for that rich classic taste; it helps the bread turn golden and deliciously tender.
- Garlic cloves, minced: Fresh garlic is essential—no shortcuts here! It gives the bread its irresistible aroma and punchy flavor.
- Fresh parsley, chopped: Adds color and a pop of freshness to balance out the richness of the butter and cheese.
- Lemon zest: A touch of zest brightens up the buttery, cheesy flavors and keeps every bite from feeling too heavy.
- Grated parmesan: For a salty, savory hit that makes the topping simply addictive; use freshly grated if you can!
Variations
Don’t be afraid to play with this Air Fryer Garlic Pizza Bread Made from Scratch! It’s so easy to customize—just swap or add ingredients to suit your mood, pantry, or guests’ preferences.
- Cheesy Upgrade: Sprinkle in shredded mozzarella between dough balls before baking for an oozy, pizza-fied twist.
- Make it Vegan: Use plant-based butter and skip the parmesan, or try nutritional yeast for that cheesy depth.
- Herb Swap: Substitute or add other herbs like basil, oregano, or chives for even more aromatic flair.
- Spicy Kick: Toss a pinch of crushed red pepper flakes into the butter mixture for a subtle, tongue-tingling heat.
How to Make Air Fryer Garlic Pizza Bread Made from Scratch
Step 1: Preheat and Prep the Air Fryer
Before anything else, get your air fryer nice and hot by preheating it to 400°F (204°C) for 5-10 minutes. A preheated basket ensures the dough puffs up and browns evenly, setting the stage for that signature golden crust.
Step 2: Make the Garlic Butter Mixture
Add your butter to a heat-proof bowl and melt it until it’s halfway melted, then stir until it’s creamy and fully liquid. Now, add the minced garlic, parsley, parmesan, and lemon zest. Mix well—this fragrant blend is the soul of your Air Fryer Garlic Pizza Bread Made from Scratch!
Step 3: Shape and Butter the Dough Balls
Divide your pizza dough into 12 even pieces. Gently roll each one into a ball—there’s something wonderfully therapeutic about this part. Brush a 7 or 8-inch pan with half of the garlic butter, then roll each dough ball in the mixture so every side is coated. Don’t butter the tops just yet; this keeps the herbs from burning later.
Step 4: Air Fry in Stages
First, air fry those dough balls at 400°F (204°C) for 5 minutes. Without opening the fryer, reduce the temp to 325°F (163°C) and bake for another 5 minutes. Now, gently spread the reserved garlic butter over the tops and finish with a final 5 minutes in the air fryer. This three-stage process guarantees a fluffy interior, a crisp crust, and perfectly toasted herbs on top.
Step 5: Finish and Serve
Let the bread cool for 5-10 minutes—this makes it easier to handle and helps the flavors meld. Serve your Air Fryer Garlic Pizza Bread Made from Scratch straight from the pan, optionally topped with more fresh herbs or a sprinkle of sea salt for that irresistible finish.
Pro Tips for Making Air Fryer Garlic Pizza Bread Made from Scratch
- Dough Temperature Matters: Let your pizza dough come to room temperature before shaping—the dough will be softer, easier to work with, and will rise better in the air fryer.
- Herb Butter Timing: Don’t brush the tops with garlic butter until the final bake—this prevents those beautiful herbs from burning and keeps the flavors vibrant.
- Pan Sizing Secret: Use a snug-fitting 7-8 inch pan so the balls puff up into each other, making each piece extra tender and pull-apart perfect.
- Watch Your Air Fryer: Every air fryer is different—take a peek near the end of cook time to make sure the bread is golden but not overly browned.
How to Serve Air Fryer Garlic Pizza Bread Made from Scratch

Garnishes
When it comes to garnishing Air Fryer Garlic Pizza Bread Made from Scratch, think simple and fresh. A sprinkle of extra chopped parsley or basil brings a burst of color, while an extra dusting of parmesan or tiny flakes of sea salt turn each bite into bliss. If you like a touch of heat, a pinch of chili flakes never hurts!
Side Dishes
This bread is ready to steal the show, but it’s happy playing a supporting role too! Serve alongside a big bowl of tomato soup, your favorite pasta, or a fresh salad for balance. It’s also delightful with pizza night spreads—dip it in warm marinara or creamy ranch for extra fun.
Creative Ways to Present
Place the bread right in the center of the table, pan and all, for a family-style feast—let everyone pull apart pieces! Or, arrange the rolls on a wooden board with little bowls of dipping sauces for a crowd-friendly appetizer. You can even slice leftovers for sandwiches or tear them up into rustic croutons for salads and soups.
Make Ahead and Storage
Storing Leftovers
If you’re lucky enough to have leftovers, store your Air Fryer Garlic Pizza Bread Made from Scratch in an airtight container at room temperature for up to 2 days. The bread will still be soft and flavorful—just as delicious for snacking!
Freezing
You can freeze baked (and cooled) pizza bread for up to 2 months. Wrap tightly in foil and place in a freezer-safe bag. Defrost at room temperature or overnight in the fridge for a quick, homemade treat any time.
Reheating
For that fresh-from-the-air-fryer taste, warm leftover bread in the air fryer at 320°F for just a few minutes until heated through and re-crisped. The microwave works too—just keep in mind the crust may soften a bit, but it’ll still be delicious.
FAQs
-
Can I use store-bought pizza dough for Air Fryer Garlic Pizza Bread Made from Scratch?
Absolutely! While homemade dough has unbeatable flavor, high-quality store-bought pizza dough is a fantastic shortcut and will still give you that fluffy, pull-apart texture.
-
Can I add cheese inside the dough balls for extra gooeyness?
Definitely—tuck small cubes of mozzarella or provolone into each dough ball before rolling for a melty, pizza-inspired surprise inside every bite.
-
Do I need a specific type of air fryer pan for this recipe?
A 7 to 8-inch round cake pan or any oven-safe pan that fits in your air fryer basket works perfectly. Just be sure it’s not too large, or the bread won’t rise into lovely soft pull-apart balls.
-
What if I don’t have fresh lemon zest—can I skip it?
While you can leave it out, lemon zest truly brightens the buttery garlic flavor. If you don’t have it, try a pinch of black pepper or a few drops of lemon juice—just enough to perk up the taste.
Final Thoughts
I hope you’ll give this Air Fryer Garlic Pizza Bread Made from Scratch a try and let it become a staple in your own kitchen. It’s unbelievably simple, unbelievably delicious, and always brings people together—one perfectly garlicky bite at a time!
Print
Air Fryer Garlic Pizza Bread Made from Scratch Recipe
- Prep Time: 20 minutes
- Cook Time: 15 minutes
- Total Time: 35 minutes
- Yield: 4 servings
- Category: Appetizer
- Method: Air Fry
- Cuisine: Italian
- Diet: Vegetarian
Description
Enjoy the crispy and flavorful Air Fryer Garlic Pizza Bread that’s made from scratch with this easy recipe. Perfect as an appetizer or side dish for any meal!
Ingredients
Pizza Dough:
- 1 pizza dough
Garlic Butter Mixture:
- 1/2 cup unsalted butter
- 4 large garlic cloves, minced
- 1/4 cup parsley, finely chopped
- 1 teaspoon lemon zest
- 2 tablespoons grated parmesan
Instructions
- Preheat the Air Fryer: Preheat the air fryer at 400°F (204°C) for 5-10 minutes.
- Prepare Garlic Butter: Melt the butter in a heat-proof bowl until halfway melted. Stir until creamy and completely melted. Add parsley, parmesan, garlic, and lemon zest. Mix well.
- Prepare Dough: Cut the pizza dough into 12 equal pieces and roll into balls.
- Coat Dough: Brush the pan with some of the butter mixture. Coat each dough ball with the butter and place in the pan.
- Air Fry: Air fry at 400°F (204°C) for 5 minutes. Lower temperature to 325°F (163°C) and bake for another 5 minutes. Spread remaining butter mixture on top and bake for 5 more minutes.
- Serve: Let cool for 5-10 minutes. Serve hot, optionally topped with more herbs or sea salt.
Nutrition
- Serving Size: 1 serving
- Calories: 320 kcal
- Sugar: 1g
- Sodium: 540mg
- Fat: 20g
- Saturated Fat: 12g
- Unsaturated Fat: 6g
- Trans Fat: 0g
- Carbohydrates: 30g
- Fiber: 2g
- Protein: 6g
- Cholesterol: 45mg

